
In the digital age, feedback is more important than ever. Whether you’re gathering data for a research project, collecting RSVPs for an event, or just soliciting opinions, Google Forms offers a versatile platform for collecting information. But what happens after the submit button is clicked? Enter the world of automation with Google Apps Script, where every form submission triggers a personalized email response and logs the data in a Google Spreadsheet. This tutorial will guide you through setting up an autoresponder script for Google Forms submissions, a practical exercise for both beginners and seasoned users looking to enhance their Google Apps Script skills.
Objective: Develop a Google Apps Script that sends an automatic email response to Google Form submissions and logs the data in a Google Spreadsheet.
Prerequisites:
- Basic understanding of Google Apps Script
- A Google Form designed to collect at least the submitter’s email address
- A Google Spreadsheet for storing submission data
Exercise Steps:
- Set Up Google Form and Spreadsheet: Begin by creating a Google Form tailored to your data collection needs, ensuring it includes a field for the submitter’s email address. Then, set up a Google Spreadsheet to store the form submissions.
- Link Form to Spreadsheet: In the Responses tab of your Google Form, link it to your newly created Google Spreadsheet.
- Open Script Editor: Navigate to Extensions > Apps Script from either the Google Form or Spreadsheet to access the script editor.
- Write the Autoresponder Script: Replace the script editor’s content with the provided autoresponder script. This script captures submission data, sends a thank you email to the submitter, and logs the data in the specified Google Spreadsheet.
- Replace Placeholder: Update the placeholder with the ID of your Google Spreadsheet, found in the URL of the spreadsheet.
- Set Up Trigger: Execute the
setupTriggerfunction manually from the script editor to establish a trigger for form submissions. - Test Your Form: Submit a test entry to verify the functionality of your autoresponder and data logging.
Deliverables:
- A Google Form for data collection
- A linked Google Spreadsheet for logging submissions
- A Google Apps Script for automating email responses and data logging
This exercise not only teaches you how to utilize Google Apps Script for automating responses and data management but also lays the groundwork for more advanced automation tasks. By the end of this tutorial, you’ll have a fully functional autoresponder that enhances your data collection process, providing immediate feedback to participants and efficiently organizing their submissions.

Form Submit Send Email Response
Creating an autoresponder script for Google Forms submissions that also logs the submission data to a Google Spreadsheet is a practical exercise for learning Google Apps Script. This exercise involves setting up a Google Form, writing a script to automatically respond to submissions, and saving the submission data to a Spreadsheet. Here’s a step-by-step guide:

Objective
Develop a Google Apps Script that automatically sends a response email to the submitter of a Google Form and logs the submission data into a Google Spreadsheet.
Prerequisites
- Basic knowledge of Google Apps Script.
- A Google Form with at least one question that collects the submitter’s email address.
- A Google Spreadsheet for logging the submissions.
Exercise Steps
- Set Up Google Form and Spreadsheet
- Create a Google Form with questions relevant to your needs. Ensure one question collects the submitter’s email address.
- Create a Google Spreadsheet to store the form submissions.
- Link Form to Spreadsheet
- Open your Google Form, go to the Responses tab, and link it to your newly created Google Spreadsheet by clicking on the Google Sheets icon.
- Open Script Editor
- Open the Google Form or Spreadsheet, go to Extensions > Apps Script to open the script editor.
- Write the Autoresponder Script
- In the Apps Script editor, replace any existing content with the following script:
function setupTrigger(){
ScriptApp.newTrigger('onFormSubmit')
.forSpreadsheet(SpreadsheetApp.getActive())
.onFormSubmit()
.create();
}
function onFormSubmit(e){
const responses = e.values;
const email = responses[1];
const subject = 'New entry';
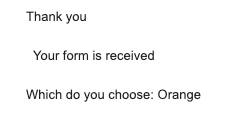
let message = 'Thank you \n\n Your form is received\n\n';
const form = FormApp.openByUrl('https://docs.google.com/forms/d/1pWyyHXyz9EREPxLOu_YsKgvkptP8u9kPcSvlQDQ2jLs/edit');
const items = form.getItems();
for (var i = 0; i < items.length; i++) {
message += items[i].getTitle() + ": " + responses[i + 2] + "\n";
}
MailApp.sendEmail(email,subject,message);
const ss = SpreadsheetApp.openById('1ZXFyGGiYunNmqfJKF5CaaKvBX52MVTkbD1ApaWnvtjk');
const sheet = ss.getSheetByName('track');
sheet.appendRow(responses);
}- Replace Placeholder
- Replace ‘YOUR_SPREADSHEET_ID’ with the ID of your Google Spreadsheet. The ID can be found in the spreadsheet’s URL.
- Set Up Trigger
- Run setupTrigger function manually from the script editor to create a trigger for the form submission. This step requires authorizing the script to run under your Google account.
- Test Your Form
- Submit a test entry through your Google Form to ensure the autoresponder works and the data is logged in the spreadsheet.
Deliverables
- Google Form with at least one question for the email address.
- Google Spreadsheet linked to the form for submissions.
- Google Apps Script with:
- A function to send an auto-response email.
- (Optional) A function to log submission data into a spreadsheet, demonstrating how to manipulate or log additional data.
This exercise covers fundamental Google Apps Script functionalities, including working with Forms, sending emails, and manipulating Spreadsheet data, providing a solid foundation for more complex automation tasks.