
Google Apps Script Coding Examples #GoogleAppsScript #GAS #GoogleSheets #GoogleDocs #GoogleForms #GoogleDrive #automation #scripting #productivity #cloudcomputing #javascript
Send Email using Gmail API
function sendEmail() {
var recipient = “john.doe@example.com”;
var subject = “Test email”;
var body = “This is a test email sent from Google Apps Script”;
GmailApp.sendEmail(recipient, subject, body);
}
This script uses the GmailApp class in Google Apps Script to send an email to a recipient. The recipient’s email address is specified in the recipient variable, the subject of the email is specified in the subject variable, and the body of the email is specified in the body variable. The sendEmail method of the GmailApp class is then called with these parameters to send the email.
Get Data from Google Sheets
function getData() {
var ss = SpreadsheetApp.getActiveSpreadsheet();
var sheet = ss.getSheetByName(“Sheet1”);
var data = sheet.getDataRange().getValues();
for (var i = 0; i < data.length; i++) {
Logger.log(data[i][0] + ” ” + data[i][1]);
}
}
This script uses the SpreadsheetApp class in Google Apps Script to get data from a Google Sheets spreadsheet. The active spreadsheet is retrieved with the getActiveSpreadsheet method, the sheet with the name “Sheet1” is retrieved with the getSheetByName method, and the data in the sheet is retrieved with the getDataRange and getValues methods. The data is then logged to the console using a for loop.
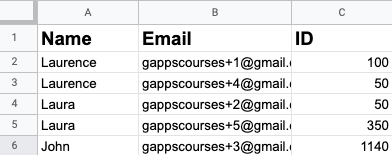
Data From Sheets as Email Table
function tableMaker(){
const id = ‘1P9R_brKeReNmrY’;
const sheet = SpreadsheetApp.openById(id).getSheetByName(‘users’);
const data = sheet.getDataRange().getValues();
const header = data[0];
const rows = data.slice(1);
let html = ‘<table style=”border:1px solid black”>’;
data.forEach(row=>{
html += ‘<tr>’;
row.forEach(cell=>{
html += ‘<td style=”border:1px solid #ddd”>’+cell+'</td>’;
})
html += ‘</tr>’;
})
html += ‘</table>’;
const email = Session.getActiveUser().getEmail();
const subject = ‘My Table’;
MailApp.sendEmail({
to:email,
subject:subject,
htmlBody:html
});
}
- Sets the id variable to a specific Google Sheets ID.
- Opens the Google Sheets file with the given id, selects the sheet named “users”, and retrieves all the data from the sheet.
- Extracts the header row and the data rows from the retrieved data.
- Initializes an HTML string with an opening <table> tag and a border style.
- Loops through each row of data (including the header row), and for each row:
- a. Adds an opening <tr> tag to the HTML string.
- b. Loops through each cell in the row and adds a <td> tag with the cell value and a border style to the HTML string.
- c. Adds a closing </tr> tag to the HTML string.
- Adds a closing </table> tag to the HTML string.
- Gets the email address of the active user.
- Sets the subject of the email to “My Table”.
- Sends an email to the active user’s email address with the table HTML as the email’s HTML body.
In summary, this function retrieves data from a specific Google Sheets file, creates an HTML table from the data, and sends an email with the table as the email’s HTML body to the active user’s email address.
Add a Custom Menu to Google Sheets
function onOpen() {
var ui = SpreadsheetApp.getUi();
ui.createMenu(“Custom Menu”)
.addItem(“Option 1”, “option1”)
.addItem(“Option 2”, “option2”)
.addToUi();
}
function option1() {
Browser.msgBox(“Option 1 selected”);
}
function option2() {
Browser.msgBox(“Option 2 selected”);
}
This script adds a custom menu to a Google Sheets spreadsheet using the SpreadsheetApp and Ui classes in Google Apps Script. The onOpen function is called when the spreadsheet is opened, and it creates a new menu called “Custom Menu” with two options: “Option 1” and “Option 2”. When each option is selected, a message box is displayed with the selected option.
Create a Google Calendar Event
function createEvent() {
var calendar = CalendarApp.getDefaultCalendar();
var title = “Test event”;
var startTime = new Date(“March 15, 2023 08:00:00”);
var endTime = new Date(“March 15, 2023 09:00:00”);
var description = “This is a test event created with Google Apps Script”;
var event = calendar.createEvent(title, startTime, endTime, {
description: description
});
Logger.log(“Event created: ” + event.getTitle());
}
This script uses the CalendarApp class in Google Apps Script to create a new event in the user’s default Google Calendar. The title of the event is specified in the title variable, the start time is specified in the startTime variable, the end time is specified in the endTime variable, and the description is specified in the description variable. The createEvent method of the CalendarApp class is then called with these parameters and an object containing the event description to create the event. Finally, the title of the created event is logged to the console using the Logger.log method.
Access the Google Drive API
function listFiles() {
var folderId = “XXXXXXXXXXXXXXXXXXXXXXX”; // Replace with your folder ID
var folder = DriveApp.getFolderById(folderId);
var files = folder.getFiles();
while (files.hasNext()) {
var file = files.next();
Logger.log(file.getName());
}
}
This script uses the DriveApp class in Google Apps Script to access the Google Drive API and retrieve a list of files in a specified folder. The ID of the folder is specified in the folderId variable, and the folder is retrieved with the getFolderById method of the DriveApp class. The files in the folder are then retrieved with the getFiles method, and a while loop is used to iterate through the files and log their names to the console using the Logger.log method.
Folder files listed to Sheet and creating new files into a folder
function dataFolder(){
const sid = ‘1P9R_b-dTdoBAAWAGF6kPZyKSXJ6r2P_LFgrKeReNmrY’;
const id = ‘1a591VSrO-dj11PJk04cm6PtpiRVepssw’;
const folder = DriveApp.getFolderById(id);
const sheet = SpreadsheetApp.openById(sid).getSheetByName(‘files’);
const files = folder.getFiles();
Logger.log(files);
while (files.hasNext()){
const file = files.next();
sheet.appendRow([file.getName(),file.getId(),file.getSize()]);
Logger.log(file.getName());
}
}
function newFiles(){
const id = ‘1a591VSrO-dj11PJk04cm6PtpiRVepssw’;
const folder = DriveApp.getFolderById(id);
const doc = DocumentApp.create(‘new Doc’);
const docID = doc.getId();
const file = DriveApp.getFileById(docID);
file.moveTo(folder);
}
function newFiles2(){
const folder = DriveApp.getFolderById(‘1a591VSrO-dj11PJk04cm6PtpiRVepssw’);
const doc = DocumentApp.create(‘new Doc 2’);
DriveApp.getFileById(doc.getId()).moveTo(folder);
}
dataFolder() function
The dataFolder() function does the following:
- Sets the sid variable to a specific Google Sheets ID.
- Sets the id variable to a specific Google Drive folder ID.
- Gets the folder with the given id.
- Opens the Google Sheets file with the given sid, selects the sheet named “files”.
- Gets a list of files in the folder.
- Loops through each file in the folder, and for each file:
- Appends a new row to the “files” sheet in the Google Sheets file with the file name, ID, and size.
- Logs the file name to the console.
newFiles() function
The newFiles() function does the following:
- Sets the id variable to a specific Google Drive folder ID.
- Gets the folder with the given id.
- Creates a new Google Docs document with the name “new Doc”.
- Gets the ID of the newly created document.
- Gets the file with the ID of the newly created document.
- Moves the file to the folder with the given id.
newFiles2() function
The newFiles2() function does the following:
- Gets the folder with a specific Google Drive folder ID.
- Creates a new Google Docs document with the name “new Doc 2”.
- Gets the ID of the newly created document.
- Gets the file with the ID of the newly created document.
- Moves the file to the folder with the specific Google Drive folder ID.
In summary, the dataFolder() function logs the names of files in a Google Drive folder and adds the file name, ID, and size to a specific Google Sheets file. The newFiles() and newFiles2() functions create a new Google Docs document with a specific name and move it to a specific Google Drive folder.
Sending Emails From Google Sheets:
One useful application of Google Apps Script is automating email sending. You can use Google Sheets as a data source and send personalized emails to recipients based on the information in the sheet. Here is an example code:
function sendEmails() {
var sheet = SpreadsheetApp.getActiveSheet();
var dataRange = sheet.getDataRange();
var data = dataRange.getValues();
for (var i = 1; i < data.length; i++) {
var row = data[i];
var emailAddress = row[0];
var message = ‘Dear ‘ + row[1] + ‘,\n\n’ + ‘This is a test email.’;
var subject = ‘Test Email’;
MailApp.sendEmail(emailAddress, subject, message);
}
}
This code loops through the rows of a sheet, retrieves the email address and name of each recipient, and sends a personalized email using the MailApp.sendEmail() function.
Sheet Data Custom Emails

function sender(){
const id = ‘1P9R_FgrKeReNmrY’;
const sheet = SpreadsheetApp.openById(id).getSheetByName(‘users’);
const data = sheet.getDataRange().getValues();
const users = data.slice(1);
users.forEach(user =>{
const email = user[1];
const message = `Dear ${user[0]} \n\nThis is a test!`;
const subject = `Info for ID ${user[2]}`;
MailApp.sendEmail(email,subject,message);
})
}
- Sets the id variable to a specific Google Sheets ID.
- Opens the Google Sheets file with the given id and selects the sheet named “users”.
- Gets the data range from the “users” sheet and gets all values from it.
- Slices the data array to remove the first row (header row) and create a new array named users with only the user information.
- Loops through each user in the users array using the forEach() method.
- For each user:
- Sets the email variable to the email address of the user, which is located at index 1 in the user array.
- Constructs a message string that includes the user’s name and a test message.
- Sets the subject variable to a string that includes the user’s ID, which is located at index 2 in the user array.
- Sends an email to the user using the MailApp.sendEmail() method, passing the email, subject, and message variables as arguments.
In summary, the sender() function retrieves user data from a Google Sheets file, constructs personalized messages for each user, and sends an email to each user with their name, ID, and a test message.
Creating Google Calendar Events:
Another useful application of Google Apps Script is creating Google Calendar events programmatically. Here is an example code:
function createEvent() {
var calendar = CalendarApp.getDefaultCalendar();
var event = calendar.createEvent(‘Test Event’, new Date(‘March 2, 2023 09:00:00 EST’), new Date(‘March 2, 2023 10:00:00 EST’), {
description: ‘This is a test event’
});
Logger.log(‘Event ID: ‘ + event.getId());
}
This code creates a new Google Calendar event with a title, start and end date/time, and a description. It also logs the ID of the newly created event for reference.
Accessing and Modifying Google Sheets:
Google Sheets is a popular application for managing and analyzing data. Google Apps Script can be used to access and modify data in Sheets programmatically. Here is an example code:
function modifySheet() {
var sheet = SpreadsheetApp.getActiveSpreadsheet().getActiveSheet();
var data = sheet.getDataRange().getValues();
for (var i = 0; i < data.length; i++) {
var row = data[i];
if (row[0] == ‘John’) {
sheet.getRange(i + 1, 2).setValue(‘Active’);
}
}
}
This code retrieves data from the active sheet, loops through each row, and checks if the name in the first column is ‘John’. If it is, the script sets the value of the second column to ‘Active’ using the sheet.getRange() and .setValue() functions.
Update Sheet Access Sheet Data with Apps Script
function modData(){
const id = ‘1P9RFgrKeReNmrY’;
const sheet = SpreadsheetApp.openById(id).getSheetByName(‘users’);
const data = sheet.getDataRange().getValues();
data.forEach((row,index)=>{
if(row[0] == ‘Laurence’){
const range = sheet.getRange(index+1,1);
range.setBackground(‘blue’);
//range.setValue(‘Active’);
}
})
}
The modData() function does the following:
- Sets the id variable to a specific Google Sheets ID.
- Opens the Google Sheets file with the given id and selects the sheet named “users”.
- Gets the data range from the “users” sheet and gets all values from it.
- Loops through each row of data using the forEach() method, passing the current row and its index as arguments.
- For each row of data:
- Checks if the value in the first column (column A) is equal to “Laurence”.
- If the value is “Laurence”:
- Gets the range of the cell in the first column and the same row as the current row using the getRange() method, passing the row and column as arguments.
- Sets the background color of the cell using the setBackground() method, passing the color as an argument. In this case, the cell’s background color is set to blue.
- Commented out: Sets the value of the cell to “Active” using the setValue() method.
In summary, the modData() function modifies the data in a Google Sheets file by changing the background color of the cell in the first column and the same row as the row with the name “Laurence” to blue. It also includes commented-out code that sets the value of the same cell to “Active”.
Accessing and Modifying Google Docs:
Google Docs is a popular application for creating and sharing documents. Google Apps Script can be used to access and modify documents programmatically. Here is an example code:
function modifyDoc() {
var doc = DocumentApp.getActiveDocument();
var body = doc.getBody();
var paragraphs = body.getParagraphs();
for (var i = 0; i < paragraphs.length; i++) {
var paragraph = paragraphs[i];
if (paragraph.getText().indexOf(‘Lorem ipsum’) !== -1) {
paragraph.setAttributes({
bold: true
});
}
}
}
This code retrieves the active Google Doc, loops through each paragraph, and checks if the text contains the phrase ‘Lorem ipsum’. If it does, the script sets the bold attribute of that paragraph to true using the paragraph.setAttributes() function.
Update Styling of element with specific text in the contents

function modDoc(){
const id = ‘1SCE46vJwZCXXVY’;
const doc = DocumentApp.openById(id);
const body = doc.getBody();
const paras = body.getParagraphs();
const style = {};
style[DocumentApp.Attribute.BOLD] = true;
style[DocumentApp.Attribute.FONT_SIZE] = 18;
paras.forEach(para =>{
if(para.getText().indexOf(‘Lorem ipsum’) !== -1){
para.setAttributes(style);
}
})
}
This code modifies a Google Document by applying some formatting to specific paragraphs.
- The first line defines a variable id that stores the ID of the Google Document that will be modified.
- The second line opens the Google Document with the given ID using the openById method of the DocumentApp class, and assigns it to the variable doc.
- The third line gets the body of the document using the getBody method of the Document class, and assigns it to the variable body.
- The fourth line gets all the paragraphs in the document using the getParagraphs method of the Body class, and assigns them to the variable paras.
- The fifth line defines a JavaScript object called style that will be used to apply the formatting. The object has two properties: BOLD and FONT_SIZE, which are constants defined in the Attribute enum of the DocumentApp class. The BOLD property is set to true, and the FONT_SIZE property is set to 18.
- The code then iterates over each paragraph in the document using a forEach loop.
- For each paragraph, it checks if the text of the paragraph contains the string “Lorem ipsum” using the indexOf method of the String class. If the string is found (i.e., indexOf returns a value greater than or equal to 0), the code applies the formatting defined in the style object to the paragraph using the setAttributes method of the Paragraph class.
- Once the loop has finished, the code exits and the modified document is saved automatically.
Creating Google Forms:
Google Forms is a powerful tool for creating surveys, quizzes, and other types of forms. Google Apps Script can be used to create and customize Google Forms programmatically. Here is an example code:
function createForm() {
var form = FormApp.create(‘Test Form’);
form.addTextItem()
.setTitle(‘What is your name?’)
.setRequired(true);
form.addMultipleChoiceItem()
.setTitle(‘What is your favorite color?’)
.setChoices([
form.createChoice(‘Red’),
form.createChoice(‘Blue’),
form.createChoice(‘Green’)
])
.setRequired(true);
Logger.log(‘Form URL: ‘ + form.getPublishedUrl());
}
This code creates a new Google Form with a title, a text question, and a multiple choice question with three choices. It also logs the URL of the published form for reference. The form can be further customized using other methods available in the Form service of Google Apps Script.
These are just a few examples of what you can do with Google Apps Script. With this powerful scripting language, you can automate various tasks and extend the functionality of Google Workspace applications according to your needs.
Create and view form with code

function makeForm(){
const form = FormApp.create(‘Laurence Test’);
form.addTextItem()
.setTitle(‘Whats your name’)
.setRequired(true);
const item1 = form.addMultipleChoiceItem();
item1.setTitle(‘Your Favorite Color’)
.setChoices([
item1.createChoice(‘Red’),
item1.createChoice(‘Blue’),
item1.createChoice(‘Green’),
item1.createChoice(‘Yellow’)
])
Logger.log(form.getPublishedUrl());
}
The makeForm() function creates a new Google Form called “Laurence Test” and adds two types of form items to it: a text item and a multiple choice item.
The first item added is a text item which asks the user to enter their name. The setTitle() method sets the title of the item to “What’s your name?” and the setRequired() method makes answering this question mandatory.
The second item added is a multiple choice item which asks the user to select their favorite color. The setTitle() method sets the title of the item to “Your Favorite Color” and the setChoices() method sets the possible answer options to “Red”, “Blue”, “Green”, and “Yellow”.
Finally, the Logger.log() method is used to log the URL of the published form to the console, which can be used to share the form with others.
Creating and Updating Google Slides:
function makeSlides(){
const pre = SlidesApp.create(‘Laurence Test2’);
const slide = pre.getSlides()[0];
slide.insertTextBox(‘Laurence Svekis’,20,20,250,250);
}
function upSlides(){
const id = ‘1qTkK20Av6Rm5G5i3NhP276fO3ey48’;
const pre = SlidesApp.openById(id);
const slide = pre.getSlides()[0];
const eles = slide.getShapes();
eles.forEach(ele =>{
Logger.log(ele.getText().asString());
ele.getText().replaceAllText(‘Laurence’,’Mr’);
})
}
The first function makeSlides() creates a new Google Slides presentation titled “Laurence Test2”. The function then retrieves the first slide in the presentation and inserts a new text box on it using the insertTextBox() method. The text box is positioned at coordinates (20, 20) with a width and height of 250.
The second function upSlides() opens an existing Google Slides presentation with the ID 1q276fO3ey48. It retrieves the first slide in the presentation and gets all the shapes on it using the getShapes() method. The function then loops through all the shapes and logs the text content of each shape to the console using the getText() method. Finally, it replaces all occurrences of the string “Laurence” in the text of each shape with “Mr” using the replaceAllText() method.
Accessing and Modifying Google Forms:
Google Forms is a powerful tool for creating surveys, quizzes, and other types of forms. Google Apps Script can be used to access and modify existing Google Forms programmatically. Here is an example code:
function modifyForm() {
var form = FormApp.openByUrl(‘https://forms.google.com/…’);
var items = form.getItems();
for (var i = 0; i < items.length; i++) {
var item = items[i];
if (item.getTitle() == ‘Favorite color’) {
item.asMultipleChoiceItem().setChoiceValues([‘Red’, ‘Blue’, ‘Green’]);
}
}
Logger.log(‘Form URL: ‘ + form.getPublishedUrl());
}
This code opens an existing Google Form by URL, retrieves all the form items, and modifies the choices of the multiple choice item with the title ‘Favorite color’. It also logs the URL of the published form for reference.
Select and update the form choices
function modForm(){
const id = ‘1Q1ZUposHg’;
const form = FormApp.openById(id);
const items = form.getItems();
items.forEach(item =>{
Logger.log(item.getTitle());
})
const mul = items[1].asMultipleChoiceItem();
mul.setChoiceValues([‘Purple’,’Pink’,’Teal’]);
}
The code modForm() does the following:
- The variable id is assigned the ID of an existing Google Form.
- The openById() method of FormApp is used to open the Google Form with the given ID, and its reference is stored in the variable form.
- The getItems() method of form is used to get all the items in the form, and they are stored in the items array.
- A forEach() loop is used to iterate over the items in the items array. For each item, its title is logged to the console using the getTitle() method of the item.
- The second item in the form (at index 1 in the items array) is assumed to be a multiple choice question and is assigned to the variable mul using the asMultipleChoiceItem() method.
- The setChoiceValues() method of mul is used to set the available choices for the multiple choice question to [‘Purple’,’Pink’,’Teal’].
Overall, the code opens a Google Form, gets all the items in the form, logs their titles, and then modifies the second item in the form to change its available choices for answers.
Using Google Sheets as a Database:
Google Sheets can be used as a database to store and retrieve data. Google Apps Script can be used to interact with the Sheets database programmatically. Here is an example code:
function getCustomerData(customerId) {
var sheet = SpreadsheetApp.openById(‘…’).getSheetByName(‘Customers’);
var data = sheet.getDataRange().getValues();
for (var i = 1; i < data.length; i++) {
var row = data[i];
if (row[0] == customerId) {
return {
name: row[1],
email: row[2],
phone: row[3]
};
}
}
return null;
}
This code retrieves customer data from a Google Sheets database by ID. It loops through all the rows of the ‘Customers’ sheet, matches the customer ID with the first column of each row, and returns an object with the name, email, and phone number of the customer if a match is found. If no match is found, it returns null.
Sheet Data as JSON output in WebApp


function getUserInfo(id){
const sid = ‘1P9R_brKeReNmrY’;
const sheet = SpreadsheetApp.openById(sid).getSheetByName(‘users’);
const data = sheet.getDataRange().getValues().slice(1);
let rep = null;
data.forEach(ele =>{
if(ele[2] == id){
rep = {name:ele[0],email:ele[1],id:ele[2],status:ele[3]}
};
})
return rep;
}
function tester(){
Logger.log(getUserInfo(3));
}
function doGet(e){
let data = null;
if(‘id’ in e.parameters){
let val = e.parameters[‘id’][0];
data = getUserInfo(val);
}
const output = JSON.stringify(data);
return ContentService.createTextOutput(output).setMimeType(ContentService.MimeType.JSON);
}
The getUserInfo() function takes an id parameter and returns an object containing information about a user. It first sets a variable sid to a string value, which is a Google Sheets ID. The function then uses SpreadsheetApp to open the specified sheet and get the sheet named ‘users’. The getDataRange() method is used to get all the data in the sheet, and then the slice(1) method is called to exclude the header row. The forEach() method is then used to iterate over each row of data, and if the third column of the row matches the id parameter, an object is created with the user’s name, email, id, and status, which is assigned to the rep variable. Finally, the rep variable is returned.
The tester() function calls the getUserInfo() function with a parameter value of 3 and logs the result using the Logger.log() method.
The doGet() function is an HTTP request handler function that takes a single e (event) parameter. It first sets a data variable to null. If the id parameter is present in the e.parameters object, then it sets the val variable to the first value of the id parameter array, and calls the getUserInfo() function with the val parameter, and sets the returned value to the data variable. The function then uses JSON.stringify() to convert the data variable to a JSON string, and returns a ContentService object with the JSON string as the response body and the MIME type set to ContentService.MimeType.JSON.
In summary, the getUserInfo() function retrieves user information from a Google Sheet based on the id parameter value, the tester() function tests the getUserInfo() function by logging the result, and the doGet() function handles HTTP requests by calling the getUserInfo() function and returning the result as a JSON string.
Sending Emails With Attachments:
Google Apps Script can be used to send emails with attachments using the Gmail service. Here is an example code:
function sendEmailWithAttachment() {
var recipient = ‘example@example.com’;
var subject = ‘Test Email with Attachment’;
var body = ‘This is a test email with an attachment.’;
var attachment = DriveApp.getFileById(‘…’);
GmailApp.sendEmail(recipient, subject, body, {
attachments: [attachment]
});
}
This code sends an email with an attachment to a recipient using the GmailApp.sendEmail() function. The attachment is retrieved by ID using the DriveApp.getFileById() function.
File as an attachment in email
function sendAtt(){
const id = ‘1SCECXXVY’;
const rep = Session.getActiveUser().getEmail();
const sub = ‘Test Email’;
const body = ‘Hello World Testing….’;
const att = DriveApp.getFileById(id);
MailApp.sendEmail(rep,sub,body,{
attachments:[att]
});
}
This code defines a function sendAtt() that sends an email with an attachment to the active user’s email address. The function starts by setting a constant id to a string value representing the ID of the file to be attached. The Session.getActiveUser().getEmail() method is used to get the email address of the active user, which is assigned to the constant rep. The constants sub and body are then set to strings representing the email subject and body, respectively. The DriveApp.getFileById() method is called to get a file with the specified ID, and the resulting File object is assigned to the constant att. Finally, the MailApp.sendEmail() method is called with the rep parameter as the recipient email address, sub as the email subject, body as the email body, and an object with an attachments property that contains an array with the att file object. This sends an email to the active user with the specified subject, body, and attachment.
Creating and Modifying Google Calendar Events:
Google Calendar is a powerful tool for managing events and schedules. Google Apps Script can be used to create and modify Google Calendar events programmatically. Here is an example code:
function createCalendarEvent() {
var calendar = CalendarApp.getCalendarById(‘…’);
var event = calendar.createEvent(‘Test Event’,
new Date(‘2023-03-03T10:00:00.000Z’),
new Date(‘2023-03-03T11:00:00.000Z’),
{description: ‘This is a test event.’});
Logger.log(‘Event ID: ‘ + event.getId());
}
function modifyCalendarEvent() {
var calendar = CalendarApp.getCalendarById(‘…’);
var eventId = ‘…’;
var event = calendar.getEventById(eventId);
event.setTitle(‘New Title’);
event.setDescription(‘New Description’);
event.setTime(new Date(‘2023-03-03T12:00:00.000Z’),
new Date(‘2023-03-03T13:00:00.000Z’));
Logger.log(‘Event ID: ‘ + event.getId());
}
The first function creates a new Google Calendar event with a title, start and end times, and a description. It logs the ID of the newly created event for reference.
The second function modifies an existing Google Calendar event by ID. It changes the title, description, and start and end times of the event. It also logs the ID of the modified event for reference.
These are just a few examples of what you can do with Google Apps Script. With this powerful scripting language, you can automate various tasks and extend the functionality of Google Workspace applications according to your needs.