
JavaScript DOM coding Exercises and Challenges Get the course below
https://www.udemy.com/course/javascript-dom-course/?referralCode=184A9BA60ABD50E82338
Interactive and Dynamic Web projects with JavaScript code DOM examples. Select and update page elements using common DOM methods and add event listeners using JavaScript code. Coding examples and exercise to learn more about JavaScript and the DOM
Background Color Table Fun Create Table with JavaScript
This exercise will build an interactive table of colored cells that can be clicked to apply the cell background color to the page. In Addition several buttons to update the background colors of the table cells. The table will be dynamically generated using values for columns and rows. The application will also include 3 interactive buttons to update the page elements.
Button actions when clicked :
- Add random background colors to all the td elements in the table
- Get the color values from the elements in the row above, apply them to the following row creating a shifting down of the row colors to the below row. First row gets new random colors.
- MoveLeft effect, when clicked will get the background color of the next element, and apply it to the element. The last element in the table will get a new background color randomly created.

Exercise :
- Create a variable object for the number of rows and columns in the table.
- Create a function to add the table to the page. The table function should create the main table element, loop through the rows and cols adding the tr and td page elements.
- Generate and set the style of the cell width using the cols value, so that the cells take up the full width of the page.
- As you add the td cells to the table, document.createElement(‘td’) then add a text value of the number, then add some styling like border and text align.
- Add an event listener to the td element, when clicked update the document.body background to the same as the table cell background color.
- Create a function to generate random colors, Math.random().toString(16).slice(2,8)
- Create a function to create buttons, add 3 buttons to the page.
- Add an event listener to the first button, when clicked it should select all the page td cells from the main table. As it loops through the elements update the background to a random color
- Create a second page button, this one will have an effect of moving the colors down one row. Select all the td cells from the main table. Create a holding array, as you loop through the cells, for the first row generates random values. Add these to the holding array. As you move through the second row, subtract the number of columns from the ind value of the td element. This will give you the value of the element that is in the row above. Get the background Color of the element above and add it to the holding array.
- Once you complete the holding array it should have all the color values with one row shifted down, now loop through the holding array and apply the background colors to the matching td elements from the node list.
- Create a third button. Once this button is clicked, loop through all the td elements in the main table. Update the background of the current element to the color of the element background to the right by one index value. For the last element td add a random background color.
JavaScript DOM coding Exercises and Challenges
Interactive and Dynamic Web projects with JavaScript code DOM examples. Select and update page elements using common DOM methods and add event listeners using JavaScript code. Coding examples and exercise to learn more about JavaScript and the DOM
Background Color Table Fun Create Table with JavaScript
This exercise will build an interactive table of colored cells that can be clicked to apply the cell background color to the page. In Addition several buttons to update the background colors of the table cells. The table will be dynamically generated using values for columns and rows. The application will also include 3 interactive buttons to update the page elements.
Button actions when clicked :
- Add random background colors to all the td elements in the table
- Get the color values from the elements in the row above, apply them to the following row creating a shifting down of the row colors to the below row. First row gets new random colors.
- MoveLeft effect, when clicked will get the background color of the next element, and apply it to the element. The last element in the table will get a new background color randomly created.
Exercise :
- Create a variable object for the number of rows and columns in the table.
- Create a function to add the table to the page. The table function should create the main table element, loop through the rows and cols adding the tr and td page elements.
- Generate and set the style of the cell width using the cols value, so that the cells take up the full width of the page.
- As you add the td cells to the table, document.createElement(‘td’) then add a text value of the number, then add some styling like border and text align.
- Add an event listener to the td element, when clicked update the document.body background to the same as the table cell background color.
- Create a function to generate random colors, Math.random().toString(16).slice(2,8)
- Create a function to create buttons, add 3 buttons to the page.
- Add an event listener to the first button, when clicked it should select all the page td cells from the main table. As it loops through the elements update the background to a random color
- Create a second page button, this one will have an effect of moving the colors down one row. Select all the td cells from the main table. Create a holding array, as you loop through the cells, for the first row generates random values. Add these to the holding array. As you move through the second row, subtract the number of columns from the ind value of the td element. This will give you the value of the element that is in the row above. Get the background Color of the element above and add it to the holding array.
- Once you complete the holding array it should have all the color values with one row shifted down, now loop through the holding array and apply the background colors to the matching td elements from the node list.
- Create a third button. Once this button is clicked, loop through all the td elements in the main table. Update the background of the current element to the color of the element background to the right by one index value. For the last element td add a random background color.
const output = document.querySelector(‘div’);
console.log(output);
output.innerHTML = ”;
const tabValue = {
rows: 5,
cols: 9
}
const main = addTable(output, tabValue.rows, tabValue.cols);
const btn1 = btnMaker(output, ‘Random’, ‘blue’, ‘white’);
const btn2 = btnMaker(output, ‘MoveDown’, ‘red’, ‘white’);
const btn3 = btnMaker(output, ‘MoveLeft’, ‘purple’, ‘white’);
btn3.addEventListener(‘click’, (e) => {
const tds = main.querySelectorAll(‘td’);
for (let i = 0; i < tds.length; i++) { console.log(tds.length, i); const bgColor = (i + 1 == tds.length) ? ranColor() : tds[i + 1].style.backgroundColor; console.log(bgColor); tds[i].style.backgroundColor = bgColor; } }) btn1.addEventListener(‘click’, (e) => {
const tds = main.querySelectorAll(‘td’);
console.log(tds);
tds.forEach(ele => {
console.log(ele);
ele.style.backgroundColor = ranColor();
})
})
btn2.addEventListener(‘click’, (e) => {
const tds = main.querySelectorAll(‘td’);
let holder = [];
tds.forEach((ele, ind) => {
let temp = ind – tabValue.cols;
let tempColor = ”;
//console.log(temp);
if (temp >= 0) {
const el = tds[temp];
tempColor = el.style.backgroundColor;
       //ele.style.backgroundColor =
   } else {
       tempColor = ranColor();
   }
   holder.push(tempColor);
})
console.log(holder);
holder.forEach((val, ind) => {
tds[ind].style.backgroundColor = val;
})
})
function ranColor() {
return #${Math.random().toString(16).slice(2,8)};
}
function btnMaker(parent, html, clr, fntColor) {
const btn = document.createElement(‘button’);
btn.innerHTML = html;
btn.style.backgroundColor = clr;
btn.style.color = fntColor;
return parent.appendChild(btn);
}
function addTable(parent, rows, cols) {
const tbl = document.createElement(‘table’);
tbl.style.border = ‘1px solid black’;
const tblby = document.createElement(‘tbody’);
tbl.append(tblby);
let counter = 0;
let wid = (100 / cols) * 100;
for (let y = 0; y < rows; y++) { const tr = document.createElement(‘tr’); for (let x = 0; x < cols; x++) { const td = document.createElement(‘td’); counter++; td.textContent = ${counter}; td.style.width = ${wid}px; td.style.border = ‘1px solid #ddd’; td.style.textAlign = ‘center’; tr.append(td); td.addEventListener(‘click’, () => {
document.body.style.backgroundColor = td.style.backgroundColor;
})
}
tblby.append(tr);
}
return parent.appendChild(tbl);
}
Element Selector and Swap of Elements within the DOM JavaScript Code
This exercise is going to demonstrate how to select an element, and then move the element to a new part of the page. The elements can only exist in one place on the page, so when you have the element object selected you can then place it and move it to other parts of the webpage.
Exercise:
- Select the main container element from the HTML
- Using a loop create 20 spans within the main element
- Apply and add styling to the spans. Add an event listener to the element.
- On click run a function to get the event target element. Create a global object to hold the selected elements. Add a condition that checks if there is a value within the holding element. If there is then using insertBefore add the original element into the parent before the new selected element.
- If the holding element does not exist, then select the event target element and add it as the holding element. Add some styling and an active class to the element. This will make it easier to select if needed and visual to the user so they know which element is the active one.
- Add a condition that will check for the active class on elements, if found remove it from the element.
const output = document.querySelector(‘div’);
console.log(output);
output.innerHTML = ”;
const holder = {
ele : null
}
for(let i=0;i<20;i++){
const ele = document.createElement(‘span’);
output.append(ele);
ele.textContent = ${i+1} - Cell;
ele.style.border = ‘1px solid #ddd’;
ele.style.padding = ’10px’;
ele.style.display = ‘inline-block’;
ele.addEventListener(‘click’,mover);
}
function mover(e){
const ele = e.target;
if(holder.ele){
const parent = ele.parentNode;
parent.insertBefore(holder.ele,ele);
holder.ele.style.color = ‘black’;
holder.ele.style.borderColor = ‘#ddd’;
holder.ele = null;
}else{
const withActive = document.querySelector(‘.active’);
if(withActive){
withActive.classList.remove(‘active’);
}
holder.ele = ele;
holder.ele.classList.add(‘active’);
holder.ele.style.color = ‘red’;
holder.ele.style.borderColor = ‘red’;
}
}
JavaScript Dynamic Modal from Data Object Create Modals with Code
This exercise will demonstrate how to create a modal from data, and dynamically add the buttons and the modals into your webpages. Each modal can have its own data that can create and customize them. The behaviors are the same so the code used can create the actions dynamically for each item in the data object.
Exercise :
- Use the HTML code as the starter code for this project.
- Select the main div from the page.
- Create a data object that contains multiple items, each with a title, body, color and font color.
- Loop through the items in the array, create page buttons for each. To each add a button on the page that can open the modal, once clicked the button should toggle the modal display settings, from none to block. This will hide and show the modal when the button is clicked.
- Create a function to generate the modal called genModal. Return the main modal in that function, so that the element can be used. Add an event listener to the element that checks if the target event element is the same as the parent modal, then invoke the closer function with the modal object.
- Within the genModal function pass the data into the function as an argument. This data can then be used to set the textContent and style of the modal elements.
- Create a main parent that will be the overlay. Add the overlay class to the parent modal element.
- Within the modal overlay parent, add a main modal container which will have the title, body.
- Within the title create a text area element and a close button element.
- Add an eventlistener to the close button element.
- Add an x in the modal title, that will also close the modal when the element is clicked.
- Create and apply style properties to the modal elements to create styling and structure for the modals.
JavaScript
const output = document.querySelector(‘div’);
const data = [{
title : ‘My Modal 1’,
body : ‘This is the modal content 1’,
color : ‘#ddd’,
font : ‘black’
},{
title : ‘My Modal 2’,
body : ‘This is the modal content 2’,
color : ‘yellow’,
font : ‘black’
},{
title : ‘My Modal 3’,
body : ‘This is the modal content 3’,
color : ‘purple’,
font : ‘white’
}]
data.forEach((mod,ind) =>{
const btn = document.createElement(‘button’);
btn.textContent = Open Modal #${ind+1};
output.append(btn);
const modal = genModal(modal #${ind+1},mod);
output.append(modal);
modal.addEventListener(‘click’,(e)=>{
if(e.target == modal){
closer(modal);
}
});
btn.addEventListener(‘click’,(e)=>{
const temp = modal.style.display;
if(temp === ‘block’) {
modal.style.display= ‘none’
}else{
modal.style.display = ‘block’;
}
})
})
function closer(ele){
console.log(ele);
ele.style.display = ‘none’;
}
function genModal(id,mData){
const overlay = document.createElement(‘div’);
const main = document.createElement(‘div’);
const mTitle = document.createElement(‘div’);
const mBody = document.createElement(‘div’);
const closeX = document.createElement(‘span’);
const innerTitle = document.createElement(‘div’);
closeX.classList.add(‘close’);
closeX.onclick = ()=>{
closer(overlay);
};
closeX.innerHTML = ‘×’;
mTitle.style.fontSize = ‘1.5em’;
mBody.style.border = ‘1px solid #111’;
mBody.style.padding = ’10px’;
mTitle.append(closeX);
mTitle.style.backgroundColor = ‘black’;
mTitle.style.color = ‘white’;
mTitle.style.padding = ‘4px’;
innerTitle.textContent = mData.title;
mTitle.append(innerTitle);
overlay.classList.add(‘overlay’);
main.classList.add(‘main’);
main.append(mTitle);
main.append(mBody);
overlay.append(main);
main.style.color = mData.font;
main.style.backgroundColor = mData.color;
mBody.textContent = mData.body;
console.log(main);
return overlay;
}
Page Clickers Create Dynamic Interactive Click Counters
This exercise will demonstrate how to attach custom property values into the element object. You can set a value just like within any object, and then access that value using its property name. This is ideal for tracking clickers that need to hold their own values and work independently of the other page elements and the other click values.
Coding to practice applying code to add event listeners on dynamic page elements. Create functions to clean up the code, and avoid repeat statements. Set element attributes, like type min and max. Create page elements with document.createElement() and then append it to the parent with append() prepend() or appendChild() Set element style properties with color, fontSize, backgroundColor, and content values textContent, innerHTML. Use forEach to loop through an array or nodeList.
Exercise :
- Select the main page element that will be updated.
- Create an input field and a button. Set the attributes to the input field so that it is a number type, and has a min of 1 and max of 20. Set a default value of 5 to the input.
- Create a function to create elements, with parameters of the element tag name, and the parent that the element will be appended to.
- Create an empty array to hold the main clicker elements, and the values of the clicks.
- Add a button to generate a report of the clicker values. When the button is clicked, loop through the holding array, and add to the report the value of the clicker element with how many times it’s been clicked.
- On the button beside the input field, get the input value and create the number of clickers in the input value. Create a separate function to generate the clicker.
- In the clicker maker function, create a main element container. Add a trackingValue property to the element, setting the value to 0. Add the new element into the holder array.
- Create a div to hold the clicked value, a button to decrease, a button to increase and an input with a button to save the value from the input to the element clicked value.
- Apply styling to the elements, create a function to add the attributes to each input field.
- Create a function that will update the click values, using arguments for the input element, the text output element and the value of the clicker. Call it updater().
- Add the event listeners to the clicker buttons, to increase and decrease. Send the values to the updater() function.
- The 3rd button should take the value from the input and apply that value to the click value when pressed.
const main = document.querySelector(‘div’);
console.log(main);
main.customValues = 1000;
const myInput = makeElement(document.body,’input’);
const btn = makeElement(document.body,’button’)
btn.textContent = ‘Make Clickers’;
myInput.setAttribute(‘type’,’number’);
myInput.setAttribute(‘min’,1);
myInput.setAttribute(‘max’,20);
myInput.value = 5;
const holder = [];
const main2 = makeElement(document.body,’div’);
const btnReport = makeElement(main2,’button’);
btnReport.textContent = ‘Generate Report’;
btnReport.onclick = ()=>{
console.log(holder);
const report = makeElement(main2,’div’);
main2.prepend(report);
let html = ‘New Report’;
holder.forEach((ele,ind)=>{
html += <div>${ind+1}. = ${ele.trackingVal}</div>;
})
html += ‘
‘;
report.innerHTML = html
}
btn.onclick = ()=>{
for(let i=0;i{
div.trackingVal–;
if(div.trackingVal <= 0) div.trackingVal =0; updater(inField,div1,div.trackingVal); } btn2.onclick = ()=>{
div.trackingVal++;
updater(inField,div1,div.trackingVal);
}
btn3.onclick = ()=>{
div.trackingVal = inField.value;
if(div.trackingVal <= 0) div.trackingVal =0;
updater(inField,div1,div.trackingVal);
}
}
function updater(inputEle,txtEle,num){
inputEle.value = num;
txtEle.innerHTML = ${num} :;
}
function inputToNum(ele){
ele.setAttribute(‘type’,’number’);
ele.setAttribute(‘min’,0);
ele.setAttribute(‘max’,10000);
ele.value = 0;
}
function makeElement(parent,eleType){
const ele = document.createElement(eleType);
return parent.appendChild(ele);
}
/*
main.onclick = (e)=>{
main.customValues++;
main.textContent = Clicks ${main.customValues};
}
*/
Random Words Maker with JavaScript String Methods
This exercise will create a placeholder random word generator. There will be an input for the number of words to create and a button to add them to the page. The coding will focus on JavaScript String methods and how we can update strings, get a random letter from a string and how we can use random to randomize the content that is being output. Also will be using Math in order to add random content and structure the output to look like proper sentences.
String methods used in this lesson include, toUpperCase(), slice(), trim(), substring()
DOM elements will be created with JavaScript code, including how to create and select elements. How to add event listeners to the element. document.createElement() document.querySelector(). Update the page elements with append() and prepend()
Exercise :
- Select a main page element, create an input and button element. Add the new elements into the HTML page.
- Add two strings, one containing vowels and the other common letters to use.
- Add an onclick event to the button, once clicked invokes a function called makeWords() that passes the number of words to create using the input value. Also as one of the parameters include the element where the new text will be placed.
- Create a main loop, that will loop the code for the number of words needed. Each iteration will create a new word to the string.
- Create a random number for the letters of the word to be created. Then nest a new loop within the main loop, iterating the number of times randomly selected.
- Create a random value that will randomize if a vowel is needed, or if a letter. Depending on the random result use either the letters or the vowel strings to select the next letter. Select the next letter randomly and add it to the word.
- Add a condition to check if the word is the first one, if it is then capitalize the first letter in the word.
- Randomize adding an end of the sentence, to capitalize the letter and add a period.
- Using the complete words string, create a new page element and add the textContent value to the string of the generated words. Prepend the new element in the container.
const main = document.querySelector(‘div’);
const btn = document.createElement(‘button’);
const myInput = document.createElement(‘input’);
myInput.value = 40;
myInput.style.display = ‘block’;
btn.textContent = ‘Add words’;
main.append(myInput);
main.append(btn);
console.log(main);
const output = document.createElement(‘div’);
main.append(output);
btn.onclick = ()=>{
makeWords(output,myInput.value);
}
const vowels = ‘aeiou’;
const letters = ‘abcdefghijssttnnmmmpppowcertuiyuiosdfjkkljklsfdxcvmblkjlsdjds’;
function makeWords(parent,num){
let temp = ”;
for(let x=0;x7)+2; //console.log(wordLen); let tempWord = ”; for(let i=0;i4)+1; //console.log(i%ranVowPos); let str =(i%ranVowPos)==0 ? vowels : letters; const val = Math.floor(Math.random()*str.length); tempWord += str.substring(val,val+1); } if(x == 0 ){ tempWord = tempWord[0].toUpperCase() + tempWord.slice(1); } if(Math.random() > .8){
temp = temp.trim();
const capWord = tempWord[0].toUpperCase() + tempWord.slice(1);
temp += . ${capWord};
}else{
temp += tempWord + ‘ ‘;
}
}
const containerEle = document.createElement(‘div’);
containerEle.textContent = ${temp.trim()}.;
containerEle.style.padding = ’10px’;
containerEle.style.border = ‘1px solid #ddd’;
output.prepend(containerEle);
console.log(temp);
}
Scrollbar scroll tracker Calculate the Scroll position on the page
This exercise is going to provide practice with updating style properties of page elements. Including style of textAlign, border, padding, position, width, backgroundColor, height, color, top, left, zIndex. We are also going to use values from the main HTML element, which is in the document as an object with the property name document.documentElement. The document.documentElement will return the root element of the document which is the HTML element. The scrollHeight, scrollTop, and clientHeight of the document.documentElement can be used to calculate the position of the current scroll on the document, and how much of the document is remaining. This can be used to get a percentage of the document that is currently scrolled to.
Exercise :
- Select the main page element, add new divs into it. Create random heights of the divs so that you can use the scroll bar and the page content is larger than the area within the browser.
- Create a main scrollbar container, and two divs, each nested within the parent.
- Apply styling to the main scroll bar container, set a fixed position, and width of 100%.Add styling as needed.
- Create the empty scroll indicator with a height and width of 100% This can be used as the blank area that the inner scroll bar will fill as the user scrolls down the page.
- Add the inner scroll bar, set width to 0 and set a background color different from its parent
- Using the window.onscroll event, calculate the position of the scroller. Get the top value of the current document in the browser. Using the document.documentElement.scrollTop which will change and be 0 if at the top. document.body.scrollTop will be 0 as it’s the document top if your body is at the top of the web page.
- The document.documentElement.scrollHeight will always be the total height of all the body contents. The document.documentElement.clientHeight is the visible area in the browser of the page.
- Subtract the document.documentElement.scrollHeight – document.documentElement.clientHeight which will give a value of the total available height of the scrolling. Subtracting the clientHeight will set the height to 0 once the bottom of the page is reached.
- Divide the total value off the top document.documentElement.scrollTop which will increase once the user scrolls down, with the total available body height. This will return a percentage, which then can be multiplied by 100 for a %
- Use the percentage of page scrolled value to set the width of the scroll bar.
const main = document.querySelector(‘div’);
const scrollInd = document.createElement(‘div’);
const scrBarP = document.createElement(‘div’);
const scrBarC = document.createElement(‘div’);
document.body.prepend(scrollInd);
scrollInd.textContent = ‘Scroll Bar’;
scrollInd.append(scrBarP);
scrBarP.append(scrBarC);
scrollInd.style.textAlign = ‘center’;
scrollInd.style.border = ‘1px solid black’;
scrollInd.style.padding = ‘0px’;
scrollInd.style.position = ‘fixed’;
scrollInd.style.width = ‘100%’;
scrollInd.style.backgroundColor = ‘black’;
scrollInd.style.color = ‘white’;
scrollInd.style.top = ‘0’;
scrollInd.style.left = ‘0’;
scrollInd.style.zIndex = ‘1’;
scrBarP.style.width = ‘100%’;
scrBarP.style.height = ’21px’;
scrBarP.style.padding = ‘3px’;
scrBarP.style.backgroundColor = ‘white’;
scrBarC.style.width = ‘0%’;
scrBarC.style.height = ’15px’;
scrBarC.style.backgroundColor = ‘green’;
window.onscroll = (e)=>{
const sTop = document.body.scrollTop || document.documentElement.scrollTop;
//console.log(document.documentElement.scrollHeight);
//console.log(document.documentElement.clientHeight);
const pos = document.documentElement.scrollHeight – document.documentElement.clientHeight;
const scrolMeter = (sTop / pos)*100;
console.log(scrolMeter);
const bgColor = scrolMeter > 50 ? ‘red’ : ‘green’;
scrBarC.style.width = ${scrolMeter}%;
scrBarC.style.backgroundColor = bgColor;
}
for(let i=0;i<10;i++){
const div = document.createElement(‘div’);
main.append(div);
div.style.border = ‘1px solid #ddd’;
div.style.height = ${ranV(300)+150}px;
div.innerHTML = <h1>${i+1} Header</h1><div>Laurence Svekis</div>;
div.style.backgroundColor = ranC();
div.style.color = ‘white’;
}
function ranC(){
return #${Math.random().toString(16).slice(2,8)};
}
function ranV(max){
return Math.floor(Math.random()*max)+1;
}
Math Quiz and Start and Stop Counters with JavaScript
This exercise is going to use the setInterval() and setTimeout() methods, and how we can use them within a mini quiz application. The questions are going to get generated by JavaScript code, randomly creating the values and storing all the answers in an array which can be used to show the questions to the user. The code will move through the questions in sequence showing the question and waiting for the user to submit an answer. If the input value is correct then it will move to the next question, if its incorrect then the question stays on screen until the correct answer is provided. Once the quiz is complete and all the questions are answered correctly, the counter timer stops and all the questions/answers will be displayed on the screen.
Exercise :
- Create the page elements for the game.
- Set the starting values for the number of questions, and track the counter in a global object. Create an empty array to store questions. This can be used as well if you have a prebuilt array of questions instead of having the code create the questions.
- Create the questions, storing them into the empty holding array, as objects in the array. Set the property for the question as a string and the answer to the question.
- Once the questions are created create a function and invoke it so that the question can be created and shown to the player. Start the time within this function so that the timer starts once the questions are ready and shown.
- Create a function to create elements to show the question. Add a text area element for the question, and an input for the answer. Create a third element to show feedback to the player.
- In the text area populate the question string value.
- Add an event listener of keydown on the input field, if the pressed key is Enter then submit the answer and check if its correct.
- If the answer is not correct, provide the feedback to the player.
- If the input value is correct and matches the correct answer, then move to the next question. Provide feedback to the user. In order for the player to see the feedback load the next question using setTimeout
- Add and set the focus on the input field of the question
- In the next question, check if the player is on the last question, if they are then end the game. Show all the questions and answers. Stop the timer.
const main = document.querySelector(‘div’);
const btn = document.createElement(‘button’);
const btn1 = document.createElement(‘button’);
const div1 = document.createElement(‘div’);
const div2 = document.createElement(‘div’);
const questions = 3;
const ques = [];
const timerVal = {cur:0,counter:0,running:false,int:{}};
main.innerHTML = ”;
main.append(div1);
main.append(btn);
main.append(btn1);
main.append(div2);
div1.textContent = 0;
btn.textContent = ‘Start’;
btn1.textContent = ‘Create Questions’;
btn1.onclick = ()=>{
btn1.style.display = ‘none’;
createQuestions();
}
function createQuestions(){
for(let i=0;i<questions;i++){
const first = ranNum(1,5);
const sec = ranNum(1,5);
const que = ${first} + ${sec};
const ans = first + sec;
//console.log(que,ans);
const myObj = {que:que,ans:ans}
ques.push(myObj);
}
showQuestion(0);
startTimer();
}
function showQuestion(ind){
div2.innerHTML = ”;
const ele = document.createElement(‘div’);
const ele1 = document.createElement(‘div’);
const inEle = document.createElement(‘input’);
const ele2 = document.createElement(‘div’);
inEle.setAttribute(‘type’,’number’);
inEle.style.width = ‘100px’;
ele1.style.display = ‘inline-block’;
ele1.textContent = ques[ind].que + ‘ = ‘;
inEle.addEventListener(‘keydown’,(e)=>{
if(e.code == ‘Enter’){
const val1 = inEle.value;
let mes = ‘wrong’;
inEle.value = ”;
if(val1 == ques[ind].ans){
mes = ‘correct’;
setTimeout(‘movetoNextQuestion()’,500);
}
ele2.textContent =${mes} ${ques[ind].que} = ${val1};
}
})
ele.append(ele1);
ele.append(inEle);
ele.append(ele2);
div2.append(ele);
inEle.focus();
}
function movetoNextQuestion(){
timerVal.cur++;
if(timerVal.cur >= ques.length){
console.log(‘end’);
div2.innerHTML = ”;
ques.forEach((q) =>{
div2.innerHTML += <div>${q.que} = ${q.ans}</div>;
})
//JSON.stringify(ques);
stopTimer();
}else{
showQuestion(timerVal.cur);
}
}
function startTimer(){
timerVal.running = true;
timerVal.int = setInterval(‘updater()’,1000);
btn.textContent = ‘Stop’;
}
function stopTimer(){
timerVal.running = false;
clearInterval(timerVal.int);
btn.textContent = ‘Start’;
}
function ranNum(min,max){
return Math.floor(Math.random()*(max-min+1)+min);
}
btn.onclick = ()=>{
if(timerVal.running){
stopTimer();
}else{
startTimer();
}
//div1.textContent = timerVal.running;
}
function updater(){
if(timerVal.running){
timerVal.counter++;
//console.log(timerVal.counter);
div1.textContent =timerVal.counter;
}
}
Dynamic Interactive JavaScript DOM memory Game
The objective of the memory game is to find a matching square. Turn over one set of squares on each turn. If a match is found the square will stay turned over, the game continues until all the matches are found.
This exercise is designed to explore more of what can be done with JavaScript, and how to apply game logic to achieve desired goals with the code. The project will also demonstrate how to create a dynamic grid using code, and CSS grid. The game should work the same regardless of the size and number of squares.
Exercise :
- Setup the HTML to create several classes that can be applied to the page elements that will be created with JavaScript. Set the main game board to use the display property of the grid and be able to apply CSS Grid to this element. You can use the below HTML as a starting file to skip the creation of the HTML and CSS and adjust and customize as needed.
- Setup the default game values, grid size, the arr for the possible contents, and a global game object that can hold score, total, game and flip array, timer and the game pause action.
- Calculate the total of squares needed, add a condition to ensure that there is enough content in the arr to build the page elements with values.
- Add an event listener document.addEventListener(‘DOMContentLoaded’, makeGrid); that gets invoked once the page loads. It should invoke a function makeGrid()
- Loop through the total number of items to be placed on the grid, add page elements and an event listener when the element is clicked to flipBox() function. This function will be used as the elements on the page are clicked.
- Create an element making function called maker(), which will create the different elements, append the new element to a parent, add a class and add content into the element. This will save a lot of repeat coding. Add a class of box to each new element.
- For the main game container set a property for the grid template columns, which will create the Grid Structure for the page. style.setProperty(
grid-template-columns,repeat(${grid.y},1fr)) - Create a function to add the items to the newly created page elements. Within the function add a temporary empty array, that can be used to duplicate the values and create a new array of all the items in the game. Randomly sort the main array of items, then loop through the total needed in a for loop, adding the one set of items into the temp array.
- Using concat, duplicate the array and add it to the main game object array. Then randomize the order of that new array.
- Using querySelectorAll select all the elements with a class of box. Loop through the elements, add a front and back element into the box class element. Also add to the box class element the value of the text content on the front side, and the value of false for found. These are new properties added to the parent element which can then be selected and used in the game logic. Add to the front the text content from the array, and add classes to both front and back of front and back.
- Create a function to handle the clicks on the box elements. Within the function select the parent which should be the box element as the click event target should be the child element nested within.
- Add a condition to check if the element has a class of active, active should be added to each item as its flipped over, this can be used to avoid a duplicate flip of the item. Also check for the game pause, as the pause can be used to stop the game play once 2 items are flipped over and need to flip back.
- If the item is not flipped, then add the class of active to the parent with box class. Add the parent box element into the game flip array for already flipped squares. Check the length of the flipped squares, if there are 2 then create a function to checkCards() for a match.
- In the checkCards() function, pause the gameplay. Loop through the flipped cards and check if they match. If they do not match flipp the cards back. If there is a match then keep the flipped cards on the front, and clear the game.flip array. Update the score of found items.
- If found to match check for the game over, if it’s over then end the game with a message to the player.
- If no match is found then flip the cards back over to the back side, use the setTimeout() to create a pause so the player can observe the results. When the cards flip back, continue the game play.
- The game play will continue until all the matches are found. There are several ways to accomplish the above objectives, as well the below code is designed so that you can use it to customize the game logic. Try it out and make updates to the parameters to see and change how the game plays.
JavaScript
const main = document.querySelector(‘.game’);
const message = maker(‘div’, document.body, ‘Press any square to start’, ‘message’);
const grid = {
x: 2,
y: 2
};
const arr = [‘red’, ‘blue’, ‘purple’, ‘green’, ‘yellow’, ‘pink’, ‘orange’];
const game = {
score: 0,
total: 0,
game: [],
flip: [],
timer: {},
pause: false
};
let total = grid.x * grid.y;
total = arr.length * 2 < total ? arr.length * 2 : total; game.total = total / 2; document.addEventListener(‘DOMContentLoaded’, makeGrid); function makeGrid() { for (let i = 0; i < total; i++) { //const html = ${i+1}; const el = maker(‘div’, main, ”, ‘box’); el.onclick = flipBox; } main.style.setProperty(grid-template-columns, repeat(${grid.y},1fr)); addBoxes(); } function toggleFlip(parent, boo) { const bEle = parent.querySelector(‘.back’); const fEle = parent.querySelector(‘.front’); if (boo) { bEle.style.display = ‘none’; fEle.style.display = ‘block’; } else { bEle.style.display = ‘block’; fEle.style.display = ‘none’; } //console.log(parent); } function checkCards() { game.pause = true; let match = null; let found = false; game.flip.forEach((ele) => {
if (ele.val == match) {
console.log(‘match found’);
found = true;
} else {
match = ele.val;
}
console.log(ele.val);
})
if (!found) {
game.timer = setTimeout(flipback, 500);
} else {
game.score++;
game.flip.forEach((ele) => {
ele.found = true;
})
game.pause = false;
game.flip.length = 0;
if (game.score >= game.total) {
message.textContent = ‘Game Over’;
}
}
}
function flipback() {
game.flip.forEach((ele) => {
toggleFlip(ele, false);
ele.classList.remove(‘active’);
})
game.pause = false;
game.flip.length = 0;
}
function flipBox(e) {
const parent = e.target.parentNode;
const tempv = parent.classList.contains(‘active’);
console.log(tempv);
if (!game.pause && !tempv) {
console.log(parent.found);
if (parent.found) {
message.textContent = ‘Already Found’;
} else {
parent.classList.add(‘active’);
if (game.flip.length >= 2) {
toggleFlip(parent, false);
} else {
toggleFlip(parent, true);
}
game.flip.push(parent);
message.textContent = Cards Flipped : ${game.flip.length};
if (game.flip.length >= 2) {
checkCards();
}
}
} else {
message.textContent = Can't Click Right now;
}
}
function addBoxes() {
let gameItems = total / 2;
const temp = [];
arr.sort(() => {
return Math.random() – 0.5;
})
for (let i = 0; i < gameItems; i++) { temp.push(arr[i]); } game.game = temp.concat(temp); game.game.sort(() => {
return Math.random() – 0.5;
})
const boxes = main.querySelectorAll(‘.box’);
boxes.forEach((ele, ind) => {
ele.val = game.game[ind];
ele.found = false;
const front = maker(‘div’, ele, game.game[ind], ‘front’);
front.style.backgroundColor = game.game[ind];
front.style.display = ‘none’;
const back = maker(‘div’, ele, ind + 1, ‘back’);
back.style.display = ‘block’;
})
//console.log(game);
}
function maker(eleType, parent, html, cla) {
const ele = document.createElement(‘div’);
ele.classList.add(cla);
ele.innerHTML = html;
return parent.appendChild(ele);
}
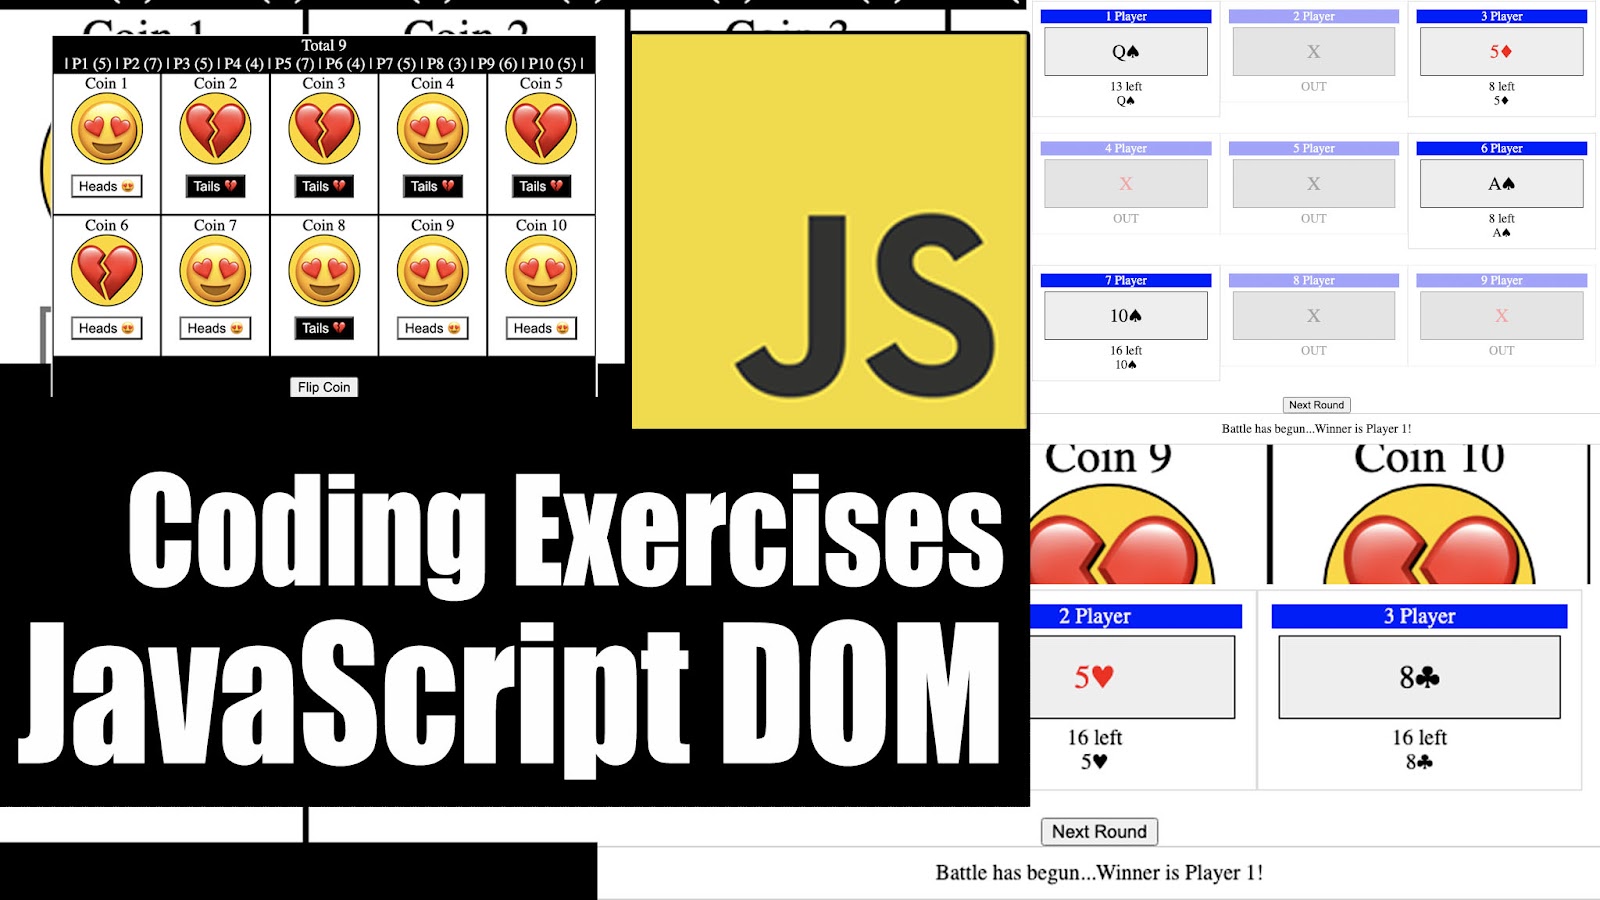
Dynamic JavaScript Coin Flipping game DOM game.
The coding challenge is to create an interactive game, which loads a number of coins and allows the player to select what they think the coin flip will return on the coin. If they are correct the score will increase by one for that player. The code is designed to be dynamic making it easy to update and add new players. This exercise is based on 2 parts, one will create a static number of players 2 and the second part will update the code to create a dynamic number of coins and players.
You can use JavaScript for styling or use the default HTML and CSS in the source code below. The object is to practice and learn more about JavaScript and how JavaScript can be used to create interactive web page elements. This exercise will also provide practice in applying game play logic to make the desired outcomes within the code, using logic and scoring.
HTML and CSS source code to create the coins and styling for the game play area.
JavaScript
Exercise :
- Select the page elements from the HTML
- Create an array that contains the values called vals, heads and tails icons.
- Create a main game object with player scoring in an array called players and a counter for the total number of rounds that have been played.
- Create the interactive page elements for the game play. Score area, game area, player 1 and player 2 divs. Add a coin to each of the player divs. Set the default starting values to heads, add to the coin element object a val to track the current value of either 0 or 1. Add the coins into an array named coins.
- Setup the dashboard for the flip coins button
- Add event listeners to the click of the buttons for the coins, these should toggle the two values of either heads or tails (0 or 1). Create a function to update the styling accordingly.
- Attach an event to the main coin flip button, disabled the button when clicked. Loop through the coins and remove the current image from the textContent. Using a setTimeout invokes a function named flipper. This timeout is used for a delay effect which will show the player the action is in play.
- Within the flipper() function update the game rounds total counter by 1. Loop through the coins array, generate a random value 0 or 1. Set the innerHTML to match the boolean using the items either heads or tails. Set the coin value to 0 or 1. Update the button setting dsiabled to false so the button to flip can be clicked again. Create a function to check the results of the flip.
- Within the checker() function parameters, pass in the coin value, the button val and the ind value of the coin. If the coin value matches the corresponding button value then that player will score a point. Output the results into the message area for the player to be able to see the score.
- The flipping should now be able to be clicked again resulting in another round of the game play.
const main = document.querySelector(‘.game’);
const vals = [‘💔’, ‘😍’];
const game = {
players: [0, 0],
total: 0
};
const scoreDiv = maker(‘div’, main, ‘score’, ‘Score’);
const gameArea = maker(‘div’, main, ‘gameArea’, ”);
const player1 = maker(‘div’, gameArea, ‘gamer’, ‘Coin 1’);
const player2 = maker(‘div’, gameArea, ‘gamer’, ‘Coin 2’);
const coin1 = maker(‘div’, player1, ‘coin’, ‘💔’);
const coin2 = maker(‘div’, player2, ‘coin’, ‘💔’);
coin1.val = 1;
coin2.val = 1;
const coins = [coin1, coin2];
const dashboard = maker(‘div’, main, ‘dash’, ”);
const btn = maker(‘button’, dashboard, ‘btn’, ‘Flip Coin’);
const btn1 = maker(‘button’, player1, ‘btn’, Heads ${vals[1]});
btn1.val = 1;
const btn2 = maker(‘button’, player2, ‘btn’, Heads ${vals[1]});
btn2.val = 1;
const btns = [btn1, btn2];
btn1.style.backgroundColor = ‘white’;
btn1.style.color = ‘black’;
btn2.style.backgroundColor = ‘white’;
btn2.style.color = ‘black’;
btn1.onclick = flipSelection;
btn2.onclick = flipSelection;
btn.onclick = (e) => {
btn.disabled = true;
coins.forEach(ele => {
ele.style.backgroundColor = ‘black’;
ele.textContent = ‘ ‘;
})
setTimeout(flipper, 500);
}
function flipSelection(e) {
const ele = e.target;
console.log(ele.val);
if (ele.val == 1) {
ele.innerHTML = Tails ${vals[0]};
ele.style.backgroundColor = ‘black’;
ele.style.color = ‘white’;
ele.val = 0;
} else {
ele.innerHTML = Heads ${vals[1]};
ele.style.backgroundColor = ‘white’;
ele.style.color = ‘black’;
ele.val = 1;
}
}
function maker(t, p, c, h) {
const el = document.createElement(t);
el.classList.add(c);
el.innerHTML = h;
return p.appendChild(el);
}
/*
for(let i=0;i<100;i++){ const boo = Math.floor(Math.random() + 0.5); console.log(boo); } */ function flipper() { //check for match game.total++; coins.forEach((ele, ind) => {
const boo = Math.floor(Math.random() + 0.5);
ele.innerHTML = vals[boo];
console.log(btns[ind].val);
console.log(ele.val);
ele.val = boo;
ele.style.backgroundColor = ‘gold’;
btn.disabled = false;
checker(ele.val, btns[ind].val, ind);
})
}
function checker(coinVal, btnVal, ind) {
if (btnVal == coinVal) {
console.log(${ind} was correct);
game.players[ind]++;
} else {
console.log(${ind} was wrong);
}
scoreDiv.innerHTML = ${game.players[0]} vs ${game.players[1]} in total ${game.total};
}
The coin game is static to 2 players, and 2 coins. To make it more interesting update the above code to run with a dynamic value for the number of players. The coins and players should be the same number, and can be tied together with the index value. The functions in the code should already be fairly flexible on the number of players, you will need to update the static element objects to add them according to the value of players desired.
Exercise :
- Create a variable for the number of players to generate, this will also create a corresponding number of coins all with clickable buttons to select either heads or tails.
- Update the CSS grid and styling to accommodate more coins on the screen. Clear the coins and btns arrays
- Create a function that will make the players, looping through the number of selected players.
- Create a player element, add a coin and button in each. Set the values of the coin and btn to the corresponding elements.
- Update the style properties and push the new elements into the coins and btns arrays.
- Add a click event running the flipselection function
- update the checker function to generate and check a report for all the coin players
- Play through the game and debug as needed to ensure the game play still works as before. Use the console.log as needed to output the resulting values where they were changed.
const main = document.querySelector(‘.game’);
const vals = [‘💔’,’😍’];
const numPlayers = 9;
const numsA = numPlayers > 3 ? 3 : numPlayers;
const game = {players : [],total:0};
const scoreDiv = maker(‘div’,main,’score’,’Score’);
const gameArea = maker(‘div’,main,’gameArea’,”);
gameArea.style.setProperty(grid-template-columns, repeat(${numsA },1fr));
const coins = [];
const btns = [];
const dashboard = maker(‘div’,main,’dash’,”);
makerPlayers();
const btn = maker(‘button’,dashboard,’btn’,’Flip Coin’);
function makerPlayers(){
for(let i=0;i<numPlayers;i++){
const player = maker(‘div’,gameArea,’gamer’,Coin ${i+1});
const coin = maker(‘div’,player,’coin’,’💔’);
coin.val = 1;
coins.push(coin);
const btn1 = maker(‘button’,player,’btn’,Heads ${vals[1]});
btn1.val = 1;
btn1.style.backgroundColor = ‘white’;
btn1.style.color = ‘black’;
btn1.onclick = flipSelection;
btns.push(btn1);
game.players.push(0);
}
}
btn.onclick = (e)=>{
btn.disabled = true;
coins.forEach(ele =>{
ele.style.backgroundColor = ‘black’;
ele.textContent = ‘ ‘;
})
setTimeout(flipper,500);
}
function flipSelection(e){
const ele = e.target;
console.log(ele.val);
if(ele.val == 1){
ele.innerHTML = Tails ${vals[0]};
ele.style.backgroundColor = ‘black’;
ele.style.color = ‘white’;
ele.val = 0;
}else{
ele.innerHTML = Heads ${vals[1]};
ele.style.backgroundColor = ‘white’;
ele.style.color = ‘black’;
ele.val = 1;
}
}
function maker(t,p,c,h){
const el = document.createElement(t);
el.classList.add(c);
el.innerHTML = h;
return p.appendChild(el);
}
/*
for(let i=0;i<100;i++){ const boo = Math.floor(Math.random() + 0.5); console.log(boo); } */ function flipper(){ //check for match game.total++; coins.forEach((ele,ind)=>{
const boo = Math.floor(Math.random() + 0.5);
ele.innerHTML = vals[boo];
console.log(btns[ind].val);
console.log(ele.val);
ele.val = boo;
ele.style.backgroundColor = ‘gold’;
btn.disabled = false;
checker(ele.val,btns[ind].val,ind);
})
let html = Total ${game.total}<br>|;
game.players.forEach((pla,i)=>{
html += P${i+1} (${game.players[i]}) |;
})
scoreDiv.innerHTML = html;
}
function checker(coinVal,btnVal,ind){
if( btnVal == coinVal){
console.log(${ind} was correct);
game.players[ind]++;
}else{
console.log(${ind} was wrong);
}
}
JavaScript Battle Cards Game using Array methods
Using JavaScript to create an interactive game, this exercise will demonstrate how to build a deck of cards. How to track players and create the output for the game play. Applying logic to determine which player wins and how many cards are left for each.
By using various array methods this will enable the application to track player status, and provide output for the game.
Objective of the game is to draw the highest card in the round, the player that draws the highest card from their deck wins. The winner of the round collects all the cards that were played in that round. Ties will happen, this results in a run off between the winners for the pot of cards in play. The players who tied, will go additional rounds drawing the next card in their deck until one player wins the round. That player will win and collect all the cards played in the round including the tie game cards.
The game will be dynamic, where the number of players will be set in the game values, and the game will work the same regardless of how many players are in the game. You can use the HTML and CSS as starting code, or customize the CSS and page styling as desired. The CSS will enhance the appearance of the game, and not designed to change the actual game play. JavaScript will be used to create page elements, and add the various classes to those elements. Within the HTML we only have the one container element with a class of game.
In this coding example we will be adding array values into other arrays, and selecting the highest value from an array of numbers. Using the 3 dots or spread operator will give us a way to pass the array into the argument and have the results be treated as the array was a set of values not contained in an array. When three dots (…) is used it expands an array into a list. This allows a function to accept an indefinite number of arguments as an array providing a way to use an array like a set of values. The example below will outline the different outputs in function a and function b for the arguments with and without the 3 dots.
const arr = [1,2,4,5];
function a(…vals){
console.log(vals);
};
a(…arr);
function b(vals){
console.log(vals);
};
b(…arr);
The code will use many array methods and several Math methods. Math.max() function will return the largest of the numbers given as input parameters, or NaN if the parameter isn’t a number and cannot be converted into a number.
const arr = [1,2,4,5];
console.log(Math.max(1,2,4,5));
console.log(Math.max(…arr));
console.log(Math.max(arr));
JavaScript
Card deck data, as the suits will repeat, and the numbers will repeat. This can be used to construct the cards with values.
const cardData = {suits:[‘spades’,’hearts’,’diams’,’clubs’],val:[‘A’,’2′,’3′,’4′,’5′,’6′,’7′,’8′,’9′,’10’,’J’,’Q’,’K’]}
function buildDeck() {
cardData.suits.forEach((suit) => {
cardData.val.forEach((v, ind) => {
const bgC = (suit == ‘hearts’) || (suit == ‘diams’) ? ‘red’ : ‘black’;
const card = {
suit: suit,
icon: &${suit};,
clr: bgC,
cardNum: v,
cardValue: ind + 1
}
deck.push(card);
})
})
deck.sort(() => {
return Math.random() – 0.5;
})
}
Exercise :
- Create a function that can be used to make page elements with parameters of element tag, parent element, content of element, and class of element. This can now be used to create elements quickly within the code.
- Setup the game board, with elements for the game area, a button for the game play and a message area for player communication from the game.
- Create a global game object that will hold the number of players, the card decks for each player, and the elements in an array that the player will need for visuals in the game play. (card view and score action feedback)
- Create a data array with card details, all of the suits and the values to be used in the main deck of cards. If you use the suits HTML character values, these can then be reused when outputting the visuals in the application. (♠ ♥ ♦ ♣)
- Create a main deck array that will be populated with the card deck. Create a function to build the deck of cards. buildDeck()
- In the buildDeck() function, loop through all the card data, loop through the suits as well as the values of the cards in order to construct a typical deck of 52 cards. Create a card object with data that can then be used to output visuals for the card and make the calculations of the card values.
- Shuffle the deck once it’s built, you can use the array sort method.
deck.sort(() => {
return Math.random() – 0.5;
}) - Add the players to the game. Create a function to add players. addPlayers()
- In the addPlayers() function, calculate the number of cards each player will get from the main deck.
- Using a for loop, loop through each player to add them to the page, and add the player data to them including the deck of cards for that player. Add the page elements, player info, card display area, score and feedback on the round. Add these elements into arrays contained within the game object. The arrays can then be selected for each player as by using the index value of the player. The index values will be inline with the array starting at 0 for the first player index.
- Using slice() select from the main deck the start and end position for that player’s cards. This can be calculated using the last end position, setting that as start. Use that start and add the number of cards for each player to get the end value for the slice.
- Add an event listener for the main button, this will start the game play.
- Within the main click event, loop through all the players, check the number of cards in their decks. If they have more than 1 then add them into a temporary array of players that have cards and are still in the game. If they don’t have cards then apply styling to indicate visually that the player is out. Once all the active players are in an array, create a new function and send that array, and an empty array to the function gamer() The empty array will be used to hold all the cards that are in play, so that they can be awarded to the round winner. This is setup so that within the gamer() function we can invoke the function again if needed.
- Within the gamer() function loop through all the players in play. Check if the player has cards left, if they do then select the card view element for the player. Using shift() remove the first item from the player card deck array.
- Create a function to show the card on the page, invoke the function and send the card data and the element that needs to be updated.
function showCard(cc, ele) {
ele.innerHTML = <div>${cc.cardNum}${cc.icon}</div>;
ele.style.color = cc.clr;
}
- Add the played card to the holder array, add the value of the played card to the vals array. Update the game score for the player with the card value that was played.
- Create a new array to hold the winners of this round.
- From the vals array get the highest value from the items in the vals array. const highValue = Math.max(…vals);
- Using the vals array, loop through all the players checking for the player that played the high value card. Add the players into the winners array. This will also pick up ties and could add multiple winners for this round into the winners array.
- Apply logic to check if there are more than one player in the winners array. If there are more than one player then this is a tie, and a second draw of players cards is needed. Output the tied feedback to the page. Use return to invoke the gamer array, adding only the tied players into the round players, and add the holder array so that more cards can be added.
- If there is only one winner, that player is now the winner of the round and will collect all the cards in the holding array. You can use push to update the players card deck with the new won cards from the holder array. To add the array as items use the Spread operator to add them as a list. .push(…holder);
- Create a function to update the scores for the players on the page. Loop through all the game score elements for the players, using the index select the associated player and get that player’s card deck length. If they have a value then output the cards remaining for that player. If no cards remain, apply a style of opacity to the player element.
el.parentNode.style.opacity = 0.4;
- For the game end, within the score update function create an array that can hold the players that are left in the game. If the length of the player’s length in the game array is one, then end the game and announce the winner. You can disabled the main play button and provide text that the game is over.
JavaScript Card Game final source code :
const main = document.querySelector(‘.game’);
//main.innerHTML = ♠ ♥ ♦ ♣;
const gameArea = maker(main, ‘div’, ‘gameArea’, ”);
const btn = maker(main, ‘button’, ‘btn’, ‘Next Round’);
const mes = maker(main, ‘div’, ‘mes’, ‘Click to Play’);
const game = {
players: 3,
cards: [],
view: [],
s: []
};
const cardData = {suits:[‘spades’,’hearts’,’diams’,’clubs’],val:[‘A’,’2′,’3′,’4′,’5′,’6′,’7′,’8′,’9′,’10’,’J’,’Q’,’K’]}
/*const cardData = {
suits: [‘spades’, ‘hearts’, ‘diams’, ‘clubs’],
val: [‘A’, ‘2’, ‘3’, ‘4’, ‘5’]
}
*/
const deck = [];
buildDeck();
addPlayers();
btn.addEventListener(‘click’, (e) => {
const temp = [];
for (let i = 0; i < game.players; i++) { game.s[i].lastChild.innerHTML = ”; if (game.cards[i].length > 0) {
temp.push(i);
} else {
const ele = game.view[i];
ele.innerHTML = ‘X’;
game.s[i].firstChild.innerHTML = ‘OUT’;
ele.style.backgroundColor = ‘#bbb’;
}
}
mes.innerHTML = ‘Battle has begun…’;
gamer(temp, []);
})
function gamer(inPlay, holder) {
const vals = [];
console.log(inPlay);
inPlay.forEach((i) => {
if (game.cards[i].length > 0) {
const ele = game.view[i];
const first = game.cards[i].shift();
showCard(first, ele);
vals.push(first.cardValue);
holder.push(first);
game.s[i].lastChild.innerHTML += ${first.cardNum}${first.icon};
}
})
const winners = [];
const highValue = Math.max(…vals);
console.log(highValue);
vals.forEach((e, i) => {
if (e >= highValue) winners.push(inPlay[i]);
})
console.log(winners);
if (winners.length > 1) {
mes.innerHTML += Tie:;
winners.forEach(v => {
mes.innerHTML += P${v+1};
})
mes.innerHTML += ...;
return gamer(winners, holder);
} else if (winners.length == 0) {
mes.innerHTML += ‘No winner’;
} else {
const temp = winners[0];
game.cards[temp].push(…holder);
mes.innerHTML += Winner is Player ${temp+1}!;
}
updateScores();
}
function updateScores() {
let tempPlay = [];
game.s.forEach((el, i) => {
const cardCount = game.cards[i].length;
if (cardCount) {
el.firstChild.innerHTML = ${cardCount} left;
tempPlay.push(i);
} else {
el.parentNode.style.opacity = 0.4;
}
})
if (tempPlay.length <= 1) { mes.innerHTML = Game Over! Player ${tempPlay[0]+1} Wins; btn.disabled = true; btn.textContent = ‘GAME OVER’; } } function showCard(cc, ele) { ele.innerHTML = <div>${cc.cardNum}${cc.icon}</div>; ele.style.color = cc.clr; } function addPlayers() { let start = 0; let num = Math.floor(deck.length / game.players); let end = start + num; for (let i = 0; i < game.players; i++) { const el = maker(gameArea, ‘div’, ‘player’, ); const ele = maker(el, 'div', 'info', `${i+1} Player`); const card = maker(el, 'div', 'card',); game.view.push(card); game.cards[i] = deck.slice(start, end); const score = maker(el, ‘div’, ‘score’, `); const cardLeft = maker(score, 'div', 'box',${game.cards[i].length} left); const cardPlayed = maker(score, 'div', 'box', ''); game.s.push(score); start = end; end = end + num; } console.log(game.cards); } function buildDeck() { cardData.suits.forEach((suit) => { cardData.val.forEach((v, ind) => { const bgC = (suit == 'hearts') || (suit == 'diams') ? 'red' : 'black'; const card = { suit: suit, icon:&${suit};`, clr: bgC, cardNum: v, cardValue: ind + 1 } deck.push(card); }) }) deck.sort(() => {
return Math.random() – 0.5;
})
}
function maker(par, eleType, cla, html) {
const ele = document.createElement(eleType);
ele.classList.add(cla);
ele.innerHTML = html;
return par.appendChild(ele);
}
Interactive Web Pages with JavaScript by Laurence Svekis https://basescripts.com/