Easy To-Do List Tutorial: Create Your Own with HTML & JavaScript
Learn how to create a simple, interactive to-do list with our step-by-step tutorial. This beginner-friendly guide will take you through the process of building a basic to-do list application using HTML and JavaScript. You’ll learn how to add new tasks and remove them with a simple click. Perfect for getting started with web development or brushing up on your coding skills. Don’t forget to hit the like button, share with your friends, and subscribe for more awesome coding tutorials!
Tags:
HTML, JavaScript, To-Do List, Web Development, Coding Tutorial, JavaScript Projects, Beginner Programming, Task List, Interactive Web Pages, Software Development, Learn Coding, HTML5, DOM Manipulation, Web Design, Coding for Beginners, Web Application, JavaScript for Beginners, Programming Skills, Tech Tutorials, Front-End Development, DIY Projects, Productivity Tools, Code Along
Building a Simple To-Do List with HTML and JavaScript
Introduction:
In this tutorial, we’ll walk through creating a simple yet functional to-do list using just HTML and JavaScript. This is an excellent project for beginners and those looking to get more practice with client-side scripting.
HTML Structure:
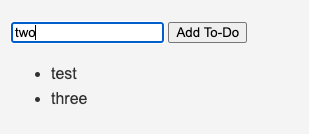
Our HTML is minimalistic yet functional. We have a main div class where our to-do list will live. It includes an input field for new tasks, a button to add them, and an unordered list (<ul>) where the tasks will be displayed.
<main>

 <div class="main">

 <input type="text" id="todoInput">

 <button id="addTodoBtn">Add To-Do</button>

 <ul id="todoList"></ul>

 </div>

</main>
JavaScript Logic:
Our JavaScript is straightforward. First, we grab our DOM elements (the input field, button, and list). We then add an event listener to the button so that when it’s clicked, a new list item is created with the input’s current value, but only if the input is not empty. Clicking on any list item will remove it from the list, allowing users to ‘complete’ tasks.
const btn = document.getElementById('addTodoBtn');

const inputValue = document.getElementById('todoInput');

const ul = document.getElementById('todoList');

btn.addEventListener('click', () => {

 if (inputValue.value != '') {

 const li = document.createElement('li');

 li.textContent = inputValue.value;

 li.addEventListener('click', function() {

 this.parentNode.removeChild(this);

 });

 ul.appendChild(li);

 inputValue.value = '';

 }

});
Conclusion:
And there you have it! A simple to-do list application you can enhance and customize. This project serves as a great starting point for those looking to get into web development, as it covers fundamental concepts such as DOM manipulation and event handling. Experiment with styles, functionalities, and more to make it your own. Happy coding!
Tips for Improvement:
- Add a feature to mark tasks as completed instead of deleting them.
- Implement local storage to save tasks even when the browser is closed.
- Enhance the styling with CSS to make your to-do list more visually appealing.
Remember, the best way to learn coding is by doing. So, take this basic project and expand on it in ways that challenge your current skill level.