
41) Canvas Signature Pad + Save PNG — exercise41_signature_pad.html

<!doctype html>
<html lang=”en”>
<head>
<meta charset=”utf-8″>
<title>Signature Pad — Canvas + Pointer Events</title>
<!–
Build: Simple signature/drawing pad using <canvas> + Pointer Events with Save PNG.
Objectives:
– Use pointerdown/move/up/cancel to draw smooth lines on a canvas.
– Handle DPR (devicePixelRatio) for crisp rendering.
– Provide Clear and Save (download PNG) actions.
Steps:
1) Draw inside the canvas with mouse/touch/stylus.
2) Click “Save PNG” to download your drawing; “Clear” to reset.
3) Inspect how the canvas is scaled for devicePixelRatio.
–>
<style>
body{font:16px/1.5 system-ui,sans-serif;padding:1rem}
.wrap{max-width:680px}
canvas{border:1px solid #ddd;border-radius:.5rem;background:#fff;touch-action:none}
.row{margin:.5rem 0;display:flex;gap:.5rem;align-items:center}
input[type=color],input[type=range]{vertical-align:middle}
</style>
</head>
<body>
<div class=”wrap”>
<h1>Exercise 41 — Signature Pad</h1>
<div class=”row”>
<label>Color <input type=”color” id=”color” value=”#111111″></label>
<label>Width <input type=”range” id=”width” min=”1″ max=”20″ value=”3″></label>
<button id=”clear”>Clear</button>
<button id=”save”>Save PNG</button>
</div>
<canvas id=”pad” width=”640″ height=”360″ aria-label=”Signature pad”></canvas>
</div>
<script>
const canvas = document.getElementById(‘pad’);
const ctx = canvas.getContext(‘2d’);
const color = document.getElementById(‘color’);
const width = document.getElementById(‘width’);
function resizeForDPR(){
const dpr = window.devicePixelRatio || 1;
const rect = canvas.getBoundingClientRect();
canvas.width = Math.round(rect.width * dpr);
canvas.height = Math.round(rect.height * dpr);
ctx.scale(dpr, dpr);
ctx.lineJoin = ctx.lineCap = ’round’;
ctx.lineWidth = Number(width.value);
ctx.strokeStyle = color.value;
ctx.fillStyle = ‘#ffffff’;
ctx.fillRect(0,0,rect.width,rect.height);
}
function ensureCSSSize(){ // keep CSS size stable
canvas.style.width = ‘640px’;
canvas.style.height = ‘360px’;
}
ensureCSSSize(); resizeForDPR();
window.addEventListener(‘resize’, ()=>{ ensureCSSSize(); resizeForDPR(); });
let drawing = false, last = null;
function pos(e){
const r = canvas.getBoundingClientRect();
return { x: e.clientX – r.left, y: e.clientY – r.top };
}
canvas.addEventListener(‘pointerdown’, (e)=>{ e.preventDefault(); drawing=true; last=pos(e); });
canvas.addEventListener(‘pointermove’, (e)=>{
if(!drawing) return;
const p = pos(e);
ctx.strokeStyle = color.value; ctx.lineWidth = Number(width.value);
ctx.beginPath(); ctx.moveTo(last.x,last.y); ctx.lineTo(p.x,p.y); ctx.stroke();
last = p;
});
[‘pointerup’,’pointercancel’,’pointerleave’].forEach(type =>
canvas.addEventListener(type, ()=> drawing=false));
document.getElementById(‘clear’).onclick = ()=>{
const r = canvas.getBoundingClientRect();
ctx.fillStyle = ‘#fff’; ctx.fillRect(0,0,r.width,r.height);
};
document.getElementById(‘save’).onclick = ()=>{
const a = document.createElement(‘a’);
a.href = canvas.toDataURL(‘image/png’);
a.download = ‘signature.png’; a.click();
};
</script>
</body>
</html>
42) Drag-and-Drop File Previews (Images) — exercise42_dnd_file_previews.html

<!doctype html>
<html lang=”en”>
<head>
<meta charset=”utf-8″>
<title>Drag & Drop — Image Previews with Validation</title>
<!–
Build: Dropzone that accepts multiple images with type/size validation and live previews.
Objectives:
– Handle dragenter/over/leave/drop events and prevent default.
– Validate file types and size; show errors per file.
– Use FileReader to preview thumbnails.
Steps:
1) Drag files over the dashed box or click to choose.
2) Valid images show as thumbnails; errors show below.
3) Inspect the drop handler for file iteration and validation.
–>
<style>
body{font:16px/1.5 system-ui,sans-serif;padding:1rem}
.drop{border:2px dashed #91d5ff;border-radius:.75rem;padding:1.25rem;text-align:center;background:#f7fbff}
.drop.drag{background:#e6f7ff}
.grid{display:grid;grid-template-columns:repeat(auto-fill,minmax(120px,1fr));gap:.5rem;margin-top:.75rem}
.card{border:1px solid #eee;border-radius:.5rem;overflow:hidden}
.card img{display:block;width:100%;height:96px;object-fit:cover}
.errors{color:#b00020;margin-top:.5rem}
.hidden{display:none}
</style>
</head>
<body>
<h1>Exercise 42 — Drag & Drop Previews</h1>
<div class=”drop” id=”drop” tabindex=”0″ role=”button” aria-label=”Upload images”>
<p><strong>Drop images</strong> here or click to select</p>
<input id=”file” type=”file” accept=”image/*” multiple class=”hidden”>
</div>
<div class=”grid” id=”grid”></div>
<div class=”errors” id=”errors”></div>
<script>
const drop = document.getElementById(‘drop’);
const input = document.getElementById(‘file’);
const grid = document.getElementById(‘grid’);
const errs = document.getElementById(‘errors’);
function showError(msg){ errs.innerHTML += `<div>• ${msg}</div>`; }
function clearErrors(){ errs.innerHTML=”; }
function handleFiles(files){
clearErrors();
[…files].forEach(f=>{
if(!f.type.startsWith(‘image/’)) return showError(`${f.name}: Not an image.`);
if(f.size > 2*1024*1024) return showError(`${f.name}: > 2MB.`);
const reader = new FileReader();
reader.onload = e=>{
const card = document.createElement(‘div’);
card.className=’card’;
card.innerHTML = `<img src=”${e.target.result}” alt=”${f.name}”><div style=”padding:.35rem .5rem”><small>${f.name}</small></div>`;
grid.appendChild(card);
};
reader.readAsDataURL(f);
});
}
[‘dragenter’,’dragover’].forEach(type=>{
drop.addEventListener(type, e=>{ e.preventDefault(); drop.classList.add(‘drag’); });
});
[‘dragleave’,’dragend’,’drop’].forEach(type=>{
drop.addEventListener(type, e=>{ drop.classList.remove(‘drag’); });
});
drop.addEventListener(‘drop’, e=>{
e.preventDefault();
if(e.dataTransfer.files?.length) handleFiles(e.dataTransfer.files);
});
drop.addEventListener(‘click’, ()=> input.click());
input.addEventListener(‘change’, ()=> handleFiles(input.files));
</script>
</body>
</html>
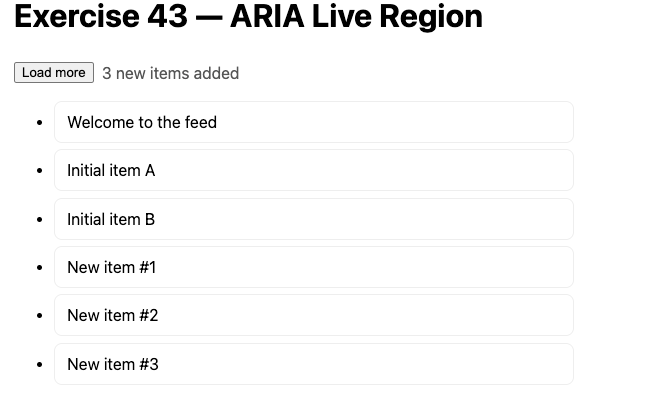
43) ARIA Live Region: Simulated Feed Loader — exercise43_live_region_feed.html
<!doctype html>
<html lang=”en”>
<head>
<meta charset=”utf-8″>
<title>ARIA Live — Announce New Items</title>
<!–
Build: Simulated “Load more” feed that appends items after a delay and announces via aria-live.
Objectives:
– Use aria-live=”polite” to announce additions to assistive tech.
– Simulate async with setTimeout and a loading state.
– Insert items efficiently and keep focus management polite.
Steps:
1) Click “Load more” to fetch 3 new items after ~800ms.
2) Hear/see an announcement “3 new items added”.
3) Inspect how aria-live text is updated.
–>
<style>
body{font:16px/1.5 system-ui,sans-serif;padding:1rem}
ul{max-width:520px}
li{border:1px solid #eee;border-radius:.5rem;padding:.5rem .75rem;margin:.4rem 0;background:#fff}
.row{display:flex;gap:.5rem;align-items:center}
.status{min-height:1.4em;color:#555}
</style>
</head>
<body>
<h1>Exercise 43 — ARIA Live Region</h1>
<div class=”row”>
<button id=”load”>Load more</button>
<span id=”state” class=”status” aria-live=”polite”></span>
</div>
<ul id=”feed”>
<li>Welcome to the feed</li>
<li>Initial item A</li>
<li>Initial item B</li>
</ul>
<script>
const feed = document.getElementById(‘feed’);
const btn = document.getElementById(‘load’);
const state = document.getElementById(‘state’);
let counter = 0;
btn.addEventListener(‘click’, ()=>{
btn.disabled = true;
state.textContent = ‘Loading…’;
setTimeout(()=>{
const count = 3;
for(let i=0;i<count;i++){
const li = document.createElement(‘li’);
li.textContent = `New item #${++counter}`;
feed.appendChild(li);
}
state.textContent = `${count} new items added`;
btn.disabled = false;
}, 800);
});
</script>
</body>
</html>
44) Editable List (CRUD + Reorder + localStorage) — exercise44_editable_list_storage.html

<!doctype html>
<html lang=”en”>
<head>
<meta charset=”utf-8″>
<title>Editable List — CRUD + Reorder + localStorage</title>
<!–
Build: Manage a to-do style list: add, edit inline, delete, move up/down; persist to localStorage.
Objectives:
– Implement event delegation for edit/save/delete controls.
– Persist the array to localStorage and initialize from it.
– Provide simple reordering without drag-and-drop.
Steps:
1) Add several items. Click a text to edit inline; Enter/Esc to save/cancel.
2) Use ↑/↓ buttons to reorder; use 🗑 to delete.
3) Refresh page — list persists from localStorage.
–>
<style>
body{font:16px/1.5 system-ui,sans-serif;padding:1rem}
.row{display:flex;gap:.5rem;margin-bottom:.5rem}
input{padding:.4rem}
ul{list-style:none;padding:0;max-width:540px}
li{display:flex;gap:.5rem;align-items:center;border:1px solid #eee;border-radius:.5rem;padding:.4rem .5rem;margin:.35rem 0;background:#fff}
li span.txt{flex:1;cursor:text}
button{padding:.25rem .45rem}
</style>
</head>
<body>
<h1>Exercise 44 — Editable List</h1>
<div class=”row”>
<input id=”new” placeholder=”Add item…”>
<button id=”add”>Add</button>
<button id=”clear”>Clear All</button>
</div>
<ul id=”list”></ul>
<script>
const KEY = ‘editable-list’;
const list = document.getElementById(‘list’);
const input = document.getElementById(‘new’);
let items = load();
function load(){ try{ return JSON.parse(localStorage.getItem(KEY))||[] }catch{ return [] } }
function save(){ localStorage.setItem(KEY, JSON.stringify(items)); }
function render(){
list.innerHTML = ”;
items.forEach((txt,i)=>{
const li = document.createElement(‘li’);
li.innerHTML = `
<button data-act=”up” data-i=”${i}”>↑</button>
<button data-act=”down” data-i=”${i}”>↓</button>
<span class=”txt” data-i=”${i}” tabindex=”0″>${txt}</span>
<button data-act=”del” data-i=”${i}” aria-label=”Delete”>🗑</button>`;
list.appendChild(li);
});
}
render();
document.getElementById(‘add’).onclick = ()=>{
const v = input.value.trim(); if(!v) return;
items.push(v); save(); render(); input.value=”; input.focus();
};
document.getElementById(‘clear’).onclick = ()=>{ items=[]; save(); render(); };
list.addEventListener(‘click’, (e)=>{
const b = e.target.closest(‘button’); if(!b) return;
const i = Number(b.dataset.i);
if (b.dataset.act===’del’){ items.splice(i,1); }
else if (b.dataset.act===’up’ && i>0){ [items[i-1],items[i]]=[items[i],items[i-1]]; }
else if (b.dataset.act===’down’ && i<items.length-1){ [items[i+1],items[i]]=[items[i],items[i+1]]; }
save(); render();
});
list.addEventListener(‘dblclick’, startEdit);
list.addEventListener(‘keydown’, (e)=>{ if(e.key===’Enter’) startEdit(e); });
function startEdit(e){
const span = e.target.closest(‘span.txt’); if(!span) return;
const i = Number(span.dataset.i);
const old = span.textContent;
const input = document.createElement(‘input’);
input.value = old; input.style.width=’100%’;
span.replaceWith(input); input.focus(); input.select();
function done(commit){
const val = input.value.trim();
input.replaceWith(span);
if (commit && val){ items[i]=val; save(); render(); }
}
input.addEventListener(‘keydown’, ev=>{
if(ev.key===’Enter’) done(true);
else if(ev.key===’Escape’) done(false);
});
input.addEventListener(‘blur’, ()=> done(true));
}
</script>
</body>
</html>
45) Synced Range + Number + Gradient Track — exercise45_range_number_sync.html

<!doctype html>
<html lang=”en”>
<head>
<meta charset=”utf-8″>
<title>Range ↔ Number Sync + Gradient Track</title>
<!–
Build: A range input synced with a number input; the slider track fills with a dynamic gradient.
Objectives:
– Keep two inputs in sync and clamp values within min/max.
– Style the range background using a computed linear-gradient.
– Show live value and percent.
Steps:
1) Move the slider; number box updates (and vice versa).
2) Watch the slider track fill based on the value.
3) Inspect gradient CSS string building.
–>
<style>
body{font:16px/1.5 system-ui,sans-serif;padding:1rem}
.row{display:flex;gap:.5rem;align-items:center;flex-wrap:wrap}
input[type=range]{width:320px;height:24px;border-radius:12px;appearance:none;background:#eee;outline:none}
input[type=range]::-webkit-slider-thumb{appearance:none;width:18px;height:18px;border-radius:50%;background:#444}
.stat{font-family:ui-monospace,Menlo,monospace}
</style>
</head>
<body>
<h1>Exercise 45 — Range & Number</h1>
<div class=”row”>
<input id=”range” type=”range” min=”0″ max=”100″ value=”30″>
<input id=”num” type=”number” min=”0″ max=”100″ value=”30″>
<span class=”stat” id=”pct”>30%</span>
</div>
<script>
const r = document.getElementById(‘range’);
const n = document.getElementById(‘num’);
const pct = document.getElementById(‘pct’);
function paint(){
const min = Number(r.min), max = Number(r.max), val = Number(r.value);
const p = (val – min) / (max – min) * 100;
r.style.background = `linear-gradient(90deg,#5ac8fa 0%,#5ac8fa ${p}%,#eee ${p}%,#eee 100%)`;
pct.textContent = Math.round(p) + ‘%’;
}
function sync(from, to){
to.value = from.value;
paint();
}
r.addEventListener(‘input’, ()=> sync(r, n));
n.addEventListener(‘input’, ()=>{
const v = Math.min(Number(n.max), Math.max(Number(n.min), Number(n.value||0)));
n.value = v; r.value = v; paint();
});
paint();
</script>
</body>
</html>
46) Paste Image from Clipboard to Gallery — exercise46_paste_image_gallery.html

<!doctype html>
<html lang=”en”>
<head>
<meta charset=”utf-8″>
<title>Clipboard — Paste Image to Gallery</title>
<!–
Build: Paste images (Cmd/Ctrl+V) directly into a gallery, using the Clipboard API on paste events.
Objectives:
– Listen to ‘paste’ and iterate ClipboardEvent.clipboardData.items.
– Extract images (image/*) as Blob/File and preview via object URLs.
– Clean up object URLs to avoid leaks.
Steps:
1) Copy an image (screenshot or from another app).
2) Focus page and press Ctrl/Cmd+V — image appears in the gallery.
3) Click “Clear” to remove all previews.
–>
<style>
body{font:16px/1.5 system-ui,sans-serif;padding:1rem}
.actions{margin-bottom:.5rem}
.grid{display:grid;grid-template-columns:repeat(auto-fill,minmax(140px,1fr));gap:.5rem}
.card{border:1px solid #eee;border-radius:.5rem;overflow:hidden}
.card img{display:block;width:100%;height:110px;object-fit:cover}
.hint{color:#666}
</style>
</head>
<body>
<h1>Exercise 46 — Paste Images</h1>
<p class=”hint”>Copy an image and press <kbd>Ctrl/Cmd + V</kbd> here.</p>
<div class=”actions”><button id=”clear”>Clear</button></div>
<div class=”grid” id=”grid”></div>
<script>
const grid = document.getElementById(‘grid’);
const urls = [];
document.addEventListener(‘paste’, (e)=>{
const items = e.clipboardData?.items || [];
for(const it of items){
if(it.type.startsWith(‘image/’)){
const file = it.getAsFile();
const url = URL.createObjectURL(file);
urls.push(url);
const card = document.createElement(‘div’);
card.className=’card’;
card.innerHTML = `<img src=”${url}” alt=”pasted image”>`;
grid.appendChild(card);
}
}
});
document.getElementById(‘clear’).onclick = ()=>{
grid.innerHTML=”;
urls.forEach(u=>URL.revokeObjectURL(u));
urls.length=0;
};
</script>
</body>
</html>
47) Form Autosave + Restore (localStorage) — exercise47_form_autosave.html

<!doctype html>
<html lang=”en”>
<head>
<meta charset=”utf-8″>
<title>Autosave Form — localStorage</title>
<!–
Build: Autosave a small form (title + content) to localStorage; restore on load, clear on demand.
Objectives:
– Debounce input events; save JSON payload with timestamp.
– Prompt to restore when draft exists; handle Clear.
– Show “Saved at” time.
Steps:
1) Type in fields; watch “Saved at” update.
2) Refresh — choose to restore the draft.
3) Click Clear to remove stored draft.
–>
<style>
body{font:16px/1.5 system-ui,sans-serif;padding:1rem}
input,textarea{width:100%;max-width:680px;padding:.6rem;margin:.35rem 0}
.row{display:flex;gap:.5rem;align-items:center;flex-wrap:wrap}
.stat{color:#666}
</style>
</head>
<body>
<h1>Exercise 47 — Autosave</h1>
<input id=”title” placeholder=”Title”>
<textarea id=”body” rows=”8″ placeholder=”Write something…”></textarea>
<div class=”row”>
<button id=”clear”>Clear</button>
<span id=”saved” class=”stat”></span>
</div>
<script>
const KEY=’draft-v1′;
const title = document.getElementById(‘title’);
const body = document.getElementById(‘body’);
const saved = document.getElementById(‘saved’);
let t=null;
function stamp(){
const d = new Date(); saved.textContent = ‘Saved at ‘ + d.toLocaleTimeString();
}
function save(){
const payload = {title:title.value, body:body.value, ts: Date.now()};
localStorage.setItem(KEY, JSON.stringify(payload));
stamp();
}
function debounce(fn, ms){ let id; return (…a)=>{ clearTimeout(id); id=setTimeout(()=>fn(…a), ms); }; }
const onInput = debounce(save, 300);
[title, body].forEach(el => el.addEventListener(‘input’, onInput));
(function init(){
try{
const raw = localStorage.getItem(KEY);
if(raw){
const d = JSON.parse(raw);
if ((title.value||body.value) === ”){
if (confirm(‘Restore saved draft?’)){
title.value = d.title || ”;
body.value = d.body || ”;
stamp();
}
}
}
}catch{}
})();
document.getElementById(‘clear’).onclick = ()=>{
localStorage.removeItem(KEY);
saved.textContent = ‘Cleared’;
};
</script>
</body>
</html>
48) Custom Select (Listbox pattern, keyboard-friendly) — exercise48_custom_select.html
<!doctype html>
<html lang=”en”>
<head>
<meta charset=”utf-8″>
<title>Custom Select — ARIA Listbox</title>
<!–
Build: A custom select using the ARIA listbox pattern with keyboard navigation and type-ahead.
Objectives:
– Toggle a popup listbox; move focus with ArrowUp/Down, Home/End; Enter selects; Esc closes.
– Roving tabindex within options; reflect selection in the button label.
– Basic type-ahead buffer to jump to options by typing letters.
Steps:
1) Click the button (or press Enter/Space) to open the list.
2) Use arrows to navigate; Enter to select; Esc or outside-click to close.
3) Type letters to jump to the next matching option.
–>
<style>
body{font:16px/1.5 system-ui,sans-serif;padding:1rem}
.wrap{position:relative;display:inline-block}
.btn{padding:.5rem .75rem;border:1px solid #ccc;border-radius:.5rem;background:#fff;min-width:220px;text-align:left}
.popup{position:absolute;left:0;top:calc(100% + 6px);border:1px solid #ddd;border-radius:.5rem;background:#fff;box-shadow:0 10px 30px rgba(0,0,0,.12);min-width:100%;display:none;max-height:220px;overflow:auto;z-index:5}
.popup.show{display:block}
[role=option]{padding:.45rem .6rem;cursor:pointer}
[role=option][aria-selected=true]{background:#e6f7ff}
[role=option]:hover{background:#f5f5f5}
</style>
</head>
<body>
<h1>Exercise 48 — Custom Select</h1>
<div class=”wrap”>
<button id=”button” class=”btn” aria-haspopup=”listbox” aria-expanded=”false”>Choose a language…</button>
<div id=”listbox” class=”popup” role=”listbox” tabindex=”-1″ aria-label=”Languages”>
<div role=”option” tabindex=”-1″>JavaScript</div>
<div role=”option” tabindex=”-1″>TypeScript</div>
<div role=”option” tabindex=”-1″>Python</div>
<div role=”option” tabindex=”-1″>Go</div>
<div role=”option” tabindex=”-1″>Rust</div>
<div role=”option” tabindex=”-1″>Ruby</div>
<div role=”option” tabindex=”-1″>PHP</div>
<div role=”option” tabindex=”-1″>Kotlin</div>
<div role=”option” tabindex=”-1″>Swift</div>
</div>
</div>
<script>
const btn = document.getElementById(‘button’);
const lb = document.getElementById(‘listbox’);
const opts = […lb.querySelectorAll(‘[role=option]’)];
let active = -1, buffer = ”, t=null;
function open(){
lb.classList.add(‘show’); btn.setAttribute(‘aria-expanded’,’true’);
active = Math.max(0, opts.findIndex(o => o.getAttribute(‘aria-selected’)===’true’));
focusActive();
document.addEventListener(‘click’, onDoc);
}
function close(){
lb.classList.remove(‘show’); btn.setAttribute(‘aria-expanded’,’false’);
btn.focus();
document.removeEventListener(‘click’, onDoc);
}
function onDoc(e){ if(!lb.contains(e.target) && e.target!==btn) close(); }
function focusActive(){
opts.forEach(o => o.tabIndex = -1);
if (active<0) active = 0;
opts[active].tabIndex = 0;
opts[active].focus({preventScroll:true});
opts[active].scrollIntoView({block:’nearest’});
}
function select(i){
opts.forEach(o => o.setAttribute(‘aria-selected’,’false’));
opts[i].setAttribute(‘aria-selected’,’true’);
btn.textContent = opts[i].textContent;
close();
}
btn.addEventListener(‘click’, ()=> lb.classList.contains(‘show’) ? close() : open());
btn.addEventListener(‘keydown’, e=>{
if (e.key===’ArrowDown’ || e.key===’Enter’ || e.key===’ ‘){ e.preventDefault(); open(); }
});
lb.addEventListener(‘keydown’, e=>{
if (e.key===’ArrowDown’){ active = Math.min(opts.length-1, active+1); focusActive(); }
else if (e.key===’ArrowUp’){ active = Math.max(0, active-1); focusActive(); }
else if (e.key===’Home’){ active = 0; focusActive(); }
else if (e.key===’End’){ active = opts.length-1; focusActive(); }
else if (e.key===’Enter’){ select(active); }
else if (e.key===’Escape’){ close(); }
else if (e.key.length===1 && /\w/.test(e.key)){ // type-ahead
buffer += e.key.toLowerCase(); clearTimeout(t);
t = setTimeout(()=> buffer=”, 600);
const i = opts.findIndex(o => o.textContent.toLowerCase().startsWith(buffer));
if (i>=0){ active = i; focusActive(); }
}
});
lb.addEventListener(‘click’, e=>{
const i = opts.indexOf(e.target.closest(‘[role=option]’)); if(i>=0) select(i);
});
</script>
</body>
</html>
49) Responsive Table → Cards (matchMedia) — exercise49_table_to_cards.html

<!doctype html>
<html lang=”en”>
<head>
<meta charset=”utf-8″>
<title>Responsive Table → Cards (matchMedia)</title>
<!–
Build: Switch between a table view and a card grid based on viewport width (JS-driven with matchMedia).
Objectives:
– Use window.matchMedia to detect a breakpoint and toggle templates.
– Render the same data set into two different DOM layouts.
– Update on resize and initial load.
Steps:
1) Resize the window below/above 700px to switch layouts.
2) Inspect the render functions for table vs. cards.
3) Notice we re-render from the same data source.
–>
<style>
body{font:16px/1.5 system-ui,sans-serif;padding:1rem}
table{border-collapse:collapse;min-width:520px}
th,td{border:1px solid #ddd;padding:.5rem .75rem;text-align:left}
.grid{display:grid;grid-template-columns:repeat(auto-fill,minmax(220px,1fr));gap:.75rem}
.card{border:1px solid #ddd;border-radius:.5rem;padding:.6rem;background:#fff}
.hint{color:#666}
</style>
</head>
<body>
<h1>Exercise 49 — Table / Cards</h1>
<p class=”hint”>Resize below 700px to see card layout.</p>
<div id=”root”></div>
<script>
const data = [
{name:’Ava’, role:’Engineer’, city:’Toronto’},
{name:’Noah’, role:’Designer’, city:’Ottawa’},
{name:’Mia’, role:’PM’, city:’Calgary’},
{name:’Liam’, role:’Engineer’, city:’Vancouver’},
{name:’Zoe’, role:’QA’, city:’Montreal’}
];
const root = document.getElementById(‘root’);
const mq = window.matchMedia(‘(max-width: 700px)’);
function render(){
root.innerHTML = ”;
if (mq.matches){
const grid = document.createElement(‘div’); grid.className=’grid’;
data.forEach(p=>{
const c = document.createElement(‘div’); c.className=’card’;
c.innerHTML = `<strong>${p.name}</strong><div>${p.role}</div><div>${p.city}</div>`;
grid.appendChild(c);
});
root.appendChild(grid);
} else {
const table = document.createElement(‘table’);
table.innerHTML = `<thead><tr><th>Name</th><th>Role</th><th>City</th></tr></thead><tbody></tbody>`;
const tb = table.querySelector(‘tbody’);
data.forEach(p=>{
const tr = document.createElement(‘tr’);
tr.innerHTML = `<td>${p.name}</td><td>${p.role}</td><td>${p.city}</td>`;
tb.appendChild(tr);
});
root.appendChild(table);
}
}
mq.addEventListener ? mq.addEventListener(‘change’, render) : mq.addListener(render);
render();
</script>
</body>
</html>
50) Theme Switcher (System/Light/Dark with CSS Vars) — exercise50_theme_switcher.html

<!doctype html>
<html lang=”en”>
<head>
<meta charset=”utf-8″>
<title>Theme Switcher — System / Light / Dark</title>
<!–
Build: App-level theme switcher that respects system setting by default and persists choice.
Objectives:
– Use CSS variables for colors; toggle data-theme=”light|dark” on <html>.
– Respect prefers-color-scheme when set to “system”.
– Persist selection to localStorage and update <meta name=”theme-color”>.
Steps:
1) Switch themes; reload to see persistence.
2) Set to “System” and change OS theme to observe sync.
3) Inspect how CSS vars + data-theme control colors.
–>
<meta name=”theme-color” content=”#ffffff”>
<style>
:root{
–bg: #ffffff; –fg: #111111; –card: #f7f7f7; –accent: #2d7ef7;
}
@media (prefers-color-scheme: dark){
:root{ –bg: #111111; –fg: #f2f2f2; –card: #1c1c1c; }
}
html[data-theme=”light”]{ –bg:#ffffff; –fg:#111111; –card:#f7f7f7; }
html[data-theme=”dark”]{ –bg:#111111; –fg:#f2f2f2; –card:#1c1c1c; }
body{background:var(–bg); color:var(–fg); font:16px/1.5 system-ui,sans-serif; padding:1rem}
.card{background:var(–card); border:1px solid rgba(0,0,0,.08); border-radius:.75rem; padding:1rem; max-width:640px}
select{padding:.4rem}
</style>
</head>
<body>
<h1>Exercise 50 — Theme Switcher</h1>
<div class=”card”>
<label>Theme:
<select id=”theme”>
<option value=”system”>System</option>
<option value=”light”>Light</option>
<option value=”dark”>Dark</option>
</select>
</label>
<p>This card reflects the active theme.</p>
</div>
<script>
const KEY=’theme-choice’;
const select = document.getElementById(‘theme’);
const meta = document.querySelector(‘meta[name=”theme-color”]’);
const prefersDark = window.matchMedia(‘(prefers-color-scheme: dark)’);
function apply(choice){
if (choice===’light’){ document.documentElement.setAttribute(‘data-theme’,’light’); meta.content = ‘#ffffff’; }
else if (choice===’dark’){ document.documentElement.setAttribute(‘data-theme’,’dark’); meta.content = ‘#111111’; }
else {
document.documentElement.removeAttribute(‘data-theme’);
meta.content = prefersDark.matches ? ‘#111111’ : ‘#ffffff’;
}
}
function save(choice){ localStorage.setItem(KEY, choice); }
function load(){ return localStorage.getItem(KEY) || ‘system’; }
select.value = load(); apply(select.value);
select.addEventListener(‘change’, ()=>{ apply(select.value); save(select.value); });
prefersDark.addEventListener ? prefersDark.addEventListener(‘change’, ()=> select.value===’system’ && apply(‘system’))
: prefersDark.addListener(()=> select.value===’system’ && apply(‘system’));
</script>
</body>
</html>