
Apps Script Coding Examples V4
Google Apps Script is a scripting platform that lets you extend Google Workspace by adding custom functionality to your Google Sheets, Docs, Forms, and Gmail. Google Apps Script is a cloud-based scripting language that provides easy ways to automate tasks across Google products and third-party services.
Read Data from from Sheet
Google Apps Script that reads data from a Google Sheet, performs calculations on the data, and writes the results back to the sheet:
function calculateAverages() {
var sheet = SpreadsheetApp.getActiveSheet();
var data = sheet.getDataRange().getValues();
var total = 0;
for (var i = 0; i < data.length; i++) {
total += data[i][0];
}
var average = total / data.length;
sheet.getRange(data.length + 1, 1).setValue(average);
}
Explanation:
The function calculateAverages is defined.
The sheet variable is set to the active sheet in the current spreadsheet using the SpreadsheetApp.getActiveSheet method.
The data variable is set to the values of all cells in the active sheet using the sheet.getDataRange().getValues method.
A for loop is used to sum up the values in the first column of the data array. The total variable is used to keep track of the sum.
The average value is calculated by dividing the total by the number of rows in the data (data.length).
The average value is written to the next empty row in the first column of the sheet using the sheet.getRange(data.length + 1, 1).setValue method.
This script can be run in a Google Spreadsheet by opening the script editor (under the “Tools” menu), copying and pasting the code into the editor, and then clicking the “Run” button. It will read the data in the sheet, perform the calculation, and write the result to the next empty row in column A.
Get sheet data – apply changes and set value in sheet data

function sheetData2(){
const sheet = SpreadsheetApp.openById(ID).getSheetByName(‘data’);
const data = sheet.getDataRange().getValues();
const headings = data[0];
const results = data.slice(1);
results.forEach((row,index) => {
const days = (Math.floor(parseInt(row[1])/8));
sheet.getRange(index+2,3).setValue(days);
})
//Logger.log(results);
}
Send email from Sheet
Google Apps Script that sends an email based on the contents of a Google Sheet:
function sendEmails() {
var sheet = SpreadsheetApp.getActiveSheet();
var data = sheet.getDataRange().getValues();
for (var i = 1; i < data.length; i++) {
var emailAddress = data[i][0];
var message = data[i][1];
var subject = “Important Message”;
MailApp.sendEmail(emailAddress, subject, message);
}
}
Use Sheet data for custom emails out

function senderEmail(){
const sheet = SpreadsheetApp
.openById(ID)
.getSheetByName(‘Users’);
const data = sheet.getDataRange().getValues();
const users = data.slice(1);
Logger.log(users);
users.forEach((user,index)=>{
const userName = user[0];
const email = user[2];
const id = user[1];
const message = `Hello ${userName}, your id is ${id}`;
MailApp.sendEmail(email,’Welcome’,message);
})
}

Explanation:
The function sendEmails is defined.
The sheet variable is set to the active sheet in the current spreadsheet using the SpreadsheetApp.getActiveSheet method.
The data variable is set to the values of all cells in the active sheet using the sheet.getDataRange().getValues method.
A for loop is used to iterate through the rows in the data array, starting from the second row (the first row is assumed to contain headers).
For each row, the email address is stored in the emailAddress variable, the message text is stored in the message variable, and the subject of the email is set to “Important Message”.
The mailApp.sendEmail method is used to send an email to the address stored in emailAddress, with the subject and message stored in subject and message respectively.
This script can be run in a Google Spreadsheet by opening the script editor (under the “Tools” menu), copying and pasting the code into the editor, and then clicking the “Run” button. It will read the data in the sheet, send an email to each email address specified in column A, with the message specified in column B.
Send Emails to recipients from Sheet data
Google Apps Script that sends an email to a list of recipients based on data in a Google Sheet:
function sendEmails() {
var sheet = SpreadsheetApp.getActiveSheet();
var data = sheet.getDataRange().getValues();
for (var i = 1; i < data.length; i++) {
var email = data[i][0];
var subject = data[i][1];
var message = data[i][2];
MailApp.sendEmail(email, subject, message);
}
}
Explanation:
The function sendEmails is defined.
The sheet variable is set to the active sheet in the current spreadsheet using the SpreadsheetApp.getActiveSheet method.
The data variable is set to the values of all cells in the active sheet using the sheet.getDataRange().getValues method.
A for loop is used to iterate through the rows in the data array, starting from the second row (the first row is assumed to contain headers).
For each row, the email address, subject, and message are stored in the email, subject, and message variables respectively.
An email is sent to the recipient specified by email using the MailApp.sendEmail method, with the subject and message specified by subject and message respectively.
Send emails from User list in Sheets
Google Apps Script that sends an email to a list of recipients from a Google Sheet:
function sendEmails() {
var sheet = SpreadsheetApp.getActiveSheet();
var data = sheet.getDataRange().getValues();
var subject = “Important Update”;
var message = “Hello,\n\nThis is an important update. Please read carefully.\n\nBest regards,\nYour Name”;
for (var i = 1; i < data.length; i++) {
var email = data[i][0];
MailApp.sendEmail(email, subject, message);
}
}
Explanation:
The function sendEmails is defined.
The sheet variable is set to the active sheet in the current spreadsheet using the SpreadsheetApp.getActiveSheet method.
The data variable is set to the values of all cells in the active sheet using the sheet.getDataRange().getValues method.
The subject and message variables are set to the subject and message of the email respectively.
A for loop is used to iterate through the rows in the data array, starting from the second row (the first row is assumed to contain headers).
For each row, the email address is stored in the email variable.
An email is sent to the recipient using the MailApp.sendEmail method, with the recipient’s email address, subject, and message specified by email, subject, and message respectively.
Sending an email to all users from the spreadsheet data

function emailOut(){
const sheet = SpreadsheetApp.getActiveSheet();
const data = sheet.getDataRange().getValues();
Logger.log(data);
const subject = ‘My Update’;
const message = ‘Hello, \n\nMy update info!\n\nRegards,\nLaurence Svekis’;
for(let i=1;i<data.length;i++){
const email = (data[i][2]);
MailApp.sendEmail(email,subject,message);
}
}
Apps Script on Sheets examples
Google Apps Script that performs various operations on a Google Sheet, including formatting cells, calculating values, and creating charts:
function formatSheet() {
var sheet = SpreadsheetApp.getActiveSheet();
var data = sheet.getDataRange().getValues();
// Format the header row in bold
var headerRange = sheet.getRange(1, 1, 1, data[0].length);
headerRange.setFontWeight(“bold”);
// Add borders to all cells
var borderRange = sheet.getRange(1, 1, data.length, data[0].length);
borderRange.setBorder(true, true, true, true, null, null);
// Calculate the sum of the values in column 1
var sum = 0;
for (var i = 1; i < data.length; i++) {
sum += data[i][0];
}
// Write the sum to the bottom of column 1
sheet.getRange(data.length + 1, 1).setValue(sum);
// Create a chart to visualize the data
var chart = sheet.newChart()
.setChartType(Charts.ChartType.BAR)
.addRange(sheet.getRange(1, 1, data.length, 1))
.setOption(‘title’, ‘Column 1 Data’)
.setOption(‘width’, 400)
.setOption(‘height’, 300)
.setPosition(5,6,0,0)
.build();
sheet.insertChart(chart);
}
Explanation:
The function formatSheet is defined.
The sheet variable is set to the active sheet in the current spreadsheet using the SpreadsheetApp.getActiveSheet method.
The data variable is set to the values of all cells in the active sheet using the sheet.getDataRange().getValues method.
The header row is formatted in bold by getting the range of cells in the first row and using the setFontWeight method to set the font weight to “bold”.
Borders are added to all cells by getting the range of all cells and using the setBorder method to set all borders to true.
The sum of the values in column 1 is calculated using a for loop and stored in the sum variable.
The sum is written to the bottom of column 1 using the sheet.getRange(data.length + 1, 1).setValue method.
A bar chart is created to visualize the data in column 1 using the Charts service and the sheet.newChart method. The chart options, such as the title and dimensions, are set using the setOption method. The chart is inserted into the sheet using the sheet.insertChart method.
This script can be run in a Google Spreadsheet by opening the script editor (under the “Tools” menu), copying and pasting the code into the editor, and then clicking the “Run” button. It will format the cells in the sheet, calculate the sum of the values in column 1, and insert a chart to visualize the data.
Using Sheet data create a chart update styling
function formatSheetData(){
const sheet = SpreadsheetApp.getActiveSpreadsheet().getSheets()[1];
sheet.getRange(1,4,1,1).setValue(‘Total’);
const data = sheet.getDataRange().getValues();
const headerRange = sheet.getRange(1,1,1,data[0].length);
headerRange.setFontWeight(‘bold’);
headerRange.setFontSize(20);
const borderRange = sheet.getRange(1,1,data.length,data[0].length);
borderRange.setBorder(true,false,false,true,true,true,’black’,SpreadsheetApp.BorderStyle.DOTTED);
let total = 0;
for(let i=1;i<data.length;i++){
let sum = parseInt(data[i][1]) * parseInt(data[i][2]);
sheet.getRange(i+1,4,1,1).setValue(sum);
Logger.log(sum);
total += sum;
}
sheet.getRange(data.length+1,4,1,1).setValue(total);
const myChart = sheet.newChart()
.setChartType(Charts.ChartType.BAR)
.addRange(sheet.getRange(‘B2:C7’))
.setOption(‘title’,’My Data’)
.setOption(‘width’,500)
.setOption(‘height’,400)
.setPosition(5,6,0,0)
.build();
sheet.insertChart(myChart)
Logger.log(total);
}

Apps Script Create Calendar entries from Sheet data
Google Apps Script that automatically creates and updates a Google Calendar event based on data in a Google Sheet:
function createCalendarEvent() {
var sheet = SpreadsheetApp.getActiveSheet();
var data = sheet.getDataRange().getValues();
for (var i = 1; i < data.length; i++) {
var startTime = data[i][0];
var endTime = data[i][1];
var eventName = data[i][2];
var calendar = CalendarApp.getCalendarById(data[i][3]);
var event = calendar.createEvent(eventName, startTime, endTime);
}
}
function updateCalendarEvent() {
var sheet = SpreadsheetApp.getActiveSheet();
var data = sheet.getDataRange().getValues();
for (var i = 1; i < data.length; i++) {
var eventId = data[i][4];
var event = CalendarApp.getEventById(eventId);
var startTime = data[i][0];
var endTime = data[i][1];
var eventName = data[i][2];
var calendar = CalendarApp.getCalendarById(data[i][3]);
event.setTitle(eventName);
event.setStartTime(startTime);
event.setEndTime(endTime);
event.setCalendar(calendar);
}
}
Explanation:
The function createCalendarEvent is defined.
The sheet variable is set to the active sheet in the current spreadsheet using the SpreadsheetApp.getActiveSheet method.
The data variable is set to the values of all cells in the active sheet using the sheet.getDataRange().getValues method.
A for loop is used to iterate through the rows in the data array, starting from the second row (the first row is assumed to contain headers).
For each row, the start time, end time, event name, and calendar ID are stored in the startTime, endTime, eventName, and calendar variables respectively.
A new event is created in the calendar specified by calendar using the calendar.createEvent method, with the start time, end time, and event name specified by startTime, endTime, and eventName respectively.
The function updateCalendarEvent is defined.
The sheet and data variables are set in the same way as in the createCalendarEvent function.
A for loop is used to iterate through the rows in the data array, starting from the second row.
For each row, the event ID is stored in the eventId variable, and the event is retrieved using the CalendarApp.getEventById method.
The start time, end time, event name, and calendar ID are stored in the startTime, endTime, eventName, and calendar variables respectively.
The event is updated using the setTitle, setStartTime, setEndTime, and setCalendar methods
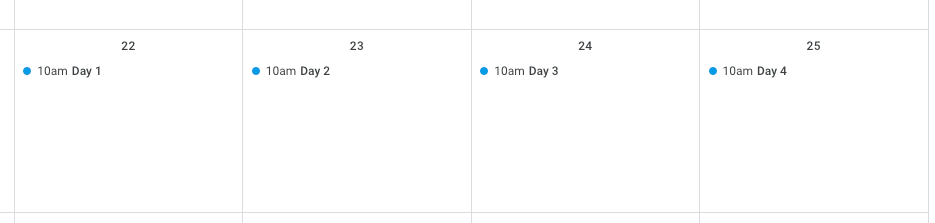
Sheet data to create Calendar events
| Event | Start | End | Location | Description |
| Day 1 | 3/22/2023 10:00:00 | 3/22/2023 12:00:00 | online | Another Day starts 1 |
| Day 2 | 3/23/2023 10:00:00 | 3/23/2023 12:00:00 | online | Another Day starts 2 |
| Day 3 | 3/24/2023 10:00:00 | 3/24/2023 12:00:00 | online | Another Day starts 3 |
| Day 4 | 3/25/2023 10:00:00 | 3/25/2023 12:00:00 | online | Another Day starts 4 |
| Day 5 | 3/26/2023 10:00:00 | 3/26/2023 12:00:00 | online | Another Day starts 5 |
const ID = ‘132trziyLsk8qIk’;
function makeEvents(){
const sheet = SpreadsheetApp.openById(ID).getSheetByName(‘Cal’);
const data = sheet.getDataRange().getValues();
const events = data.slice(1);
const headings = data[0];
events.forEach((event,index)=>{
const start = event[1];
const nameEvent = event[0];
const end = event[2];
const loc = event[3];
const des = event[4];
const cal =CalendarApp.getDefaultCalendar();
const eve = cal.createEvent(nameEvent,start,end,{
location:loc,
description:des
});
Logger.log(cal);
})
}
Calendar Events into Sheet
function updateCal(){
const cal =CalendarApp.getDefaultCalendar();
const ss = SpreadsheetApp.openById(ID);
const start = new Date();
const end = new Date(start.getTime() + (100*24*60*60*1000));
const events = cal.getEvents(start,end);
Logger.log(events);
const sheet = ss.insertSheet();
sheet.appendRow([‘Name’,’Start’,’End’,’Location’,’ID’]);
sheet.setName(‘New Event List’);
events.forEach(event => {
const arr = [event.getTitle(),event.getStartTime(),event.getEndTime(),event.getLocation(),event.getId()];
sheet.appendRow(arr);
})
}
Sheet data to populate Calendar
Google Apps Script that copies the data from a Google Sheet to a Google Calendar:
function copyToCalendar() {
var sheet = SpreadsheetApp.getActiveSheet();
var data = sheet.getDataRange().getValues();
var calendar = CalendarApp.getCalendarById(“your_calendar_id”);
for (var i = 1; i < data.length; i++) {
var date = data[i][0];
var eventName = data[i][1];
var description = data[i][2];
var start = new Date(date);
var end = new Date(date);
end.setHours(end.getHours() + 1);
calendar.createEvent(eventName, start, end, { description: description });
}
}
Explanation:
The function copyToCalendar is defined.
The sheet variable is set to the active sheet in the current spreadsheet using the SpreadsheetApp.getActiveSheet method.
The data variable is set to the values of all cells in the active sheet using the sheet.getDataRange().getValues method.
The calendar variable is set to the calendar with the specified ID using the CalendarApp.getCalendarById method. Replace “your_calendar_id” with the actual ID of your calendar.
A for loop is used to iterate through the rows in the data array, starting from the second row (the first row is assumed to contain headers).
For each row, the date, event name, and description are stored in the date, eventName, and description variables respectively.
The start variable is set to a new date object created from the date variable.
The end variable is set to a new date object created from the date variable, with the number of hours increased by 1.
A new event is created in the calendar using the calendar.createEvent method, with the event name, start and end times, and description specified by eventName, start, end, and description respectively.
Logs Email Attachments details
Google Apps Script that logs information about all attachments in a Gmail account:
function logAttachments() {
var threads = GmailApp.search(“has:attachment”);
for (var i = 0; i < threads.length; i++) {
var messages = threads[i].getMessages();
for (var j = 0; j < messages.length; j++) {
var attachments = messages[j].getAttachments();
for (var k = 0; k < attachments.length; k++) {
var attachment = attachments[k];
var fileName = attachment.getName();
var size = attachment.getSize();
Logger.log(“Attachment: ” + fileName + ” – Size: ” + size + ” bytes”);
}
}
}
}
Explanation:
The function logAttachments is defined.
The threads variable is set to an array of all threads in the Gmail account that have attachments, using the GmailApp.search method with the query “has:attachment”.
A for loop is used to iterate through the threads in the threads array.
For each thread, the messages variable is set to an array of all messages in the thread using the threads[i].getMessages method.
Another for loop is used to iterate through the messages in the messages array.
For each message, the attachments variable is set to an array of all attachments in the message using the messages[j].getAttachments method.
Another for loop is used to iterate through the attachments in the attachments array.
For each attachment, the fileName and size variables are set to the name and size of the attachment respectively, using the attachment.getName and attachment.getSize methods.
The information about the attachment is logged to the Google Apps Script log using the Logger.log method.
Get Gmail Attachments Log into Sheet

function getAtt(){
const id = ‘132trvLa8IvLsk8qIk’;
const threads = GmailApp.search(‘has:attachment’);
const ss = SpreadsheetApp.openById(id);
const sheet = ss.insertSheet();
sheet.setName(‘Attachments’);
threads.forEach(thread =>{
const messages = thread.getMessages();
messages.forEach(message => {
const attments = message.getAttachments();
attments.forEach(attachment =>{
Logger.log(attachment.getName());
const arr = [attachment.getName(),attachment.getSize(),attachment.getContentType()];
sheet.appendRow(arr);
})
})
})
}
Create folder in drive from Sheet Data
Google Apps Script that creates a new folder in Google Drive for each row in a Google Sheet and stores a PDF file with the contents of a specific column in that folder:
function createFoldersAndFiles() {
var sheet = SpreadsheetApp.getActiveSheet();
var data = sheet.getDataRange().getValues();
var parentFolder = DriveApp.getFolderById(“your_parent_folder_id”);
for (var i = 1; i < data.length; i++) {
var folderName = data[i][0];
var contents = data[i][1];
var folder = parentFolder.createFolder(folderName);
var file = folder.createFile(“contents.pdf”, contents, MimeType.PDF);
}
}
Explanation:
The function createFoldersAndFiles is defined.
The sheet variable is set to the active sheet in the current spreadsheet using the SpreadsheetApp.getActiveSheet method.
The data variable is set to the values of all cells in the active sheet using the sheet.getDataRange().getValues method.
The parentFolder variable is set to the folder with the specified ID using the DriveApp.getFolderById method. Replace “your_parent_folder_id” with the actual ID of your parent folder.
A for loop is used to iterate through the rows in the data array, starting from the second row (the first row is assumed to contain headers).
For each row, the folder name and contents are stored in the folderName and contents variables respectively.
A new folder is created in the parent folder using the parentFolder.createFolder method and the folder name is specified by folderName.
A new file with the contents of the contents variable is created in the new folder using the folder.createFile method, with the file name “contents.pdf” and MIME type PDF specified by “contents.pdf” and MimeType.PDF respectively.
Get attachments from Gmail and Copy To Drive

function makeFolderDrive(){
const folder = DriveApp.createFolder(‘attachments’);
const threads = GmailApp.search(‘has:attachment’);
const attachments = [];
threads.forEach(thread => {
thread.getMessages().forEach(message => {
message.getAttachments().forEach(attachment => {
const file = folder.createFile(attachment.copyBlob().setName(attachment.getName()));
attachments.push(attachment.getName());
})
})
})
Logger.log(attachments);
}