
Source code
Each one includes: what you’ll build, learning objectives, step-by-step instructions, a single self-contained HTML file (copy–paste into a .html file and open in a browser), and a short breakdown of how the code works.
1) Select, Read, and Update DOM Content, Attributes, and Styles
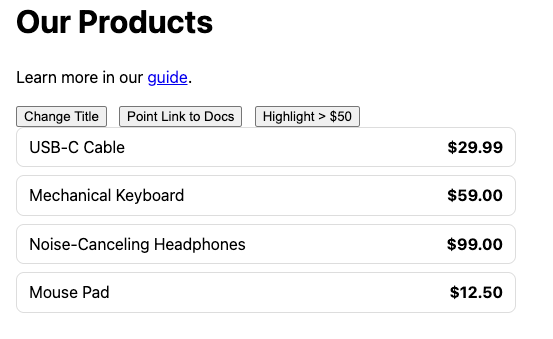
What you’ll build: A tiny product list with buttons to (a) change header text, (b) update a link’s URL, and (c) highlight expensive items.
Objectives
- Use querySelector, querySelectorAll
- Read and update textContent, innerHTML, style, and attributes
Steps
- Load the page; review the list.
- Click Change Title, Point Link to Docs, Highlight > $50.
- Observe the DOM changes.
Code (save as exercise1.html)
<!doctype html>
<html lang=”en”>
<head>
<meta charset=”utf-8″ />
<title>DOM Basics: Select & Update</title>
<style>
body { font: 16px/1.4 system-ui, sans-serif; padding: 1.5rem; }
.products { display: grid; gap: .5rem; max-width: 500px; }
.item { display: flex; justify-content: space-between; padding: .5rem .75rem; border: 1px solid #ddd; border-radius: .5rem; }
.expensive { background: #fff7e6; border-color: #f0c36d; }
.actions button { margin-right: .5rem; }
</style>
</head>
<body>
<h1 id=”title”>Our Products</h1>
<p>Learn more in our <a id=”learnLink” href=”https://example.com”>guide</a>.</p>
<div class=”actions”>
<button id=”btnTitle”>Change Title</button>
<button id=”btnLink”>Point Link to Docs</button>
<button id=”btnHighlight”>Highlight > $50</button>
</div>
<div class=”products” id=”products”>
<div class=”item” data-price=”29.99″><span>USB-C Cable</span><strong>$29.99</strong></div>
<div class=”item” data-price=”59.00″><span>Mechanical Keyboard</span><strong>$59.00</strong></div>
<div class=”item” data-price=”99.00″><span>Noise-Canceling Headphones</span><strong>$99.00</strong></div>
<div class=”item” data-price=”12.50″><span>Mouse Pad</span><strong>$12.50</strong></div>
</div>
<script>
const title = document.querySelector(‘#title’);
const learnLink = document.querySelector(‘#learnLink’);
const items = document.querySelectorAll(‘.item’);
document.querySelector(‘#btnTitle’).addEventListener(‘click’, () => {
title.textContent = ‘Top-Rated Products’;
});
document.querySelector(‘#btnLink’).addEventListener(‘click’, () => {
learnLink.setAttribute(‘href’, ‘https://developer.mozilla.org/en-US/docs/Web/API/Document_Object_Model’);
learnLink.textContent = ‘DOM docs on MDN’;
});
document.querySelector(‘#btnHighlight’).addEventListener(‘click’, () => {
items.forEach(el => {
const price = parseFloat(el.dataset.price);
el.classList.toggle(‘expensive’, price > 50);
});
});
</script>
</body>
</html>
How it works (breakdown)
- querySelector/querySelectorAll locate nodes.
- textContent updates text; setAttribute updates href.
- dataset.price reads the data-price attribute.
- classList.toggle(name, condition) adds/removes a class based on price.
2) Create Elements, Use DocumentFragment, and Append Efficiently

What you’ll build: Generate a to-do list from an array, then add new items.

Objectives
- Create nodes with document.createElement
- Batch insertions with DocumentFragment
- Read/write from an input
Steps
- Click Generate Todos to render initial tasks.
- Type a task and click Add to append it.
Code (save as exercise2.html)
<!doctype html>
<html lang=”en”>
<head>
<meta charset=”utf-8″ />
<title>Create & Append</title>
<style>
body { font: 16px/1.4 system-ui, sans-serif; padding: 1.5rem; }
.todo-app { max-width: 520px; }
ul { padding-left: 1.1rem; }
li { margin: .35rem 0; }
.row { display:flex; gap:.5rem; margin:.75rem 0; }
input { flex:1; padding:.5rem; }
</style>
</head>
<body>
<section class=”todo-app”>
<h1>Todos</h1>
<div class=”row”>
<button id=”btnGen”>Generate Todos</button>
</div>
<ul id=”list”></ul>
<div class=”row”>
<input id=”todoInput” placeholder=”New task…” />
<button id=”btnAdd”>Add</button>
</div>
</section>
<script>
const data = [“Buy milk”, “Email Alex”, “Book dentist”, “Write blog post”];
const list = document.getElementById(‘list’);
document.getElementById(‘btnGen’).addEventListener(‘click’, () => {
list.innerHTML = ”; // clear first
const frag = document.createDocumentFragment();
data.forEach(text => {
const li = document.createElement(‘li’);
li.textContent = text;
frag.appendChild(li);
});
list.appendChild(frag);
});
document.getElementById(‘btnAdd’).addEventListener(‘click’, () => {
const input = document.getElementById(‘todoInput’);
const text = input.value.trim();
if (!text) return;
const li = document.createElement(‘li’);
li.textContent = text;
list.appendChild(li);
input.value = ”;
input.focus();
});
</script>
</body>
</html>
How it works
- Build list items using createElement.
- DocumentFragment avoids multiple reflows; appended once to the DOM.
- Input value is validated (trim) before creating an <li>.
3) Event Handling and Delegation

What you’ll build: A clickable list where items toggle “done” using one event listener on the parent.
Objectives
- Understand event bubbling
- Use event delegation with event.target
- Toggle classes with classList
Steps
- Click any list item to mark/unmark as done.
- Note only the <ul> has an event listener.
Code (save as exercise3.html)
<!doctype html>
<html lang=”en”>
<head>
<meta charset=”utf-8″ />
<title>Event Delegation</title>
<style>
body { font: 16px/1.4 system-ui, sans-serif; padding: 1.5rem; }
li { cursor: pointer; padding: .25rem .5rem; }
li.done { text-decoration: line-through; color: #888; }
</style>
</head>
<body>
<h1>Click to Toggle</h1>
<ul id=”list”>
<li data-id=”1″>Read docs</li>
<li data-id=”2″>Practice JS</li>
<li data-id=”3″>Build something</li>
</ul>
<script>
document.getElementById(‘list’).addEventListener(‘click’, (e) => {
if (e.target.matches(‘li’)) {
e.target.classList.toggle(‘done’);
console.log(‘Toggled item id:’, e.target.dataset.id);
}
});
</script>
</body>
</html>
How it works
- Clicks bubble from <li> to <ul>.
- The parent checks e.target and toggles done.
- Minimizes listeners, great for dynamic lists.
4) Form Validation and Rendering Errors in the DOM

What you’ll build: A signup form with custom inline validations.
Objectives
- Prevent default submission
- Validate fields and show helpful messages
- Use aria-live to announce errors
Steps
- Submit empty form to see errors.
- Fix fields; see errors clear as you type.
- Submit valid form to see success.
Code (save as exercise4.html)
<!doctype html>
<html lang=”en”>
<head>
<meta charset=”utf-8″ />
<title>Form Validation</title>
<style>
body { font: 16px/1.4 system-ui, sans-serif; padding: 1.5rem; max-width: 640px; }
.field { margin-bottom: .75rem; }
.error { color: #b00020; font-size: .95rem; }
.ok { color: #0a7d00; }
input { width: 100%; padding: .5rem; }
</style>
</head>
<body>
<h1>Create Account</h1>
<form id=”form” novalidate>
<div class=”field”>
<label>Email</label>
<input id=”email” type=”email” placeholder=”you@example.com” />
<div class=”error” id=”emailErr” aria-live=”polite”></div>
</div>
<div class=”field”>
<label>Password (min 8, 1 number)</label>
<input id=”pass” type=”password” />
<div class=”error” id=”passErr” aria-live=”polite”></div>
</div>
<button>Sign Up</button>
</form>
<p id=”result” class=”ok” aria-live=”polite”></p>
<script>
const form = document.getElementById(‘form’);
const email = document.getElementById(’email’);
const pass = document.getElementById(‘pass’);
const result = document.getElementById(‘result’);
const emailErr = document.getElementById(’emailErr’);
const passErr = document.getElementById(‘passErr’);
function validateEmail(value) {
return /\S+@\S+\.\S+/.test(value);
}
function validatePass(value) {
return value.length >= 8 && /\d/.test(value);
}
form.addEventListener(‘submit’, (e) => {
e.preventDefault();
let ok = true;
if (!validateEmail(email.value)) {
emailErr.textContent = ‘Please enter a valid email.’;
ok = false;
} else emailErr.textContent = ”;
if (!validatePass(pass.value)) {
passErr.textContent = ‘Password must be 8+ chars and include a number.’;
ok = false;
} else passErr.textContent = ”;
if (ok) {
result.textContent = ‘Success! Account created.’;
form.reset();
} else {
result.textContent = ”;
}
});
[email, pass].forEach(input => {
input.addEventListener(‘input’, () => {
if (input === email) {
emailErr.textContent = validateEmail(email.value) ? ” : ‘Invalid email.’;
} else {
passErr.textContent = validatePass(pass.value) ? ” : ‘8+ chars incl. a number.’;
}
});
});
</script>
</body>
</html>
How it works
- preventDefault() stops native submit.
- Custom validators update .textContent in error nodes.
- aria-live makes screen readers announce updates.
5) Render a Table from JSON (Embedded) + Sort on Click (Delegation)
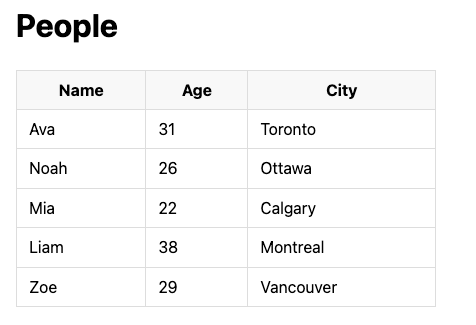
What you’ll build: Parse JSON embedded in the page and render a sortable table.
Objectives
- Parse JSON from <script type=”application/json”>
- Build rows from data
- Implement column sorting by clicking headers
Steps
- Click Name, Age, or City header to sort.
- Watch the table rerender with new order.
Code (save as exercise5.html)
<!doctype html>
<html lang=”en”>
<head>
<meta charset=”utf-8″ />
<title>Render & Sort Table</title>
<style>
body { font: 16px/1.4 system-ui, sans-serif; padding: 1.5rem; }
table { border-collapse: collapse; min-width: 420px; }
th, td { border: 1px solid #ddd; padding: .5rem .75rem; }
th { cursor: pointer; background: #f8f8f8; user-select: none; }
th.active::after { content: ” ⬍”; }
</style>
</head>
<body>
<h1>People</h1>
<table>
<thead>
<tr>
<th data-key=”name”>Name</th>
<th data-key=”age”>Age</th>
<th data-key=”city”>City</th>
</tr>
</thead>
<tbody id=”rows”></tbody>
</table>
<script type=”application/json” id=”peopleData”>
[
{“name”:”Ava”,”age”:31,”city”:”Toronto”},
{“name”:”Noah”,”age”:26,”city”:”Ottawa”},
{“name”:”Mia”,”age”:22,”city”:”Calgary”},
{“name”:”Liam”,”age”:38,”city”:”Montreal”},
{“name”:”Zoe”,”age”:29,”city”:”Vancouver”}
]
</script>
<script>
const raw = document.getElementById(‘peopleData’).textContent;
let data = JSON.parse(raw);
const tbody = document.getElementById(‘rows’);
let currentKey = null;
let asc = true;
function render() {
tbody.innerHTML = ”;
data.forEach(p => {
const tr = document.createElement(‘tr’);
tr.innerHTML = `<td>${p.name}</td><td>${p.age}</td><td>${p.city}</td>`;
tbody.appendChild(tr);
});
}
function sortBy(key) {
asc = key === currentKey ? !asc : true;
currentKey = key;
data = […data].sort((a, b) => {
const va = a[key], vb = b[key];
return (va > vb ? 1 : va < vb ? -1 : 0) * (asc ? 1 : -1);
});
document.querySelectorAll(‘th’).forEach(th => th.classList.toggle(‘active’, th.dataset.key === key));
render();
}
document.querySelector(‘thead’).addEventListener(‘click’, (e) => {
if (e.target.matches(‘th[data-key]’)) sortBy(e.target.dataset.key);
});
render();
</script>
</body>
</html>
How it works
- JSON is embedded safely and parsed at runtime.
- Sorting reuses the same render function.
- Active header is indicated with a class.
6) Persist UI State with localStorage (Theme + Note)

What you’ll build: A light/dark theme switch that persists; a note that saves as you type.
Objectives
- Store/retrieve JSON or strings in localStorage
- Apply persisted state on load
Steps
- Toggle theme; reload the page—theme sticks.
- Type a note; reload—text remains.
Code (save as exercise6.html)
<!doctype html>
<html lang=”en”>
<head>
<meta charset=”utf-8″ />
<title>localStorage State</title>
<style>
:root { color-scheme: light dark; }
body { font: 16px/1.5 system-ui, sans-serif; padding: 1.5rem; transition: background .2s, color .2s; }
body.dark { background: #0f1115; color: #eaeaea; }
.row { display:flex; align-items:center; gap:.5rem; }
textarea { width: 100%; min-height: 120px; padding: .75rem; }
</style>
</head>
<body>
<div class=”row”>
<label><input type=”checkbox” id=”themeToggle” /> Dark mode</label>
</div>
<h1>Scratchpad</h1>
<textarea id=”note” placeholder=”Type here…”></textarea>
<script>
const THEME_KEY = ‘demo_theme’;
const NOTE_KEY = ‘demo_note’;
const toggle = document.getElementById(‘themeToggle’);
const note = document.getElementById(‘note’);
function applyTheme(theme) {
document.body.classList.toggle(‘dark’, theme === ‘dark’);
toggle.checked = theme === ‘dark’;
}
const savedTheme = localStorage.getItem(THEME_KEY) || ‘light’;
applyTheme(savedTheme);
toggle.addEventListener(‘change’, () => {
const theme = toggle.checked ? ‘dark’ : ‘light’;
localStorage.setItem(THEME_KEY, theme);
applyTheme(theme);
});
note.value = localStorage.getItem(NOTE_KEY) || ”;
note.addEventListener(‘input’, () => {
localStorage.setItem(NOTE_KEY, note.value);
});
</script>
</body>
</html>
How it works
- Reads storage on load to set initial state.
- Writes to storage on input/change.
- Uses a class on <body> to toggle theme styles.
7) Drag-and-Drop Reordering

What you’ll build: Reorder list items by dragging; the current order is shown.
Objectives
- Use native HTML5 drag-and-drop (dragstart, dragover, drop)
- Compute new order after a drop
Steps
- Drag any item above/below others.
- The order display updates live.
Code (save as exercise7.html)
<!doctype html>
<html lang=”en”>
<head>
<meta charset=”utf-8″ />
<title>Drag & Drop Reorder</title>
<style>
body { font: 16px/1.4 system-ui, sans-serif; padding: 1.5rem; }
li { padding: .4rem .6rem; border: 1px solid #ddd; border-radius: .4rem; margin-bottom: .4rem; background: #fafafa; }
li.dragging { opacity: .5; }
.drop-over { outline: 2px dashed #999; }
pre { background: #f6f8fa; padding: .5rem; }
</style>
</head>
<body>
<h1>Drag to Reorder</h1>
<ul id=”list”>
<li draggable=”true”>Alpha</li>
<li draggable=”true”>Bravo</li>
<li draggable=”true”>Charlie</li>
<li draggable=”true”>Delta</li>
</ul>
<h3>Current order</h3>
<pre id=”order”></pre>
<script>
const list = document.getElementById(‘list’);
const order = document.getElementById(‘order’);
let dragEl = null;
function updateOrder() {
order.textContent = […list.children].map(li => li.textContent).join(‘, ‘);
}
updateOrder();
list.addEventListener(‘dragstart’, e => {
if (e.target.matches(‘li’)) {
dragEl = e.target;
e.dataTransfer.setData(‘text/plain’, dragEl.textContent);
dragEl.classList.add(‘dragging’);
}
});
list.addEventListener(‘dragend’, () => {
dragEl?.classList.remove(‘dragging’);
dragEl = null;
});
list.addEventListener(‘dragover’, e => {
e.preventDefault(); // allow drop
const after = […list.children].find(li => {
const rect = li.getBoundingClientRect();
return e.clientY <= rect.top + rect.height / 2;
});
list.insertBefore(dragEl, after || null);
});
list.addEventListener(‘drop’, () => updateOrder());
</script>
</body>
</html>
How it works
- dragstart marks the item; dragover repositions it relative to midpoint of siblings.
- drop finalizes and updates the order text.
8) Accessible Modal Dialog with Focus Trap

What you’ll build: A modal that opens/closes, traps focus, and closes on Escape or overlay click.
Objectives
- Toggle modal visibility
- Manage focus order (tab loop)
- Handle keyboard interaction
Steps
- Click Open Modal.
- Tab around; focus stays inside the modal.
- Press Esc or click the overlay to close.
Code (save as exercise8.html)
<!doctype html>
<html lang=”en”>
<head>
<meta charset=”utf-8″ />
<title>Accessible Modal</title>
<style>
body { font: 16px/1.4 system-ui, sans-serif; padding: 1.5rem; }
.overlay { position: fixed; inset: 0; background: rgba(0,0,0,.5); display: none; align-items: center; justify-content: center; }
.overlay.open { display: flex; }
.modal { background: white; padding: 1rem; border-radius: .6rem; width: min(90vw, 420px); }
.row { display: flex; gap: .5rem; margin-top: .5rem; }
button { padding: .5rem .75rem; }
</style>
</head>
<body>
<button id=”open”>Open Modal</button>
<div class=”overlay” id=”overlay” aria-hidden=”true”>
<div class=”modal” role=”dialog” aria-modal=”true” aria-labelledby=”title”>
<h2 id=”title”>Confirm Action</h2>
<p>Are you sure you want to proceed?</p>
<div class=”row”>
<button id=”ok”>OK</button>
<button id=”cancel”>Cancel</button>
</div>
</div>
</div>
<script>
const openBtn = document.getElementById(‘open’);
const overlay = document.getElementById(‘overlay’);
const ok = document.getElementById(‘ok’);
const cancel = document.getElementById(‘cancel’);
let lastFocus = null;
function getFocusable(container) {
return […container.querySelectorAll(‘a, button, input, textarea, select, [tabindex]:not([tabindex=”-1″])’)]
.filter(el => !el.hasAttribute(‘disabled’) && el.offsetParent !== null);
}
function openModal() {
lastFocus = document.activeElement;
overlay.classList.add(‘open’);
overlay.setAttribute(‘aria-hidden’, ‘false’);
getFocusable(overlay)[0]?.focus();
}
function closeModal() {
overlay.classList.remove(‘open’);
overlay.setAttribute(‘aria-hidden’, ‘true’);
lastFocus?.focus();
}
openBtn.addEventListener(‘click’, openModal);
ok.addEventListener(‘click’, closeModal);
cancel.addEventListener(‘click’, closeModal);
overlay.addEventListener(‘click’, (e) => {
if (e.target === overlay) closeModal();
});
document.addEventListener(‘keydown’, (e) => {
if (!overlay.classList.contains(‘open’)) return;
if (e.key === ‘Escape’) closeModal();
if (e.key === ‘Tab’) {
const f = getFocusable(overlay);
const first = f[0], last = f[f.length – 1];
if (e.shiftKey && document.activeElement === first) { last.focus(); e.preventDefault(); }
else if (!e.shiftKey && document.activeElement === last) { first.focus(); e.preventDefault(); }
}
});
</script>
</body>
</html>
How it works
- Uses an overlay that toggles .open and aria-hidden.
- Captures focusable elements and loops them on Tab.
- Restores focus to the opener when closing.
9) Lazy-Load Images with IntersectionObserver

What you’ll build: A gallery where images load only when scrolled into view.
Objectives
- Use IntersectionObserver
- Swap data-src to src when visible
- Include inline data-URI images (no external files)
Steps
- Scroll down; watch images load as they appear.
- Open DevTools → Network to see requests (data URIs won’t request; still demonstrates logic).
Code (save as exercise9.html)
<!doctype html>
<html lang=”en”>
<head>
<meta charset=”utf-8″ />
<title>Lazy Images</title>
<style>
body { font: 16px/1.4 system-ui, sans-serif; padding: 1.5rem; }
.grid { display: grid; grid-template-columns: repeat(auto-fill, minmax(160px, 1fr)); gap: .75rem; }
.card { border: 1px solid #ddd; border-radius: .5rem; padding: .5rem; min-height: 140px; display: grid; place-items: center; }
img { max-width: 100%; display: block; }
.placeholder { background: #eee; width: 120px; height: 80px; }
.spacer { height: 800px; }
</style>
</head>
<body>
<h1>Lazy Gallery</h1>
<p>Scroll to load images.</p>
<div class=”spacer”></div>
<div class=”grid” id=”grid”>
<!– Using small data-URI PNGs with different colors –>
<div class=”card”><img class=”lazy” alt=”blue” data-src=”data:image/png;base64,iVBORw0KGgoAAAANSUhEUgAAAHgAAAAwCAYAAABHk6C7AAAACXBIWXMAAAsSAAALEgHS3X78AAAAP0lEQVR4nO3OIQEAAAgDoK1/aQ0g6gk4GQAAAAAAAAAAAAAAAAAAAAAAAAAAAAAAAAAAAAAAwK8XbQAAz3m5QwAAAABJRU5ErkJggg==” /></div>
<div class=”card”><img class=”lazy” alt=”green” data-src=”data:image/png;base64,iVBORw0KGgoAAAANSUhEUgAAAHgAAAAwCAYAAABHk6C7AAAACXBIWXMAAAsSAAALEgHS3X78AAAAP0lEQVR4nO3OIQEAAAgDoK1/aQ0g6gk4GQAAAAAAAAAAAAAAAAAAAAAAAAAAAAAAAAAAAAAAwK8XbQAAz3m5QwAAAABJRU5ErkJggg==” /></div>
<div class=”card”><img class=”lazy” alt=”red” data-src=”data:image/png;base64,iVBORw0KGgoAAAANSUhEUgAAAHgAAAAwCAYAAABHk6C7AAAACXBIWXMAAAsSAAALEgHS3X78AAAAP0lEQVR4nO3OIQEAAAgDoK1/aQ0g6gk4GQAAAAAAAAAAAAAAAAAAAAAAAAAAAAAAAAAAAAAAwK8XbQAAz3m5QwAAAABJRU5ErkJggg==” /></div>
<div class=”card”><img class=”lazy” alt=”gray” data-src=”data:image/png;base64,iVBORw0KGgoAAAANSUhEUgAAAHgAAAAwCAYAAABHk6C7AAAACXBIWXMAAAsSAAALEgHS3X78AAAAP0lEQVR4nO3OIQEAAAgDoK1/aQ0g6gk4GQAAAAAAAAAAAAAAAAAAAAAAAAAAAAAAAAAAAAAAwK8XbQAAz3m5QwAAAABJRU5ErkJggg==” /></div>
<div class=”card”><img class=”lazy” alt=”gold” data-src=”data:image/png;base64,iVBORw0KGgoAAAANSUhEUgAAAHgAAAAwCAYAAABHk6C7AAAACXBIWXMAAAsSAAALEgHS3X78AAAAP0lEQVR4nO3OIQEAAAgDoK1/aQ0g6gk4GQAAAAAAAAAAAAAAAAAAAAAAAAAAAAAAAAAAAAAAwK8XbQAAz3m5QwAAAABJRU5ErkJggg==” /></div>
<div class=”card”><img class=”lazy” alt=”teal” data-src=”data:image/png;base64,iVBORw0KGgoAAAANSUhEUgAAAHgAAAAwCAYAAABHk6C7AAAACXBIWXMAAAsSAAALEgHS3X78AAAAP0lEQVR4nO3OIQEAAAgDoK1/aQ0g6gk4GQAAAAAAAAAAAAAAAAAAAAAAAAAAAAAAAAAAAAAAwK8XbQAAz3m5QwAAAABJRU5ErkJggg==” /></div>
</div>
<div class=”spacer”></div>
<script>
const imgs = document.querySelectorAll(‘img.lazy’);
const io = new IntersectionObserver((entries, obs) => {
entries.forEach(entry => {
if (entry.isIntersecting) {
const img = entry.target;
img.src = img.dataset.src;
img.classList.remove(‘lazy’);
obs.unobserve(img);
}
});
}, { rootMargin: ‘100px 0px’ });
imgs.forEach(img => io.observe(img));
</script>
</body>
</html>
How it works
- Observer watches each .lazy image.
- When visible, data-src → src then unobserves.
- rootMargin preloads slightly before visibility.
10) MutationObserver + Custom Events (React to Dynamic Changes)

What you’ll build: Add/remove items; a MutationObserver counts changes; a custom event announces additions.
Objectives
- Detect DOM mutations
- Dispatch and listen for custom events
Steps
- Click Add Item multiple times; watch the counter increase.
- Remove selected items; observer tracks removals.
- Open console to see custom event details.
Code (save as exercise10.html)
<!doctype html>
<html lang=”en”>
<head>
<meta charset=”utf-8″ />
<title>MutationObserver & Custom Events</title>
<style>
body { font: 16px/1.4 system-ui, sans-serif; padding: 1.5rem; }
.row { display:flex; gap:.5rem; margin-bottom:.75rem; }
li { display:flex; align-items:center; gap:.5rem; }
</style>
</head>
<body>
<div class=”row”>
<button id=”add”>Add Item</button>
<button id=”remove”>Remove Selected</button>
<strong>Changes observed: <span id=”count”>0</span></strong>
</div>
<ul id=”list”>
<li><input type=”checkbox” />Sample 1</li>
<li><input type=”checkbox” />Sample 2</li>
</ul>
<script>
const list = document.getElementById(‘list’);
const addBtn = document.getElementById(‘add’);
const removeBtn = document.getElementById(‘remove’);
const countEl = document.getElementById(‘count’);
let changes = 0;
function updateCount(n=1) {
changes += n;
countEl.textContent = changes;
}
// Mutation observer: count childList changes
const observer = new MutationObserver((mutations) => {
let delta = 0;
mutations.forEach(m => {
delta += m.addedNodes.length;
delta += m.removedNodes.length;
});
if (delta) updateCount(delta);
});
observer.observe(list, { childList: true });
// Custom event listener (for added items)
list.addEventListener(‘item:added’, (e) => {
console.log(‘Custom event item:added’, e.detail);
});
let idx = 3;
addBtn.addEventListener(‘click’, () => {
const li = document.createElement(‘li’);
li.innerHTML = `<input type=”checkbox” />Sample ${idx++}`;
list.appendChild(li);
const event = new CustomEvent(‘item:added’, { detail: { text: li.textContent.trim() }});
list.dispatchEvent(event);
});
removeBtn.addEventListener(‘click’, () => {
[…list.querySelectorAll(‘li’)].forEach(li => {
const cb = li.querySelector(‘input[type=”checkbox”]’);
if (cb.checked) li.remove();
});
});
</script>
</body>
</html>
How it works
- MutationObserver watches the list’s childList.
- Added/removed nodes increment a visible counter.
- A CustomEvent (item:added) carries details about new items.