
Download PDF
Download Source Code
21) DOM Traversal Visualizer

Build: Click any nested element to highlight the target, its ancestors, and its siblings, and show the path to root.
Objectives: closest, parents/children/siblings, DOM introspection.
Steps: Open file → click around the left “tree” → watch highlights and path update.
Code (save as exercise21_traversal.html)
<!doctype html>
<html lang=”en”>
<head>
<meta charset=”utf-8″>
<title>DOM Traversal Visualizer</title>
<style>
body{font:16px/1.5 system-ui,sans-serif;padding:1.5rem;}
.layout{display:grid;grid-template-columns:1fr 1fr;gap:1rem;}
.tree{border:1px solid #ddd;border-radius:.5rem;padding:1rem;}
.box{border:1px solid #ccc;border-radius:.5rem;padding:.5rem;margin:.5rem 0;}
.box .box{margin-left:1rem;}
.legend span{display:inline-block;margin-right:.5rem;padding:.15rem .35rem;border-radius:.35rem;}
.target{background:#e6f7ff;border-color:#5ac8fa;}
.anc{outline:2px solid #ffd666;}
.sib{background:#f9f9f9;}
pre{background:#f6f8fa;padding:.75rem;border-radius:.5rem;overflow:auto;max-height:300px;}
.clickme{cursor:pointer;}
</style>
</head>
<body>
<h1>JS DOM Exercise 21 — Traversal & closest()</h1>
<p>Click any element in the left tree. We will highlight <em>target</em>, its <em>ancestors</em>, and its <em>siblings</em>, and display the path to root.</p>
<div class=”legend”>
<span style=”background:#e6f7ff;border:1px solid #5ac8fa;”>target</span>
<span style=”border:1px solid #ffd666;background:#fffbe6;”>ancestor</span>
<span style=”background:#f9f9f9;border:1px solid #ddd;”>sibling</span>
</div>
<div class=”layout”>
<div class=”tree” id=”tree”>
<div class=”box clickme” id=”a”>
A
<div class=”box clickme” id=”b”>
B
<div class=”box clickme” id=”c”>
C
<div class=”box clickme” id=”d”>D</div>
<div class=”box clickme” id=”e”>E</div>
</div>
<div class=”box clickme” id=”f”>F</div>
</div>
<div class=”box clickme” id=”g”>
G
<div class=”box clickme” id=”h”>H</div>
</div>
</div>
</div>
<div>
<h3>Path to root</h3>
<pre id=”path”></pre>
</div>
</div>
<script>
const tree = document.getElementById(‘tree’);
const pathEl = document.getElementById(‘path’);
function clearMarks(){
tree.querySelectorAll(‘.target,.anc,.sib’).forEach(el => {
el.classList.remove(‘target’,’anc’,’sib’);
});
}
function describe(el){
const id = el.id ? ‘#’ + el.id : ”;
const cls = el.className ? ‘.’ + […el.classList].filter(c=>![‘target’,’anc’,’sib’,’clickme’,’box’].includes(c)).join(‘.’) : ”;
return el.tagName.toLowerCase() + id + cls;
}
tree.addEventListener(‘click’, (e) => {
const target = e.target.closest(‘.box’);
if (!target) return;
clearMarks();
target.classList.add(‘target’);
const parent = target.parentElement.closest(‘.box’);
if (parent){
[…parent.children].forEach(ch => {
if (ch !== target && ch.classList.contains(‘box’)) ch.classList.add(‘sib’);
});
}
const path = [];
let cur = target;
while (cur && cur !== tree){
path.push(describe(cur));
if (cur !== target) cur.classList.add(‘anc’);
cur = cur.parentElement.closest(‘.box’);
}
path.push(‘div#tree’);
pathEl.textContent = path.join(‘ ← ‘);
});
</script>
</body>
</html>
Breakdown: We use closest(‘.box’) to snap to a box; walk ancestors and mark .anc; compute siblings from the parent; print a readable CSS-like path.
22) Keyboard Navigation List (j/k, Enter)
Build: Navigate a list with keyboard shortcuts; toggle done.
Objectives: Global key handling, focus management, active item state.
Steps: Press j/k or arrows; Enter toggles done; Home/End jump.
Code (save as exercise22_keyboard_nav.html)
<!doctype html>
<html lang=”en”>
<head>
<meta charset=”utf-8″>
<title>Keyboard Navigation (j/k, Enter)</title>
<style>
body{font:16px/1.5 system-ui,sans-serif;padding:1.5rem;}
ul{padding-left:1.1rem;max-width:520px;}
li{padding:.35rem .5rem;border-radius:.35rem;cursor:pointer;}
li.active{background:#e6f7ff;border:1px solid #91d5ff;}
li.done{text-decoration:line-through;color:#888;}
.hint{color:#666}
</style>
</head>
<body>
<h1>JS DOM Exercise 22 — Keyboard List</h1>
<p class=”hint”>Use <kbd>j</kbd>/<kbd>k</kbd> to move, <kbd>Enter</kbd> to toggle done, <kbd>Home</kbd>/<kbd>End</kbd> to jump.</p>
<ul id=”list”>
<li data-id=”1″>Learn querySelector</li>
<li data-id=”2″>Practice event delegation</li>
<li data-id=”3″>Master classList</li>
<li data-id=”4″>Play with localStorage</li>
<li data-id=”5″>Build a small app</li>
</ul>
<script>
const items = […document.querySelectorAll(‘#list li’)];
let index = 0;
function setActive(i){
items.forEach(li => li.classList.remove(‘active’));
index = (i + items.length) % items.length;
items[index].classList.add(‘active’);
items[index].scrollIntoView({block:’nearest’});
}
setActive(0);
document.addEventListener(‘keydown’, (e) => {
if (e.key === ‘j’ || e.key === ‘ArrowDown’) setActive(index+1);
else if (e.key === ‘k’ || e.key === ‘ArrowUp’) setActive(index-1);
else if (e.key === ‘Home’) setActive(0);
else if (e.key === ‘End’) setActive(items.length-1);
else if (e.key === ‘Enter’){
items[index].classList.toggle(‘done’);
console.log(‘Toggled item’, items[index].dataset.id);
}
});
</script>
</body>
</html>
Breakdown: Maintain an index; setActive updates classes and scroll; keydown maps keys to actions.
23) Inline Editable Table with Validation
Build: Click cells to edit; Enter saves, Esc cancels; age validated 1–120.
Objectives: In-place editors, dataset, cancel/commit flows.
Steps: Click a cell → edit → confirm/cancel; invalid ages turn red.
Code (save as exercise23_inline_edit_table.html)
<!doctype html>
<html lang=”en”>
<head>
<meta charset=”utf-8″>
<title>Inline Editable Table</title>
<style>
body{font:16px/1.5 system-ui,sans-serif;padding:1.5rem;}
table{border-collapse:collapse;min-width:520px;}
th,td{border:1px solid #ddd;padding:.5rem .75rem;}
td.editing{background:#fffbe6;}
td.invalid{background:#ffd6d6;}
.note{color:#666;margin:.5rem 0;}
</style>
</head>
<body>
<h1>JS DOM Exercise 23 — Inline Editing</h1>
<p class=”note”>Click a cell to edit. <kbd>Enter</kbd> to save, <kbd>Esc</kbd> to cancel. Age must be 1–120.</p>
<table>
<thead><tr><th>Name</th><th>Age</th><th>City</th></tr></thead>
<tbody id=”tb”>
<tr><td>Ava</td><td>31</td><td>Toronto</td></tr>
<tr><td>Noah</td><td>26</td><td>Ottawa</td></tr>
<tr><td>Mia</td><td>22</td><td>Calgary</td></tr>
</tbody>
</table>
<script>
const tb = document.getElementById(‘tb’);
let editing = null;
tb.addEventListener(‘click’, (e) => {
const td = e.target.closest(‘td’);
if(!td || td === editing) return;
startEdit(td);
});
function startEdit(td){
cancelEdit();
editing = td;
const old = td.textContent;
td.dataset.old = old;
td.classList.add(‘editing’);
const input = document.createElement(‘input’);
input.value = old;
input.style.width = ‘100%’;
td.textContent = ”;
td.appendChild(input);
input.focus();
input.select();
input.addEventListener(‘keydown’, (e) => {
if (e.key === ‘Enter’) commit(td, input.value.trim());
else if (e.key === ‘Escape’) cancelEdit();
});
input.addEventListener(‘blur’, () => commit(td, input.value.trim()));
}
function isValid(td, value){
const index = […td.parentElement.children].indexOf(td);
if (index === 1){
const n = Number(value);
return Number.isInteger(n) && n >= 1 && n <= 120;
}
return value.length > 0;
}
function commit(td, value){
if(!isValid(td, value)){
td.classList.add(‘invalid’);
return;
}
td.classList.remove(‘invalid’);
td.textContent = value;
td.classList.remove(‘editing’);
console.log(‘Changed cell’, td.dataset.old, ‘→’, value);
editing = null;
}
function cancelEdit(){
if(!editing) return;
const td = editing;
td.classList.remove(‘invalid’,’editing’);
td.textContent = td.dataset.old;
editing = null;
}
</script>
</body>
</html>
Breakdown: Replace a cell with an <input> while editing; use column index to validate age; support commit/cancel.
24) Virtualized List (10,000 rows)

Build: Efficiently render only the visible slice of a huge list.
Objectives: Windowing, scrollTop, translateY, avoiding reflow.
Steps: Scroll to see rows update smoothly.
Code (save as exercise24_virtualized_list.html)
<!doctype html>
<html lang=”en”>
<head>
<meta charset=”utf-8″>
<title>Virtualized List (10,000 items) — Fixed Demo</title>
<style>
body{font:16px/1.5 system-ui,sans-serif;padding:1.5rem;}
.controls{display:flex;gap:.5rem;align-items:center;margin-bottom:.5rem;flex-wrap:wrap}
.viewport{height:320px;border:2px solid #bbb;border-radius:.5rem;overflow:auto;position:relative;background:#fafafa}
.spacer{height:0;}
.inner{position:absolute;left:0;right:0;will-change:transform;}
.row{height:24px; line-height:24px; padding:0 .5rem; border-bottom:1px solid #eee; background:#fff;}
.row:nth-child(even){background:#fdfdfd;}
.hint{color:#666;margin:.25rem 0 .75rem}
.stat{font-family:ui-monospace, SFMono-Regular, Menlo, monospace;}
button{padding:.4rem .6rem}
</style>
</head>
<body>
<h1>Virtualized List (10,000 items)</h1>
<p class=”hint”>Scroll <strong>inside the bordered box</strong> below. Or use the jump buttons to move to a specific row.</p>
<div class=”controls”>
<button data-jump=”0″>Jump to 0</button>
<button data-jump=”5000″>Jump to 5,000</button>
<button data-jump=”9999″>Jump to 9,999</button>
<span class=”stat” id=”range”></span>
</div>
<div class=”viewport” id=”vp” aria-label=”Virtualized list viewport”>
<div class=”spacer” id=”spacer”></div>
<div class=”inner” id=”inner”></div>
</div>
<script>
const total = 10000; // total rows
const itemHeight = 24; // px per row (match .row height + borders)
const buffer = 6; // extra rows above/below for smoother scrolling
const vp = document.getElementById(‘vp’);
const inner = document.getElementById(‘inner’);
const spacer = document.getElementById(‘spacer’);
const rangeLabel = document.getElementById(‘range’);
// 1) make the container scrollable as if it had 10k items
spacer.style.height = (total * itemHeight) + ‘px’;
// 2) render only what’s visible + buffer
function render(){
const scrollTop = vp.scrollTop;
const height = vp.clientHeight;
// figure out the slice of rows we need
const start = Math.max(0, Math.floor(scrollTop / itemHeight) – buffer);
const end = Math.min(total, Math.ceil((scrollTop + height) / itemHeight) + buffer);
// position the slice at the right height
inner.style.transform = `translateY(${start * itemHeight}px)`;
// paint the slice
inner.innerHTML = ”;
for(let i=start; i<end; i++){
const div = document.createElement(‘div’);
div.className = ‘row’;
div.textContent = ‘Row #’ + i;
inner.appendChild(div);
}
// update status
rangeLabel.textContent = `Visible rows ~ ${start}…${end-1} (rendered: ${end – start} / ${total})`;
}
// 3) handle scrolling
vp.addEventListener(‘scroll’, render);
// 4) initial paint
render();
// 5) jump helpers
document.querySelectorAll(‘button[data-jump]’).forEach(btn => {
btn.addEventListener(‘click’, () => {
const i = Number(btn.getAttribute(‘data-jump’));
// scroll the viewport so that row i is at the top
vp.scrollTop = i * itemHeight;
render();
});
});
</script>
</body>
</html>
Breakdown: A big spacer sets total height; we translate the inner slice and render only what’s visible.
25) Filter Chips + Search
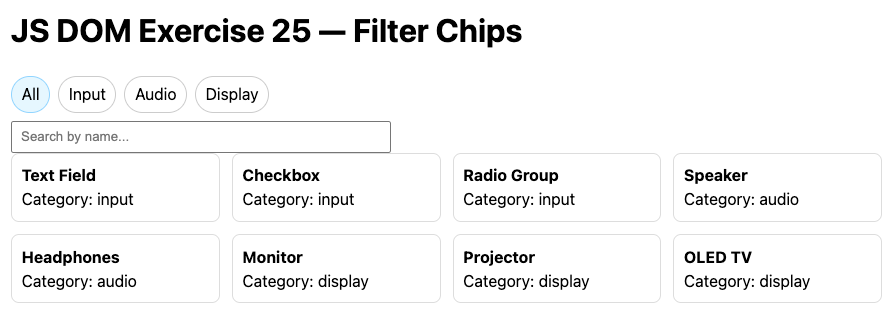
Build: Filter cards by category chips and free-text search.
Objectives: dataset, stateful filters, rendering pipelines.
Steps: Toggle chips (All/Input/Audio/Display); type to filter by name.
Code (save as exercise25_filter_chips.html)
<!doctype html>
<html lang=”en”>
<head>
<meta charset=”utf-8″>
<title>Filter Chips by Category + Search</title>
<style>
body{font:16px/1.5 system-ui,sans-serif;padding:1.5rem;}
.chips{display:flex;flex-wrap:wrap;gap:.5rem;margin-bottom:.5rem;}
.chip{padding:.35rem .6rem;border:1px solid #ccc;border-radius:999px;cursor:pointer;}
.chip.active{background:#e6f7ff;border-color:#91d5ff;}
.grid{display:grid;grid-template-columns:repeat(auto-fill,minmax(180px,1fr));gap:.75rem;}
.card{border:1px solid #ddd;border-radius:.5rem;padding:.6rem;}
input{padding:.4rem .5rem;max-width:360px;width:100%;}
</style>
</head>
<body>
<h1>JS DOM Exercise 25 — Filter Chips</h1>
<div class=”chips” id=”chips”>
<span class=”chip active” data-cat=”all”>All</span>
<span class=”chip” data-cat=”input”>Input</span>
<span class=”chip” data-cat=”audio”>Audio</span>
<span class=”chip” data-cat=”display”>Display</span>
</div>
<input id=”search” placeholder=”Search by name…” autocomplete=”off”>
<div class=”grid” id=”grid”></div>
<script>
const data = [
{name:’Text Field’, cat:’input’}, {name:’Checkbox’, cat:’input’},
{name:’Radio Group’, cat:’input’}, {name:’Speaker’, cat:’audio’},
{name:’Headphones’, cat:’audio’}, {name:’Monitor’, cat:’display’},
{name:’Projector’, cat:’display’}, {name:’OLED TV’, cat:’display’}
];
const grid = document.getElementById(‘grid’);
const chips = document.getElementById(‘chips’);
const search = document.getElementById(‘search’);
let active = ‘all’;
function render(){
grid.innerHTML = ”;
const q = search.value.trim().toLowerCase();
data.filter(item => (active===’all’||item.cat===active) && (!q || item.name.toLowerCase().includes(q)))
.forEach(item => {
const d = document.createElement(‘div’);
d.className=’card’;
d.innerHTML = `<strong>${item.name}</strong><div>Category: ${item.cat}</div>`;
grid.appendChild(d);
});
}
render();
chips.addEventListener(‘click’, (e) => {
const chip = e.target.closest(‘.chip’);
if(!chip) return;
chips.querySelectorAll(‘.chip’).forEach(c => c.classList.remove(‘active’));
chip.classList.add(‘active’);
active = chip.dataset.cat;
render();
});
search.addEventListener(‘input’, render);
</script>
</body>
</html>
Breakdown: Maintain active category state; filter pipeline combines category + query; render cards.
26) FormData Builder with JSON & Query Preview

Build: Add key/value rows, then preview as JSON and query string.
Objectives: FormData, serializing, table→data mapping.
Steps: Add pairs → Preview → see JSON and a=b&c=d.
Code (save as exercise26_formdata_builder.html)
<!doctype html>
<html lang=”en”>
<head>
<meta charset=”utf-8″>
<title>FormData Builder + JSON/Query Preview</title>
<style>
body{font:16px/1.5 system-ui,sans-serif;padding:1.5rem;}
.row{display:flex;gap:.5rem;margin:.5rem 0;}
input{padding:.4rem;}
button{padding:.4rem .6rem;}
pre{background:#f6f8fa;padding:.75rem;border-radius:.5rem;overflow:auto;}
table{border-collapse:collapse;min-width:420px;margin-top:.5rem;}
th,td{border:1px solid #ddd;padding:.35rem .5rem;}
</style>
</head>
<body>
<h1>JS DOM Exercise 26 — Build FormData</h1>
<div class=”row”>
<input id=”key” placeholder=”Key”>
<input id=”val” placeholder=”Value”>
<button id=”add”>Add Pair</button>
<button id=”clear”>Clear</button>
</div>
<table>
<thead><tr><th>Key</th><th>Value</th></tr></thead>
<tbody id=”tbody”></tbody>
</table>
<div class=”row”>
<button id=”preview”>Preview JSON & Query</button>
</div>
<h3>JSON</h3>
<pre id=”json”></pre>
<h3>Query string</h3>
<pre id=”qs”></pre>
<script>
const tb = document.getElementById(‘tbody’);
document.getElementById(‘add’).addEventListener(‘click’, () => {
const k = document.getElementById(‘key’).value.trim();
const v = document.getElementById(‘val’).value;
if(!k) return;
const tr = document.createElement(‘tr’);
tr.innerHTML = `<td>${k}</td><td>${v}</td>`;
tb.appendChild(tr);
document.getElementById(‘key’).value=”; document.getElementById(‘val’).value=”;
});
document.getElementById(‘clear’).addEventListener(‘click’, () => tb.innerHTML=”);
document.getElementById(‘preview’).addEventListener(‘click’, () => {
const fd = new FormData();
[…tb.querySelectorAll(‘tr’)].forEach(tr => {
const [k,v] = […tr.children].map(td => td.textContent);
fd.append(k, v);
});
const obj = {};
fd.forEach((v,k)=>{
if (obj[k] !== undefined){
obj[k] = Array.isArray(obj[k]) ? […obj[k], v] : [obj[k], v];
} else obj[k] = v;
});
document.getElementById(‘json’).textContent = JSON.stringify(obj,null,2);
const qs = […fd.entries()].map(([k,v]) => encodeURIComponent(k)+’=’+encodeURIComponent(v)).join(‘&’);
document.getElementById(‘qs’).textContent = qs;
});
</script>
</body>
</html>
Breakdown: Table rows → FormData → object & query; repeated keys become arrays.
27) Drag-to-Select (Marquee) on a Grid
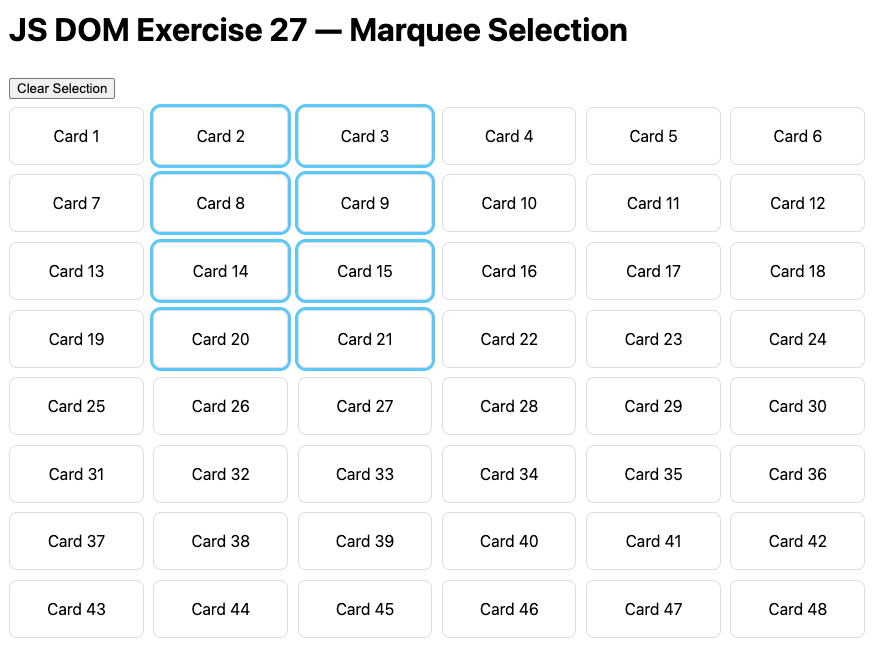
Build: Click-drag a selection rectangle to select multiple cards.
Objectives: Pointer math, bounding-box intersection, class toggling.
Steps: Mouse down, drag across cards, release; clear selection via button.
Code (save as exercise27_drag_select.html)
<!doctype html>
<html lang=”en”>
<head>
<meta charset=”utf-8″>
<title>Drag-to-Select Cards (Marquee)</title>
<style>
body{font:16px/1.5 system-ui,sans-serif;padding:1.5rem;user-select:none;}
.grid{display:grid;grid-template-columns:repeat(auto-fill,minmax(120px,1fr));gap:.6rem;position:relative;}
.card{border:1px solid #ddd;border-radius:.5rem;padding:1rem;text-align:center;background:#fff;}
.card.selected{outline:3px solid #5ac8fa;}
.marquee{position:fixed;border:2px dashed #91d5ff;background:rgba(230,247,255,.3);pointer-events:none;display:none;}
.actions{margin:.5rem 0;}
</style>
</head>
<body>
<h1>JS DOM Exercise 27 — Marquee Selection</h1>
<div class=”actions”><button id=”clear”>Clear Selection</button></div>
<div class=”grid” id=”grid”></div>
<div class=”marquee” id=”marquee”></div>
<script>
const grid = document.getElementById(‘grid’);
const marquee = document.getElementById(‘marquee’);
// Create 48 cards
for (let i=1;i<=48;i++){
const d = document.createElement(‘div’);
d.className=’card’; d.textContent=’Card ‘+i;
grid.appendChild(d);
}
let start = null;
function rectFromPoints(a,b){
const x = Math.min(a.x,b.x), y = Math.min(a.y,b.y);
const w = Math.abs(a.x-b.x), h = Math.abs(a.y-b.y);
return {x,y,w,h};
}
document.addEventListener(‘mousedown’, (e)=>{
start = {x:e.clientX,y:e.clientY};
marquee.style.display=’block’;
marquee.style.left=start.x+’px’; marquee.style.top=start.y+’px’;
marquee.style.width=’0px’; marquee.style.height=’0px’;
});
document.addEventListener(‘mousemove’, (e)=>{
if(!start) return;
const r = rectFromPoints(start, {x:e.clientX,y:e.clientY});
marquee.style.left=r.x+’px’; marquee.style.top=r.y+’px’;
marquee.style.width=r.w+’px’; marquee.style.height=r.h+’px’;
const mrect = marquee.getBoundingClientRect();
document.querySelectorAll(‘.card’).forEach(card => {
const crect = card.getBoundingClientRect();
const overlap = !(mrect.right < crect.left || mrect.left > crect.right || mrect.bottom < crect.top || mrect.top > crect.bottom);
card.classList.toggle(‘selected’, overlap);
});
});
document.addEventListener(‘mouseup’, ()=>{
start = null; marquee.style.display=’none’;
});
document.getElementById(‘clear’).addEventListener(‘click’, () => {
document.querySelectorAll(‘.card’).forEach(c=>c.classList.remove(‘selected’));
});
</script>
</body>
</html>
Breakdown: We draw a fixed-position rectangle and check overlap with each card’s bounding box as you drag.
28) CSS Variables Playground

Build: Sliders control hue, radius, and padding using CSS custom properties.
Objectives: Update CSS variables via JS, live styling.
Steps: Drag sliders and watch the card and button restyle live.
Code (save as exercise28_css_vars_playground.html)
<!doctype html>
<html lang=”en”>
<head>
<meta charset=”utf-8″>
<title>CSS Variables Playground</title>
<style>
:root{
–hue: 210;
–radius: 12px;
–pad: 12px;
}
body{font:16px/1.5 system-ui,sans-serif;padding:1.5rem;}
.controls{display:grid;grid-template-columns:repeat(auto-fit,minmax(220px,1fr));gap:.75rem;margin-bottom:1rem;}
.card{border:1px solid hsl(var(–hue) 30% 75%);border-radius:var(–radius);padding:var(–pad);background:hsl(var(–hue) 50% 97%);}
.btn{padding:.5rem .8rem;border-radius:calc(var(–radius) / 2);border:1px solid hsl(var(–hue) 30% 55%);background:hsl(var(–hue) 80% 95%);}
label{display:block;font-size:.9rem;color:#444}
input[type=range]{width:100%;}
</style>
</head>
<body>
<h1>JS DOM Exercise 28 — CSS Vars</h1>
<div class=”controls”>
<div><label>Hue <span id=”hval”>210</span></label><input id=”hue” type=”range” min=”0″ max=”360″ value=”210″></div>
<div><label>Radius <span id=”rval”>12</span>px</label><input id=”radius” type=”range” min=”0″ max=”32″ value=”12″></div>
<div><label>Padding <span id=”pval”>12</span>px</label><input id=”pad” type=”range” min=”0″ max=”48″ value=”12″></div>
</div>
<div class=”card”>
<h3>Preview Card</h3>
<p>This card’s border, background, radius, and padding react to the sliders above.</p>
<button class=”btn”>Button</button>
</div>
<script>
const root = document.documentElement.style;
const hue = document.getElementById(‘hue’);
const radius = document.getElementById(‘radius’);
const pad = document.getElementById(‘pad’);
function sync(){
root.setProperty(‘–hue’, hue.value);
root.setProperty(‘–radius’, radius.value + ‘px’);
root.setProperty(‘–pad’, pad.value + ‘px’);
document.getElementById(‘hval’).textContent = hue.value;
document.getElementById(‘rval’).textContent = radius.value;
document.getElementById(‘pval’).textContent = pad.value;
}
[hue, radius, pad].forEach(i => i.addEventListener(‘input’, sync));
sync();
</script>
</body>
</html>
Breakdown: Tie range inputs to CSS variables on :root for live theming.
29) ResizeObserver + Resizable Sidebar

Build: Drag a handle to resize a sidebar; width readout updates via ResizeObserver.
Objectives: Pointer tracking, CSS bounds, ResizeObserver.
Steps: Drag the sidebar edge; watch the width display update.
Code (save as exercise29_resize_observer.html)
<!doctype html>
<html lang=”en”>
<head>
<meta charset=”utf-8″>
<title>ResizeObserver + Resizable Sidebar</title>
<style>
body{font:16px/1.5 system-ui,sans-serif;margin:0;}
.app{display:flex;min-height:100vh;}
.sidebar{width:280px;min-width:160px;max-width:600px;border-right:1px solid #ddd;position:relative;background:#fafafa;}
.handle{position:absolute;right:-4px;top:0;width:8px;height:100%;cursor:col-resize;}
.main{flex:1;padding:1rem;}
.meta{padding:.5rem 1rem;border-bottom:1px solid #eee;background:#fff;}
</style>
</head>
<body>
<div class=”meta”>Sidebar width: <strong id=”w”>—</strong> px</div>
<div class=”app”>
<aside class=”sidebar” id=”sb”>
<div class=”handle” id=”h”></div>
<div style=”padding:1rem;”>
<h3>Sidebar</h3>
<p>Drag the right edge to resize.</p>
</div>
</aside>
<main class=”main”>
<h1>JS DOM Exercise 29 — ResizeObserver</h1>
<p>The width above updates live as you drag.</p>
</main>
</div>
<script>
const sb = document.getElementById(‘sb’);
const h = document.getElementById(‘h’);
const out = document.getElementById(‘w’);
let startX, startW;
h.addEventListener(‘mousedown’, (e)=>{
startX = e.clientX; startW = sb.offsetWidth;
document.addEventListener(‘mousemove’, onMove);
document.addEventListener(‘mouseup’, onUp, {once:true});
});
function onMove(e){
const dx = e.clientX – startX;
let w = Math.min(600, Math.max(160, startW + dx));
sb.style.width = w + ‘px’;
}
function onUp(){ document.removeEventListener(‘mousemove’, onMove); }
const ro = new ResizeObserver(entries => {
for (const entry of entries){
out.textContent = Math.round(entry.contentRect.width);
}
});
ro.observe(sb);
</script>
</body>
</html>
Breakdown: Observe the sidebar element’s content box; drag logic clamps width between min/max.
30) Custom Context Menu (Rename/Delete)

Build: Right-click a list item to open a custom menu at cursor; rename/delete actions.
Objectives: contextmenu event, absolute positioning, outside-click/escape close.
Steps: Right-click items → choose rename/delete → click elsewhere to close.
Code (save as exercise30_context_menu.html)
<!doctype html>
<html lang=”en”>
<head>
<meta charset=”utf-8″>
<title>Custom Context Menu</title>
<style>
body{font:16px/1.5 system-ui,sans-serif;padding:1.5rem;}
li{padding:.35rem .5rem;border:1px solid #eee;border-radius:.35rem;margin:.25rem 0;}
.menu{position:fixed;background:#fff;border:1px solid #ddd;border-radius:.5rem;box-shadow:0 6px 16px rgba(0,0,0,.08);display:none;min-width:160px;z-index:10;}
.menu button{display:block;width:100%;text-align:left;padding:.5rem .75rem;border:0;background:none;cursor:pointer;}
.menu button:hover{background:#f5f5f5;}
</style>
</head>
<body>
<h1>JS DOM Exercise 30 — Context Menu</h1>
<ul id=”list”>
<li>Document A</li>
<li>Document B</li>
<li>Document C</li>
<li>Document D</li>
</ul>
<div class=”menu” id=”menu” role=”menu”>
<button data-action=”rename”>Rename</button>
<button data-action=”delete”>Delete</button>
</div>
<script>
const list = document.getElementById(‘list’);
const menu = document.getElementById(‘menu’);
let targetItem = null;
list.addEventListener(‘contextmenu’, (e) => {
const li = e.target.closest(‘li’); if(!li) return;
e.preventDefault();
targetItem = li;
menu.style.left = e.clientX + ‘px’;
menu.style.top = e.clientY + ‘px’;
menu.style.display = ‘block’;
});
document.addEventListener(‘click’, (e) => {
if (!menu.contains(e.target)) menu.style.display = ‘none’;
});
document.addEventListener(‘keydown’, (e) => {
if (e.key === ‘Escape’) menu.style.display=’none’;
});
menu.addEventListener(‘click’, (e) => {
const btn = e.target.closest(‘button’); if(!btn) return;
const action = btn.dataset.action;
if (action === ‘rename’ && targetItem){
const name = prompt(‘New name:’, targetItem.textContent);
if (name) targetItem.textContent = name;
} else if (action === ‘delete’ && targetItem){
targetItem.remove();
}
menu.style.display = ‘none’;
});
</script>
</body>
</html>
Breakdown: Suppress the default menu; position our menu at clientX/Y; close on click outside or Esc.