
How to Think Like a Web Developer, Build Better Websites, and Turn Coding Knowledge Into Practical Skills
Learn to Code: Tips & Lessons | By Laurence Lars Svekis
You’ve learned some HTML. You understand a little CSS. You’ve written a few lines of JavaScript.
But here’s the question:
Can you put everything together and build a working website from scratch?
For many people learning web development, that’s where the real challenge begins.
You might understand HTML tags, CSS properties, and JavaScript functions individually. But when you’re faced with an empty code editor and asked to build something useful, suddenly everything becomes more complicated.
Where do you start?
How should you structure the page?
Why isn’t your CSS working?
How do you make the page interactive?
And how do you know whether what you’ve built is actually good?
After more than 20 years of teaching web development, I’ve seen this challenge repeatedly.
Learning individual technologies is important. Learning how they work together is what makes you a web developer.
In this issue, I’ll walk you through practical techniques for building better websites, explain some common mistakes, and share a learning approach you can start using today.
I’ll also introduce my free Web Developer Mastery Lab, featuring 50 interactive workshops designed to help you put these skills into practice.
🔗 https://discoveryvip.com/web-developer-mastery-lab/#studio
1. The Three Technologies Every Front-End Developer Needs to Understand
Modern websites are built using three foundational technologies.
Understanding the role of each one is essential.
HTML: The Structure
HTML defines what exists on a webpage.
Headings, paragraphs, buttons, forms, navigation menus, images, and other elements all begin with HTML.
Think of HTML as the structure of a building.
Without it, there’s nothing to organize or interact with.
Here’s a simple example:
<article class="product">
  <h2>JavaScript Course</h2>
  <p>Learn JavaScript by building projects.</p>
  <button type="button">Learn More</button>
</article>
This creates a product-style content section.
It has a heading, description, and button.
But there’s no custom visual styling or interaction yet.
CSS: The Presentation
CSS controls how the HTML looks.
It defines colors, spacing, typography, layout, borders, and responsive behavior.
Let’s style our example:
.product {
  max-width: 400px;
  padding: 24px;
  background: #f8fafc;
  border: 1px solid #e2e8f0;
  border-radius: 12px;
  font-family: Arial, sans-serif;
}

.product h2 {
  color: #1e3a8a;
}

.product button {
  padding: 12px 20px;
  background: #2563eb;
  color: white;
  border: none;
  border-radius: 6px;
  cursor: pointer;
}

.product button:hover {
  background: #1d4ed8;
}

.product button:focus-visible {
  outline: 3px solid #f59e0b;
  outline-offset: 3px;
}
Now the content looks more like a modern website component.
Notice that we haven’t changed the HTML content.
We’ve changed only its presentation.
This separation makes websites easier to maintain and improve.
JavaScript: The Behavior
JavaScript allows the page to respond to user actions.
Let’s make the button do something.
Add an identifier to the existing button:
<button id="learnBtn" type="button">
  Learn More
</button>
Then add JavaScript:
const button = document.querySelector("#learnBtn");

button.addEventListener("click", () => {
  alert("Let's start learning JavaScript!");
});
When the user clicks the button, JavaScript responds.
We’ve now combined all three technologies:
- HTML creates the content.
- CSS styles the content.
- JavaScript adds interaction.
This is the foundation of front-end web development.
The real power comes from combining these technologies to create complete user experiences.
2. Stop Thinking About Pages. Start Thinking About Components.
One of the most useful habits you can develop as a web developer is breaking large interfaces into smaller components.
Imagine building a complete website.
You might need a header, navigation, hero section, feature cards, contact form, and footer.
Trying to build everything at once can feel overwhelming.
Instead, think of each section as a smaller problem.
For example, a feature card might contain:
- An icon or image.
- A heading.
- A short description.
- A link or action button.
Once you’ve built one card, you can reuse its structure.
Example: Reusable Feature Cards
<section class="features">
  <article class="feature-card">
    <h3>Learn HTML</h3>
    <p>Build meaningful page structures.</p>
  </article>

  <article class="feature-card">
    <h3>Learn CSS</h3>
    <p>Create attractive, responsive layouts.</p>
  </article>

  <article class="feature-card">
    <h3>Learn JavaScript</h3>
    <p>Add interactive functionality.</p>
  </article>
</section>
Now use CSS Grid:
.features {
  display: grid;
  grid-template-columns:
    repeat(auto-fit, minmax(min(100%, 250px), 1fr));
  gap: 20px;
}

.feature-card {
  padding: 24px;
  border: 1px solid #ddd;
  border-radius: 10px;
  background: white;
}
The result is a flexible layout that automatically adjusts the number of columns based on the available space.
Why this matters
Component-based thinking helps you:
- Build interfaces more efficiently.
- Reuse consistent designs.
- Find and fix problems faster.
- Make layouts easier to maintain.
- Prepare for frameworks such as React and Vue.
You don’t need a JavaScript framework to start thinking in components.
Good web development begins with organizing your work into manageable pieces.
3. Responsive Design: Build for Screens, Not Just Your Monitor
One of the most common beginner mistakes is creating a website that looks great on a desktop but breaks on a mobile phone.
Modern websites need to adapt to different screen sizes.
This is called responsive web design.
Start with flexible layouts
Instead of giving every element a fixed width, use flexible dimensions.
For example:
.container {
  width: min(90%, 1100px);
  margin-inline: auto;
}
This creates a container that uses up to 90% of the available width, but never becomes wider than 1100 pixels.
Use media queries when necessary
.page-layout {
  display: grid;
  grid-template-columns: 2fr 1fr;
  gap: 24px;
}

@media (max-width: 768px) {
  .page-layout {
    grid-template-columns: 1fr;
  }
}
On larger screens, the layout displays two columns.
On smaller screens, the columns stack vertically.
Three responsive design habits
1. Avoid unnecessary fixed widths.
Use flexible sizing where possible.
2. Test at multiple viewport sizes.
Don’t assume a page works on mobile simply because it looks good on desktop.
3. Check the content, not just the layout.
Buttons should remain usable, text should remain readable, and navigation should be easy to operate.
A responsive website isn’t simply a desktop design made smaller.
It’s an interface that works across different devices and screen sizes.
4. JavaScript Events: Make Your Website Respond to Users
Once you’ve built and styled your page, JavaScript brings it to life.
One of the most important concepts to understand is event handling.
An event is something that happens in the browser.
Examples include clicking a button, typing into a form, changing a selection, or submitting information.
Let’s build a simple interactive counter.
HTML
<div class="counter">
  <h2>Interactive Counter</h2>
  <p id="count">0</p>
  <button id="increase" type="button">
    Increase
  </button>
  <button id="reset" type="button">
    Reset
  </button>
</div>
JavaScript
let count = 0;

const display = document.querySelector("#count");

document.querySelector("#increase")
  .addEventListener("click", () => {
    count++;
    display.textContent = count;
  });

document.querySelector("#reset")
  .addEventListener("click", () => {
    count = 0;
    display.textContent = count;
  });
What’s happening?
We create a variable called count to store the current value.
We select the paragraph that displays the count.
We attach event listeners to the buttons.
When a button is clicked, JavaScript updates the value and changes the page.
This is a simple example of manipulating the Document Object Model, commonly called the DOM.
Your challenge
Can you extend the counter to include:
- A Decrease button.
- A rule that prevents the count from going below zero.
- A message when the count reaches 10.
- A color change when the count is greater than five.
These small improvements help you practice variables, conditions, events, and DOM manipulation together.
And that’s how real programming skills develop.
5. Accessibility: A Skill Every Web Developer Should Learn Early
A website that looks good isn’t necessarily a website that works well for everyone.
Accessibility means designing and developing interfaces that people with different abilities and assistive technologies can use.
It’s not something you should only consider after finishing a website.
It should be part of your development process.
Example: Use semantic HTML
Instead of creating every section with generic <div> elements, use meaningful HTML elements.
<header>
  <h1>Learn Web Development</h1>
</header>

<nav aria-label="Main navigation">
  <a href="#lessons">Lessons</a>
  <a href="#projects">Projects</a>
</nav>

<main>
  <section id="lessons">
    <h2>Available Lessons</h2>
    <p>Start learning today.</p>
  </section>
</main>

<footer>
  <p>Web Development Learning Resources</p>
</footer>
Elements such as header, nav, main, and footer communicate the structure of your page.
This helps assistive technologies understand the document.
Four accessibility habits worth developing
Use meaningful headings. Organize content using a logical heading structure.
Label form fields. Make it clear what information users need to enter.
Support keyboard navigation. Interactive elements should work without requiring a mouse.
Maintain readable contrast. Text should be easy to distinguish from its background.
Accessibility also improves your ability to think about how people actually use your website.
Good development isn’t just about making something work. It’s about making something usable.
6. Debugging: Learn to Find Problems Instead of Guessing
Every developer encounters bugs.
The difference between struggling with bugs and solving them efficiently often comes down to having a systematic approach.
Consider this JavaScript:
const button = document.querySelector("#submit");

button.addEventListener("click", () => {
  console.log("Submitted!");
});
What happens if there’s no element with the ID submit?
querySelector() returns null.
Attempting to call addEventListener() on null produces an error.
A more defensive approach is:
const button = document.querySelector("#submit");

if (button) {
  button.addEventListener("click", () => {
    console.log("Submitted!");
  });
}
But the important skill is understanding why the original code failed.
My five-step debugging approach
Step 1: Reproduce the problem.
Identify exactly what causes the error.
Step 2: Read the error message.
Browser developer tools often tell you which operation failed and where.
Step 3: Inspect your assumptions.
Does the element exist? Is the variable defined? Is the input valid?
Step 4: Test one change at a time.
Avoid changing multiple unrelated things simultaneously.
Step 5: Verify the fix.
Test the original problem and check that your change hasn’t introduced another issue.
Debugging is not a separate activity from programming.
It’s a fundamental part of programming.
7. Learn to Review Your Work Like a Professional Developer
Finishing a webpage doesn’t mean the work is complete.
Before publishing, you should review what you’ve built.
Here’s a practical checklist you can use with almost any front-end project.
Structure
- Does the HTML use meaningful elements?
- Are headings organized logically?
- Are buttons and links used appropriately?
Visual design
- Is spacing consistent?
- Is text easy to read?
- Does the design work at different screen sizes?
Functionality
- Do buttons and forms behave as expected?
- Are JavaScript errors handled?
- Have you tested unusual inputs?
Accessibility
- Can the page be navigated with a keyboard?
- Do form controls have labels?
- Is there sufficient color contrast?
- Are images given appropriate alternative text?
Quality
- Is the code reasonably organized?
- Are unnecessary elements or styles removed?
- Have you tested the page in more than one browser?
This checklist is a starting point, not a substitute for thorough accessibility, usability, or browser testing.
A good developer doesn’t just ask, “Does it work?”
They also ask, “Does it work reliably, clearly, and for the people who need to use it?”
8. Introducing the Free Web Developer Mastery Lab
Now that we’ve explored some practical web development concepts, how can you practice them?
That’s why I created the Web Developer Mastery Lab.
It’s a free browser-based learning environment designed to help you build real HTML, CSS, and JavaScript skills through hands-on exercises.
<text></text>
What’s inside?
50 interactive workshops across 10 chapters
Practice building and improving front-end page elements through structured challenges.
A built-in coding studio
Edit HTML, CSS, and JavaScript without installing a separate development environment.
Real browser previews
See how your code renders and experiment with different viewport widths.
Workshop checks
Run automated checks against your rendered page to see whether you’ve met specific exercise requirements.
Hints and reference solutions
Get help when you’re stuck and compare your approach with an example.
Design reflection and review
Record your decisions and use a self-review checklist to think beyond simply passing a test.
Save and download your work
Keep your drafts locally, download standalone practice pages, and export your learning progress.
The workshops are unlocked, so you can explore the topics that interest you without waiting to complete earlier lessons.
No account is required.
🔗 Start building with Web Developer Mastery Lab:
https://discoveryvip.com/web-developer-mastery-lab/#studio
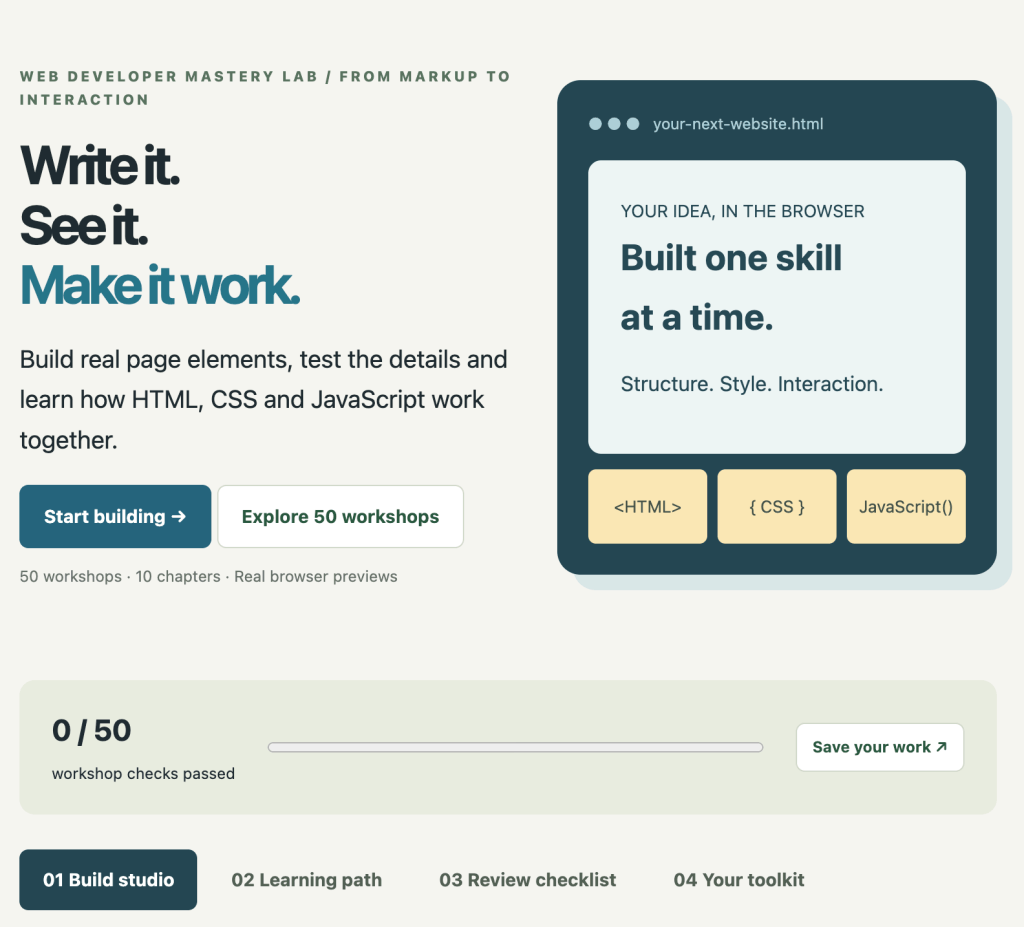
The lab is designed for front-end practice. Its automated checks don’t replace manual testing, and its isolated preview isn’t a full production hosting environment.
That’s intentional: the goal is to provide a place where you can experiment with foundational skills before moving on to larger projects.
9. A Seven-Day Challenge: Build Your First Complete Website
Here’s a practical learning challenge you can complete over seven days.
Instead of spending the week watching tutorials, build one small website and improve it every day.
| Day | Focus | Your task |
|---|---|---|
| Day 1 | HTML | Create a page with headings, navigation, and content |
| Day 2 | CSS | Add colors, spacing, and typography |
| Day 3 | Layout | Build a responsive card layout using Grid or Flexbox |
| Day 4 | JavaScript | Add an interactive feature |
| Day 5 | Forms | Create a form with basic validation |
| Day 6 | Accessibility | Improve keyboard usability and semantic structure |
| Day 7 | Testing | Debug, review, and polish your website |
Your final project
Create a small website about something you’re interested in.
It could be a personal portfolio, learning resource page, task manager, or product showcase.
Your website should include a responsive layout, multiple content sections, and at least one working JavaScript interaction.
The objective isn’t to create a perfect website.
It’s to complete the full process of turning an idea into something functional.
When you finish, ask yourself:
Could I build a similar project again without following the exact same instructions?
That’s a much more meaningful measure of learning than simply completing another tutorial.
10. How AI Can Help You Become a Better Web Developer
AI has changed how we approach programming.
You can now describe a webpage and have AI generate HTML, CSS, and JavaScript in seconds.
That’s incredibly useful.
But it also creates a learning challenge.
If AI builds everything for you, how do you develop the skills to understand, maintain, and improve what it creates?
My recommendation is to use AI as a guide, reviewer, and learning partner.
Try this prompt
AI Web Development Learning Coach
Act as an experienced web development instructor.
I’m learning HTML, CSS, and JavaScript.
Give me a small practical website-building challenge appropriate for my skill level.
Explain the requirements, but don’t generate the complete solution.
Ask me to describe how I plan to structure the HTML, style the page, and add JavaScript interactions.
After I share my code, review it for correctness, responsiveness, accessibility, and readability.
Provide hints and explanations before offering complete solutions.
Finally, suggest one improvement that will help me develop a new skill.
This approach supports active learning.
You’re still doing the thinking and coding, while AI helps you understand mistakes and explore improvements.
It’s also consistent with the principles behind my Vibe Learning framework, which emphasizes curiosity, experimentation, practice, feedback, and reflection.
Learn more:
11. Five Mistakes That Slow Down New Web Developers
Before wrapping up, here are five common mistakes worth avoiding.
Mistake #1: Learning only by watching
Watching tutorials can help you understand concepts, but you need hands-on practice to develop independent skills.
Mistake #2: Trying to learn everything at once
You don’t need to master every framework, library, or tool before building useful websites.
Start with HTML, CSS, and JavaScript fundamentals.
Mistake #3: Ignoring responsive design
A website that works only on your monitor is incomplete.
Test different screen sizes throughout development.
Mistake #4: Copying code without understanding it
Whether the code comes from a tutorial, a forum, or an AI assistant, take time to understand what it does and why.
Mistake #5: Avoiding debugging
Errors are opportunities to improve your understanding.
Learning how to investigate and resolve problems is one of the most valuable skills you can develop.
12. Keep Learning: Free Web Development Resources
If you want to continue developing your skills, here are several resources I’ve created to support your learning.
Web Developer Mastery Lab — 50 Interactive Workshops
Practice HTML, CSS, JavaScript, responsive design, and front-end development.
https://discoveryvip.com/web-developer-mastery-lab/#studio
JavaScript Mastery Lab — 50 Interactive Lessons
Develop stronger JavaScript problem-solving skills through guided coding exercises.
https://discoveryvip.com/javascript-mastery-lab/#studio
JavaScript Studio
Explore JavaScript examples and interactive coding resources.
https://discoveryvip.com/javascript-studio
DiscoveryVIP Learning Guides
Explore additional web development, programming, AI, and developer resources.
https://discoveryvip.com/guides.php
Vibe Learning
Discover a structured approach to learning with AI, practice, and reflection.
Final Thoughts: Don’t Just Learn to Code. Learn to Build.
Web development isn’t about memorizing every HTML element, CSS property, or JavaScript method.
It’s about understanding how to combine technologies to solve problems and create useful experiences.
The best way to develop that ability is to build things.
Start small.
Experiment.
Make mistakes.
Debug your code.
Improve your design.
Then build something slightly more challenging.
Over time, those small experiences develop into practical skills and confidence.
That’s what I want to encourage through my learning resources and the Web Developer Mastery Lab.
You don’t become a web developer by watching someone else build websites. You become one by building them yourself.
🚀 Ready to put your skills into practice?
Try the free Web Developer Mastery Lab:
https://discoveryvip.com/web-developer-mastery-lab/#studio
💬 Let’s Discuss: What’s the Hardest Part of Learning Web Development?
I’d love to hear from both beginners and experienced developers.
Which part of web development has been the most challenging for you?
🅰️ HTML — Structuring pages correctly
🅱️ CSS — Creating layouts and responsive designs
🅲️ JavaScript — Adding interactions and functionality
🅳️ Debugging — Understanding why something doesn’t work
🅴️ Putting everything together into a complete project
👇 Share your answer in the comments and tell us what helped you improve.
If you’re an experienced developer, what advice would you give someone building their first website today?
Your experience could help another learner overcome the exact challenge they’re facing.
About the Author
Laurence Lars Svekis is a web developer, online educator, bestselling author, and Google Developer Expert with more than 20 years of experience in web development and technology education.
His educational resources have reached more than one million students worldwide.
Through DiscoveryVIP and Vibe Learning, he develops practical programming tutorials, interactive learning tools, and AI-supported educational resources designed to help people develop useful technology skills.
Explore more resources:
Subscribe to Learn to Code: Tips & Lessons
https://www.linkedin.com/newsletters/learn-to-code-tips-lessons-6883954813151842304
#WebDevelopment #LearnToCode #HTML #CSS #JavaScript #FrontendDevelopment #WebDesign #CodingForBeginners #Programming #ResponsiveDesign #LearnWebDevelopment #DeveloperTools #VibeLearning #AIinEducation #DiscoveryVIP