
Learn how to create a browser game using JavaScript, HTML5 Canvas, animation loops, keyboard controls, gravity, jumping, collision detection, and game mechanics—with a free interactive learning guide where you can experiment with real code.
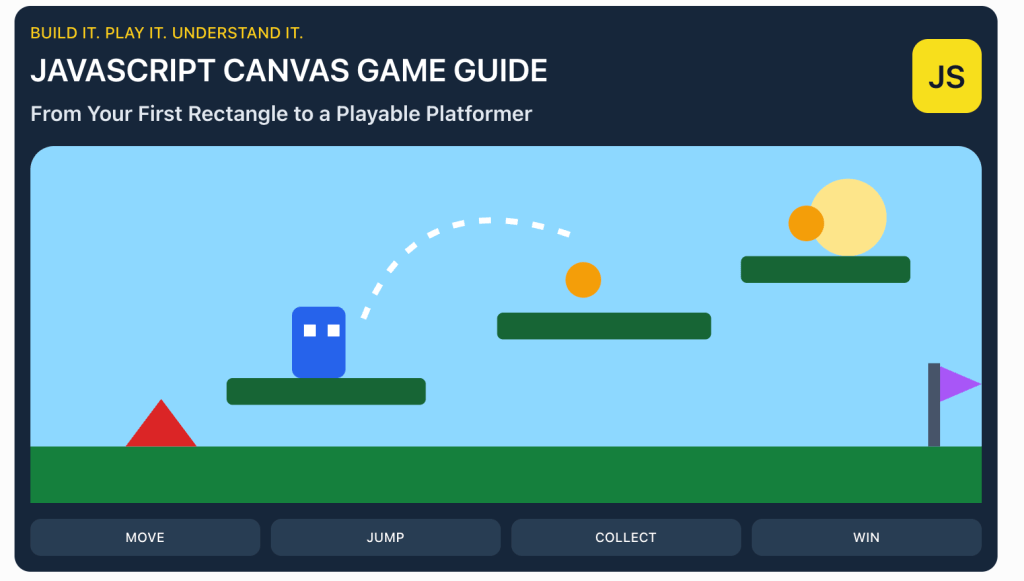
What If the Best Way to Learn JavaScript Was to Build a Game?
Imagine opening your browser and seeing a small rectangle on the screen.
You press the right arrow key.
It moves.
You press the spacebar.
It jumps.
A few lines of JavaScript later, your rectangle can land on platforms, collect objects, avoid obstacles, and reach a finish line.
You’ve just started building a video game.
But something more important is happening.
You’re learning how JavaScript works through a system you can see, control, test, and improve.
Every button press produces a result.
Every calculation affects the game.
Every bug becomes something you can investigate.
And every improvement creates an opportunity to understand programming more deeply.
This is why browser game development is one of my favorite ways to teach JavaScript.
Instead of learning programming concepts in isolation, you discover how they work together to create something interactive.
That’s also the idea behind my new free learning resource:
JavaScript Canvas Game Guide — Build a Canvas Platformer
The guide takes you through 12 lessons focused on transforming a simple rectangle into a playable platform game.
In this article, I’ll introduce the fundamental techniques behind that process and show you how to build a small working game from scratch.
By the end, you’ll understand the core systems used in many 2D browser games—and you’ll have a foundation for creating your own.
1. Why HTML5 Canvas Is Perfect for Learning Game Development
HTML5 Canvas is a browser feature that lets JavaScript draw graphics onto a rectangular area.
Unlike ordinary HTML elements, Canvas doesn’t automatically create buttons, headings, or interactive components.
Instead, you control what gets drawn.
You decide where objects appear.
You decide when they move.
You decide how they respond to user input.
And you decide what happens when objects interact.
That makes Canvas an excellent environment for learning the fundamentals of game programming.
Your first Canvas
Start with this HTML:
<!DOCTYPE html>
<html lang="en">
<head>
  <meta charset="UTF-8">
  <title>My First Canvas Game</title>
</head>
<body>

  <canvas
    id="game"
    width="640"
    height="320"
    style="border: 2px solid #333"
  ></canvas>

  <script src="game.js"></script>

</body>
</html>
The <canvas> element creates a drawing surface measuring 640 by 320 pixels.
Now add JavaScript:
const canvas = document.querySelector("#game");
const ctx = canvas.getContext("2d");

ctx.fillStyle = "#2563eb";

ctx.fillRect(50, 100, 40, 40);
You should see a blue rectangle.
That’s your first game object.
The method fillRect() accepts four values:
ctx.fillRect(x, y, width, height);The first two specify the position.
The next two specify the dimensions.
Understanding the coordinate system
Canvas coordinates begin in the upper-left corner.
x = 0is the left edge.y = 0is the top edge.- Increasing
xmoves right. - Increasing
ymoves down.
That final detail is particularly important.
In many mathematical diagrams, increasing Y means moving upward.
On Canvas, increasing Y means moving downward.
We’ll use that behavior when implementing gravity.
Try this
Change the rectangle’s position, size, and color.
Then draw three rectangles at different positions.
Try creating a simple scene containing a player, ground, and obstacle.
You’re already working with coordinates, dimensions, and visual state.
2. From Static Drawing to Animation
A rectangle that appears on the screen is a drawing.
A rectangle that changes position over time is an animation.
Let’s give our player a position and velocity.
const player = {
  x: 50,
  y: 100,
  width: 32,
  height: 32,
  vx: 2
};
Here:
xandyrepresent position.widthandheightrepresent size.vxrepresents horizontal velocity.
Now update the position:
player.x += player.vx;Each time that statement runs, the player’s horizontal position increases by two pixels.
But how do we make it run continuously?
We need a game loop.
Your first animation loop
const canvas = document.querySelector("#game");
const ctx = canvas.getContext("2d");

const player = {
  x: 50,
  y: 100,
  width: 32,
  height: 32,
  vx: 2
};

function update() {
  player.x += player.vx;
}

function draw() {
  ctx.clearRect(
    0,
    0,
    canvas.width,
    canvas.height
  );

  ctx.fillStyle = "#2563eb";

  ctx.fillRect(
    player.x,
    player.y,
    player.width,
    player.height
  );
}

function gameLoop() {
  update();
  draw();

  requestAnimationFrame(gameLoop);
}

requestAnimationFrame(gameLoop);
The browser’s requestAnimationFrame() method schedules a callback before a future repaint.
Each time the loop runs, we:
- Update the player’s position.
- Clear the previous drawing.
- Draw the player at the new position.
- Schedule another frame.
The result is movement.
An important engineering detail
This first example moves the player by two pixels per frame.
That means movement speed depends on how frequently frames are rendered.
A more robust game uses elapsed time to calculate movement.
We’ll explore that shortly.
3. The Three Core Functions Behind a Game
One of the most useful ways to organize a JavaScript game is to separate three responsibilities:
RESET → UPDATE → DRAW
This is also the core programming contract explained in the JavaScript Canvas Game Guide.
reset(): Create the initial game state
function reset() {
  return {
    player: {
      x: 50,
      y: 100,
      vx: 0,
      vy: 0
    },
    score: 0,
    finished: false
  };
}
The function creates a fresh starting state.
This makes it easier to restart the game and reproduce problems.
update(): Apply the game rules
function update(game, input, dt) {
  game.player.x += game.player.vx * dt;
  game.player.y += game.player.vy * dt;
}
The update() function advances the game simulation.
It can handle movement, gravity, collision detection, scoring, and game conditions.
draw(): Render the current state
function draw(ctx, game) {
  ctx.fillStyle = "#2563eb";

  ctx.fillRect(
    game.player.x,
    game.player.y,
    32,
    32
  );
}
The draw() function turns the current game state into graphics.
It shouldn’t be responsible for changing the physics.
Why separate these functions?
Imagine your game has a bug.
The player appears in the wrong location.
If movement calculations and drawing instructions are mixed together, debugging becomes harder.
When they’re separated, you can ask two distinct questions:
Is the game state wrong, or is the game drawing the state incorrectly?
This separation also makes game rules easier to test independently.
The DiscoveryVIP guide provides the Canvas, keyboard adapter, and timing loop in its preview and exported game. Your editable JavaScript supplies the game state, rules, and drawing behavior.
That lets you focus on one mechanic at a time.
4. Keyboard Controls: Turn Input into Movement
A game becomes interactive when it responds to the player.
For a platformer, we usually want left, right, and jump controls.
First, track which keys are pressed.
const keys = new Set();

window.addEventListener("keydown", event => {
  keys.add(event.code);
});

window.addEventListener("keyup", event => {
  keys.delete(event.code);
});
A Set is useful because it stores unique values and supports efficient membership checks.
Now translate keyboard input into movement:
function updatePlayer(player, dt) {
  const speed = 180;

  if (keys.has("ArrowLeft")) {
    player.x -= speed * dt;
  }

  if (keys.has("ArrowRight")) {
    player.x += speed * dt;
  }
}
Here, speed is measured in pixels per second.
And dt is the amount of simulation time being advanced, measured in seconds.
For example, if:
speed = 180;
dt = 1 / 60;
Then the player moves:
180 * (1 / 60) = 3;Three pixels during that simulation step.
Prevent the browser from scrolling
Arrow keys and the spacebar can also control browser scrolling.
For game controls, prevent their default behavior when appropriate.
window.addEventListener("keydown", event => {
  if (
    event.code === "ArrowLeft" ||
    event.code === "ArrowRight" ||
    event.code === "Space"
  ) {
    event.preventDefault();
  }

  keys.add(event.code);
});
Practice challenge
Add support for:
- A and D for horizontal movement.
- The spacebar for jumping.
- R for restarting.
Then add a small instruction label above your Canvas.
This introduces event handling, conditions, and state management in a practical context.
5. Gravity: Make the Player Fall
Now let’s introduce physics.
We don’t need a full physics engine to create a basic platformer.
We can start with vertical velocity and gravity.
const player = {
  x: 50,
  y: 50,
  width: 32,
  height: 32,
  vy: 0
};

const gravity = 900;
The gravity value represents acceleration in pixels per second squared.
During each simulation step:
player.vy += gravity * dt;
player.y += player.vy * dt;
The first line increases downward velocity.
The second updates the player’s vertical position.
Because Canvas Y coordinates increase downward, positive vertical velocity makes the player fall.
Add a floor
Suppose the floor begins at Y coordinate 280.
We can prevent the player from falling through it.
const floorY = 280;

if (player.y + player.height > floorY) {
  player.y = floorY - player.height;
  player.vy = 0;
}
The expression:
player.y + player.heightcalculates the player’s bottom edge.
When that edge passes the floor, we move the player back to the surface and stop downward movement.
Predict before running
What happens if gravity increases from 900 to 1800?
What happens if gravity is set to zero?
What happens if the player starts below the floor?
Predict the result before experimenting.
This is a useful learning habit: make a prediction, run the code, observe the result, and explain the difference.
6. Jumping: A Small Change That Creates a Game Mechanic
Jumping is simply an upward velocity applied to the player.
Remember that negative Y movement goes upward.
So a jump might begin with:
player.vy = -380;Gravity then gradually reduces the upward movement.
Eventually, vertical velocity becomes positive and the player begins falling.
Add a grounded state
We usually want to prevent unlimited jumping in midair.
const player = {
  x: 50,
  y: 100,
  width: 32,
  height: 32,
  vy: 0,
  grounded: false
};
Then:
if (
  keys.has("Space") &&
  player.grounded
) {
  player.vy = -380;
  player.grounded = false;
}
When the player lands, set grounded back to true.
This introduces an important programming concept:
A game mechanic is often a rule governing when state is allowed to change.
Jumping isn’t just changing the Y coordinate.
It’s checking whether a jump is permitted, applying velocity, and allowing the physics system to handle the result.
Challenge: Change the feel of the jump
Experiment with different values.
| Gravity | Jump velocity | Expected feel |
|---|---|---|
| 900 | -380 | Moderate jump |
| 1400 | -380 | Shorter, faster jump |
| 700 | -450 | Higher, floatier jump |
These are starting points for experimentation, not universal settings.
The combination of gravity and jump velocity determines the approximate jump height and duration.
Try adjusting both until the movement feels right.
7. Collision Detection: How Does the Game Know Something Was Hit?
Collision detection is one of the most important concepts in game development.
Without it, players could pass through walls, platforms, obstacles, and collectibles.
A simple approach uses axis-aligned bounding boxes.
That means we represent objects as rectangles that aren’t rotated.
Consider two objects:
const player = {
  x: 50,
  y: 100,
  width: 32,
  height: 32
};

const obstacle = {
  x: 75,
  y: 110,
  width: 40,
  height: 40
};
Do they overlap?
Rectangle collision function
function overlaps(a, b) {
  return (
    a.x < b.x + b.width &&
    a.x + a.width > b.x &&
    a.y < b.y + b.height &&
    a.y + a.height > b.y
  );
}
The function checks whether the rectangles overlap horizontally and vertically.
If all four conditions are true, a collision exists.
Try it
console.log(
  overlaps(player, obstacle)
);
Expected result:
trueNow move the obstacle farther away.
obstacle.x = 200;Test again.
Expected result:
falseCollision detection versus collision response
These are two different problems.
Detection: Did the objects overlap?
Response: What should happen because they overlapped?
For a collectible, the response might be increasing the score.
For a hazard, it might be restarting the player.
For a platform, it might be stopping downward movement.
Separating detection from response makes your game logic easier to maintain.
8. Platforms: Turn an Empty Screen into a Level
A platformer needs surfaces the player can stand on.
Let’s represent platforms as an array.
const platforms = [
  { x: 0, y: 280, width: 640, height: 40 },
  { x: 140, y: 220, width: 100, height: 15 },
  { x: 310, y: 170, width: 110, height: 15 },
  { x: 490, y: 120, width: 100, height: 15 }
];
Each platform has a position and dimensions.
Now draw them:
function drawPlatforms(ctx, platforms) {
  ctx.fillStyle = "#16a34a";

  for (const platform of platforms) {
    ctx.fillRect(
      platform.x,
      platform.y,
      platform.width,
      platform.height
    );
  }
}
This introduces arrays, objects, loops, and reusable functions.
Landing on platforms
A basic landing check compares the player’s previous bottom position with the platform’s top.
function canLand(player, platform, previousY) {
  const previousBottom =
    previousY + player.height;

  const currentBottom =
    player.y + player.height;

  const horizontalOverlap =
    player.x < platform.x + platform.width &&
    player.x + player.width > platform.x;

  return (
    player.vy >= 0 &&
    horizontalOverlap &&
    previousBottom <= platform.y &&
    currentBottom >= platform.y
  );
}
This checks whether the player crossed the platform’s top while moving downward.
When the condition is true:
player.y = platform.y - player.height;
player.vy = 0;
player.grounded = true;
For a simple learning project, this creates usable landing behavior.
More advanced games may need separate horizontal collision resolution, continuous collision detection, and techniques for handling fast-moving objects.
Design challenge
Create three platforms with different heights.
Can you make a path the player can jump across?
What happens if one platform is too high?
What happens if the gap between platforms is too wide?
You’re now experimenting with level design as well as JavaScript.
9. Collectibles, Hazards, and Goals: Give the Player a Reason to Play
Movement alone can be interesting.
But a game becomes more engaging when players have objectives.
Three common mechanics are:
Collectibles: Objects the player should pick up.
Hazards: Objects the player should avoid.
Goals: Conditions that complete the level.
Add collectibles
const coins = [
  { x: 180, y: 190, width: 14, height: 14 },
  { x: 350, y: 140, width: 14, height: 14 }
];
Detect collection:
for (let i = coins.length - 1; i >= 0; i--) {
  if (overlaps(player, coins[i])) {
    coins.splice(i, 1);
    score += 1;
  }
}
We loop backward because we’re removing elements from the array.
This prevents index shifts from causing elements to be skipped.
Add hazards
const hazards = [
  { x: 250, y: 260, width: 35, height: 20 }
];
Check whether the player touches a hazard:
for (const hazard of hazards) {
  if (overlaps(player, hazard)) {
    console.log("Player hit a hazard!");
  }
}
The response could reduce health, restart the level, or trigger a game-over state.
Add a finish area
const goal = {
  x: 580,
  y: 240,
  width: 30,
  height: 40
};
Then:
if (overlaps(player, goal)) {
  gameWon = true;
}
You now have the basic ingredients of a platform game.
Movement.
Jumping.
Platforms.
Collectibles.
Hazards.
A finish condition.
And an opportunity to add increasingly interesting rules.
10. Build a Complete Mini Platformer
Let’s combine the concepts into a playable example.
This game includes:
- Left and right movement.
- Jumping.
- Gravity.
- Platforms.
- Collectible coins.
- A hazard.
- A finish goal.
- A score.
- Restart controls.
It uses only HTML, CSS, and JavaScript.
Create a file named index.html and paste in the following code.
Complete working example
<!DOCTYPE html>
<html lang="en">
<head>
<meta charset="UTF-8">
<meta name="viewport"
      content="width=device-width, initial-scale=1">
<title>JavaScript Canvas Platformer</title>

<style>
  body {
    font-family: system-ui, sans-serif;
    background: #111827;
    color: white;
    text-align: center;
    margin: 0;
    padding: 24px;
  }

  canvas {
    background: #dbeafe;
    border: 3px solid #60a5fa;
    max-width: 100%;
  }

  p {
    color: #cbd5e1;
  }
</style>
</head>

<body>

<h1>JavaScript Canvas Platformer</h1>

<p>
  Move: ← → or A/D |
  Jump: Space or ↑ |
  Restart: R
</p>

<canvas
  id="game"
  width="640"
  height="320"
></canvas>

<script>
const canvas = document.querySelector("#game");
const ctx = canvas.getContext("2d");

const keys = new Set();

const WIDTH = canvas.width;
const HEIGHT = canvas.height;

const GRAVITY = 900;
const SPEED = 180;
const JUMP = -380;

const platforms = [
  { x: 0, y: 280, width: 640, height: 40 },
  { x: 140, y: 220, width: 100, height: 15 },
  { x: 310, y: 170, width: 110, height: 15 },
  { x: 490, y: 120, width: 100, height: 15 }
];

const hazard = {
  x: 255,
  y: 260,
  width: 40,
  height: 20
};

const goal = {
  x: 580,
  y: 240,
  width: 30,
  height: 40
};

let game;

function reset() {
  game = {
    player: {
      x: 40,
      y: 248,
      width: 26,
      height: 32,
      vy: 0,
      grounded: true
    },
    coins: [
      { x: 180, y: 195, width: 14, height: 14 },
      { x: 355, y: 145, width: 14, height: 14 },
      { x: 530, y: 95, width: 14, height: 14 }
    ],
    score: 0,
    won: false
  };
}

function overlaps(a, b) {
  return (
    a.x < b.x + b.width &&
    a.x + a.width > b.x &&
    a.y < b.y + b.height &&
    a.y + a.height > b.y
  );
}

window.addEventListener("keydown", event => {
  if (
    ["ArrowLeft", "ArrowRight",
     "ArrowUp", "Space"].includes(event.code)
  ) {
    event.preventDefault();
  }

  if (event.code === "KeyR") {
    reset();
  }

  if (
    !event.repeat &&
    !game.won &&
    game.player.grounded &&
    (event.code === "Space" ||
     event.code === "ArrowUp" ||
     event.code === "KeyW")
  ) {
    game.player.vy = JUMP;
    game.player.grounded = false;
  }

  keys.add(event.code);
});

window.addEventListener("keyup", event => {
  keys.delete(event.code);
});

window.addEventListener("blur", () => {
  keys.clear();
});

function update(dt) {
  if (game.won) return;

  const p = game.player;

  let direction = 0;

  if (
    keys.has("ArrowLeft") ||
    keys.has("KeyA")
  ) {
    direction -= 1;
  }

  if (
    keys.has("ArrowRight") ||
    keys.has("KeyD")
  ) {
    direction += 1;
  }

  p.x += direction * SPEED * dt;

  p.x = Math.max(
    0,
    Math.min(WIDTH - p.width, p.x)
  );

  const previousY = p.y;

  p.vy += GRAVITY * dt;
  p.y += p.vy * dt;
  p.grounded = false;

  for (const platform of platforms) {
    const previousBottom =
      previousY + p.height;

    const currentBottom =
      p.y + p.height;

    const horizontalOverlap =
      p.x < platform.x + platform.width &&
      p.x + p.width > platform.x;

    if (
      p.vy >= 0 &&
      horizontalOverlap &&
      previousBottom <= platform.y &&
      currentBottom >= platform.y
    ) {
      p.y = platform.y - p.height;
      p.vy = 0;
      p.grounded = true;
    }
  }

  for (let i = game.coins.length - 1; i >= 0; i--) {
    if (overlaps(p, game.coins[i])) {
      game.coins.splice(i, 1);
      game.score++;
    }
  }

  if (overlaps(p, hazard) || p.y > HEIGHT) {
    reset();
    return;
  }

  if (overlaps(p, goal)) {
    game.won = true;
  }
}

function draw() {
  ctx.clearRect(0, 0, WIDTH, HEIGHT);

  // Background
  ctx.fillStyle = "#dbeafe";
  ctx.fillRect(0, 0, WIDTH, HEIGHT);

  // Platforms
  ctx.fillStyle = "#16a34a";

  for (const platform of platforms) {
    ctx.fillRect(
      platform.x,
      platform.y,
      platform.width,
      platform.height
    );
  }

  // Coins
  ctx.fillStyle = "#f59e0b";

  for (const coin of game.coins) {
    ctx.beginPath();

    ctx.arc(
      coin.x + coin.width / 2,
      coin.y + coin.height / 2,
      coin.width / 2,
      0,
      Math.PI * 2
    );

    ctx.fill();
  }

  // Hazard
  ctx.fillStyle = "#dc2626";

  ctx.fillRect(
    hazard.x,
    hazard.y,
    hazard.width,
    hazard.height
  );

  // Goal
  ctx.fillStyle = "#7c3aed";

  ctx.fillRect(
    goal.x,
    goal.y,
    goal.width,
    goal.height
  );

  // Player
  ctx.fillStyle = "#2563eb";

  ctx.fillRect(
    game.player.x,
    game.player.y,
    game.player.width,
    game.player.height
  );

  // Score
  ctx.fillStyle = "#111827";
  ctx.font = "18px system-ui";
  ctx.fillText(
    `Coins: ${game.score}`,
    16,
    28
  );

  if (game.won) {
    ctx.fillStyle = "#111827";
    ctx.font = "bold 32px system-ui";
    ctx.fillText(
      "You Win!",
      245,
      75
    );
  }
}

let lastTime = 0;
let accumulator = 0;

const STEP = 1 / 60;

function loop(timestamp) {
  if (!lastTime) lastTime = timestamp;

  const elapsed = Math.min(
    (timestamp - lastTime) / 1000,
    0.05
  );

  lastTime = timestamp;
  accumulator += elapsed;

  while (accumulator >= STEP) {
    update(STEP);
    accumulator -= STEP;
  }

  draw();
  requestAnimationFrame(loop);
}

reset();
requestAnimationFrame(loop);
</script>

</body>
</html>
Open the file in a browser and try playing.
Move the blue rectangle using the arrow keys.
Jump onto platforms.
Collect the yellow coins.
Avoid the red hazard.
Reach the purple finish area.
Press R to restart.
What did we just build?
This small project combines several important JavaScript concepts:
| JavaScript concept | Game application |
|---|---|
| Variables and constants | Speed, gravity, dimensions |
| Objects | Player, platforms, hazards |
| Arrays | Platforms and collectibles |
| Functions | Game updates and rendering |
| Conditions | Jumping and collision rules |
| Loops | Updating and drawing objects |
| Events | Keyboard controls |
| State management | Score, player position, win condition |
| Animation | Continuous game loop |
| Mathematics | Velocity, gravity, collision geometry |
That’s what makes game development such a useful learning environment.
You’re not just reading about these concepts.
You’re seeing them work together.
11. Why a Fixed-Time-Step Game Loop Matters
You may have noticed that the complete game uses a slightly more advanced animation loop.
It doesn’t simply call update() once per rendered frame.
Instead, it uses a fixed simulation step.
const STEP = 1 / 60;This represents approximately 16.67 milliseconds of simulation time.
The loop accumulates elapsed time and advances the game in fixed increments.
Why?
Because different devices may render at different refresh rates.
A game running at 144 frames per second shouldn’t automatically move characters faster than one running at 60 frames per second.
Separating simulation updates from rendering helps produce more consistent physics.
The example also limits how much elapsed time can be accumulated after a pause.
This prevents the simulation from trying to catch up with a very large number of updates at once.
An engineering tradeoff
The simple example prioritizes understandability.
A larger game might add interpolation between simulation states, more sophisticated collision handling, and explicit pause behavior.
Those improvements become relevant as your project grows.
The important lesson is to understand why the loop works—not just copy it.
12. Debugging Game Physics: Make Invisible Values Visible
One of the most challenging parts of game development is debugging movement.
The player may fall through a platform.
A jump may feel inconsistent.
An object may appear to collide before touching another object.
A player may become stuck inside a surface.
These problems are easier to investigate when you inspect the underlying state.
Add a debug overlay
Inside your drawing function:
ctx.fillStyle = "#111827";
ctx.font = "14px monospace";

ctx.fillText(
  `X: ${game.player.x.toFixed(1)}`,
  16,
  55
);

ctx.fillText(
  `Y: ${game.player.y.toFixed(1)}`,
  16,
  73
);

ctx.fillText(
  `VY: ${game.player.vy.toFixed(1)}`,
  16,
  91
);
Now you can observe position and velocity while the game runs.
A useful debugging method
Suppose the player falls through a platform.
Don’t immediately rewrite the collision system.
Instead:
- Record the expected landing position.
- Inspect the player’s previous and current Y coordinates.
- Check the platform’s top position.
- Verify horizontal overlap.
- Check whether the player was moving downward.
- Identify the first condition that failed.
- Make one small correction and test again.
This approach is much more effective than changing several values randomly.
Using AI as a debugging partner
The Canvas Game Guide includes editable AI-assistant prompts and a debugging follow-up prompt.
A useful approach is to provide your code and observed behavior, then ask for one focused change.
For example:
I'm building a JavaScript Canvas platformer.

Problem:
The player sometimes falls through a platform.

Expected:
The player should land on the platform
when falling onto its top surface.

Actual:
The player passes through under certain conditions.

Relevant code:
[PASTE CODE]

Observed state:
[PASTE POSITION AND VELOCITY VALUES]

Please:
1. Identify the first incorrect assumption.
2. Explain why the problem occurs.
3. Suggest one minimal patch.
4. Provide a regression test.
5. Keep unrelated game mechanics unchanged.
This makes AI assistance more useful because it encourages investigation rather than unnecessary rewriting.
13. Learn Through Predictions, Not Just Copying Code
One of the most valuable features of the JavaScript Canvas Game Guide is its emphasis on predicting behavior before running code.
That learning technique deserves attention.
When you copy code and run it, you may recognize what happened without understanding why.
When you predict the result first, you create an opportunity to test your mental model.
Example: Predict the jump
Consider:
player.vy = -400;
gravity = 900;
Before running the game, ask:
Will the player initially move upward or downward?
Will the upward movement speed increase or decrease?
What happens when vertical velocity reaches zero?
What happens immediately afterward?
These questions force you to connect the code to the behavior.
The learning cycle
PREDICT → RUN → OBSERVE → EXPLAIN → MODIFY → RETEST
You can use this cycle throughout game development.
Try changing only one variable at a time.
For example:
- Increase player speed.
- Reduce gravity.
- Move a platform.
- Change a collision boundary.
- Increase the player’s width.
Predict what will happen.
Then run the game and compare.
This approach develops reasoning skills that transfer well beyond Canvas games.
14. Five Challenges to Improve Your Platformer
Once your basic game works, the next step is to make it your own.
Here are five challenges that gradually increase in complexity.
Challenge 1: Add a Double Jump
Allow the player to jump once from the ground and once while airborne.
You’ll need to track how many jumps remain.
Think about when that counter should reset.
Concepts: State, conditions, input handling.
Challenge 2: Create Moving Platforms
Make a platform travel horizontally between two points.
You’ll need to update its position over time.
Then decide how the player should behave while standing on it.
Concepts: Animation, velocity, collision response.
Challenge 3: Add a Countdown Timer
Give the player 60 seconds to reach the finish.
Display the remaining time.
What happens when the timer reaches zero?
Concepts: Time calculations, state transitions, UI feedback.
Challenge 4: Build Multiple Levels
Store different platform arrangements in separate level definitions.
Advance to the next level when the player reaches the goal.
Concepts: Arrays, data structures, modular design.
Challenge 5: Add a High Score
Store the player’s best score using localStorage.
Load it when the game starts.
Update it when the player achieves a new record.
Concepts: Browser storage, data validation, persistence.
Each challenge introduces a new problem worth solving.
And each completed feature gives you something concrete to demonstrate.
15. Introducing the JavaScript Canvas Game Guide
I’ve created the JavaScript Canvas Game Guide to provide a structured, hands-on path into browser game development.
Instead of starting with a large game engine or complicated framework, the guide focuses on understanding the building blocks of a simple platformer.
The learning experience takes you through 12 lessons, with a coding workspace that supports experimentation and verification.
What you’ll find in the guide
An editable JavaScript source editor
Work directly with the code that defines game state, rules, and drawing.
A live Canvas preview
Run your code and observe the resulting game behavior.
Predict-before-running activities
Think about what the code should do before testing it.
Coding challenges
Check your work and investigate whether your implementation behaves as expected.
Worked examples
Compare your approach with an example implementation when you need additional guidance.
AI coding and debugging prompts
Use structured prompts to ask an AI assistant for focused explanations, patches, and regression tests.
Playable game exports
Download your current code as JavaScript or as a playable HTML file containing the Canvas, controls, and game loop.
Browser-based progress
Your drafts and lesson progress are stored locally in your browser.
Why this learning approach matters
Many programming tutorials show you how to reproduce a finished result.
But learning becomes more meaningful when you have to make decisions.
Where should the player start?
How should gravity work?
When should a collision count?
What happens when the player hits a hazard?
How should the game respond when the player wins?
These questions turn a programming exercise into a problem-solving experience.
And that’s the kind of learning I want to encourage.
Explore the free guide:
16. A Seven-Day JavaScript Game Development Challenge
If you’re interested in building your first game, here’s a simple plan you can follow.
Day 1: Draw Your First Game Scene
Create a Canvas.
Draw a player, floor, and obstacle.
Experiment with coordinates and colors.
Day 2: Add Movement
Create an animation loop.
Move the player horizontally.
Add keyboard controls.
Day 3: Implement Gravity and Jumping
Add vertical velocity.
Make the player fall.
Add a jump mechanic.
Prevent jumping while airborne.
Day 4: Create Platforms
Store platforms in an array.
Draw them.
Implement landing detection.
Test different platform heights.
Day 5: Add Game Mechanics
Create collectibles.
Add hazards.
Track the score.
Add a finish condition.
Day 6: Debug and Improve
Display player position and velocity.
Test collision boundaries.
Adjust movement speed and jump height.
Fix one bug at a time.
Day 7: Finish and Share Your Game
Add instructions.
Create a restart mechanism.
Improve the appearance.
Test the game.
Export your playable HTML.
Then challenge someone else to complete it.
By the end of the week, you’ll have more than a collection of JavaScript examples.
You’ll have built a working interactive application.
17. What Game Development Teaches Beyond Games
You don’t need to become a professional game developer to benefit from learning Canvas.
The concepts you practise are useful in many other areas of JavaScript development.
State management
Games require consistent tracking of objects, scores, and conditions.
The same principle applies to interactive web applications.
Event handling
Keyboard controls are one form of event-driven programming.
The same approach applies to forms, buttons, menus, and user interactions.
Animation and timing
Game loops introduce time-based updates.
These concepts also appear in simulations, visualizations, and interactive interfaces.
Data structures
Arrays and objects represent platforms, players, and game items.
The same structures are fundamental to nearly every JavaScript application.
Debugging
Game development teaches you to connect observed behavior with the code and state that produced it.
That’s an essential software engineering skill.
Application architecture
Separating state, updates, and rendering makes a game easier to understand.
The same separation of concerns helps with larger web applications.
Performance
Games make inefficient code visible.
If an animation becomes slow or inconsistent, you have a reason to investigate rendering, calculations, and update frequency.
Game development is a practical way to learn JavaScript engineering through immediate visual feedback.
18. Continue Learning JavaScript with DiscoveryVIP
The Canvas Game Guide is one of several interactive resources I’ve created to help developers learn through practical experimentation.
If you enjoy this approach, you can continue with these resources.
JavaScript Canvas Game Guide
Build a playable platformer through 12 lessons and hands-on coding challenges.
JavaScript Game Workshop
Explore game development concepts through practical lessons and playable projects.
Canvas Game Academy
Continue developing interactive Canvas game skills.
HTML5 Canvas Lab
Explore Canvas drawing, graphics, and interactive JavaScript techniques.
JavaScript Engineering Academy Pro
Go beyond syntax to explore architecture, testing, debugging, and reliable application development.
JavaScript 100 Interactive Learning Studio
Build your JavaScript foundation through 100 guided lessons and practical challenges.
Explore all DiscoveryVIP guides:
Final Thoughts: The Best Way to Understand JavaScript Is to Make Something Happen
Learning JavaScript becomes much more interesting when your code produces something you can interact with.
A rectangle moves because you changed its position.
A character jumps because you applied velocity.
A platform stops a fall because you implemented collision detection.
A coin disappears because your game detected an interaction.
A level ends because you defined a win condition.
Each feature creates a visible connection between code and behavior.
And each problem gives you a reason to investigate, experiment, and improve.
That’s the experience I want to encourage with the JavaScript Canvas Game Guide.
You don’t need to begin with advanced graphics, complex frameworks, or a large game engine.
Start with a rectangle.
Make it move.
Make it jump.
Add a platform.
Create a challenge.
Then keep building.
The goal isn’t just to finish a game. It’s to understand the JavaScript that makes the game work.
🎮 Start building your own Canvas platformer:
https://discoveryvip.com/javascript-canvas-game-guide
About the Author
Laurence Svekis is a Google Developer Expert specializing in Google Workspace, Google Champion, author, developer, and online educator who has taught 3 million+ students worldwide.
With more than 20 years of experience in web development and education, Laurence focuses on JavaScript, HTML, CSS, Google Apps Script, browser-based applications, AI-assisted development, and practical programming education.
He is also the creator of the Vibe Learning framework, which emphasizes active participation, experimentation, feedback, and independent understanding.
Through DiscoveryVIP and VibeLearning.ca, Laurence develops interactive learning resources that help people turn programming concepts into practical skills.
Join the Conversation
Have you ever tried building a game with JavaScript?
What was the most challenging part?
Getting the movement right?
Understanding collision detection?
Creating a game loop?
Or turning a working prototype into something genuinely fun to play?
I’d be interested to hear what you’ve built—and which game mechanics you’d like to learn next.
#JavaScript #HTML5Canvas #JavaScriptGames #GameDevelopment #LearnJavaScript #WebDevelopment #CanvasAPI #JavaScriptTutorial #CodingProjects #ProgrammingEducation #FrontendDevelopment #GameProgramming #JavaScriptDeveloper #VibeCoding #VibeLearning #DiscoveryVIP #LaurenceSvekis