
Learn how 2D games work, understand the JavaScript behind movement and jumping, and discover how to turn simple programming concepts into a playable game.
Have you ever played a platform game and wondered why the controls feel so natural?
You press a button, your character jumps, gravity pulls them back down, and they land on a platform.
It seems simple.
But behind that small interaction are several programming systems working together.
The game must detect your input, calculate movement, apply gravity, check for collisions, determine whether you’ve landed, and redraw the screen.
All of this happens repeatedly, often dozens of times every second.
The interesting part?
You can build these systems yourself using JavaScript and HTML5 Canvas.
You don’t need a complicated game engine to understand the fundamentals of game development.
In this guide, we’ll explore the programming concepts behind a 2D platformer, create practical code examples, examine how game designers balance difficulty, and discover how to test and improve a playable game.
By the end, you’ll have a much clearer understanding of how platform games work — and how to start creating your own.
1. Every Game Begins with a World and a Set of Rules
A game is more than graphics moving around a screen.
At its core, a game is a collection of rules that determine how objects behave and interact.
Consider a simple platformer.
The player can move left and right, jump onto platforms, collect stars, avoid hazards, and reach an exit.
Each action requires a rule.
For example:
- Pressing right increases horizontal movement.
- Gravity pulls the player downward.
- Standing on a platform prevents further falling.
- Touching a collectible increases the score.
- Reaching the exit after collecting every star completes the level.
These rules become JavaScript instructions.
Representing a player in code
We can start with an object:
const player = {
  x: 50,
  y: 100,
  width: 28,
  height: 36,
  vx: 0,
  vy: 0,
  speed: 220,
  jumpStrength: 420,
  grounded: false
};
This object contains the player’s current state.
x and y represent position.
vx and vy represent horizontal and vertical velocity.
speed controls horizontal movement.
jumpStrength determines the initial upward jump velocity.
grounded indicates whether the player is standing on a surface.
The numbers are example starting values. Movement speed and jump strength are expressed in pixels per second, assuming the game uses seconds for elapsed time.
Important concept: Game development becomes easier when you separate the data describing an object from the functions that control its behavior.
2. Understanding the Game Loop: The Heart of Every Interactive Game
A normal webpage often waits for user actions.
A game needs to update continuously.
Even when the player isn’t pressing anything, enemies might move, animations continue, and gravity still affects objects.
This continuous process is managed by the game loop.
A typical game loop performs three tasks:
- Read player input.
- Update the game state.
- Draw the updated world.
Then the process repeats.
A practical JavaScript game loop
let lastTime = 0;

function gameLoop(timestamp) {
  const deltaTime = Math.min(
    (timestamp - lastTime) / 1000,
    0.05
  );

  lastTime = timestamp;

  update(deltaTime);
  render();

  requestAnimationFrame(gameLoop);
}

requestAnimationFrame((timestamp) => {
  lastTime = timestamp;
  requestAnimationFrame(gameLoop);
});
The browser provides a timestamp to the animation callback.
We calculate how much time has passed since the previous update.
That value is called deltaTime.
Why does delta time matter?
Imagine two computers.
One renders 60 frames per second.
The other renders 120 frames per second.
If you move a player five pixels every frame, the faster computer may move the character twice as quickly.
Instead, use time-based movement.
player.x += player.vx * deltaTime;If velocity is 200 pixels per second, the character should move approximately 200 pixels over one second of simulated movement, regardless of the rendering frequency.
This approach is commonly called frame-rate-independent movement.
The example also limits unusually large time steps, which helps prevent sudden movement after a browser tab has been inactive.
For more advanced physics, a fixed-timestep simulation can provide greater consistency.
Key takeaway: The game loop connects time, input, physics, and rendering into one continuously updating system.
3. How Jump Physics Actually Works
Jumping is one of the most recognizable mechanics in platform games.
But a jump isn’t simply moving a character upward and then downward.
A basic jump uses velocity and gravity.
Understanding vertical velocity
In HTML5 Canvas, the Y coordinate increases as you move down the screen.
That means:
- Negative vertical velocity moves the player upward.
- Positive vertical velocity moves the player downward.
- Gravity increases vertical velocity over time.
We can express this with JavaScript:
const gravity = 1000;

function updatePhysics(deltaTime) {
  player.vy += gravity * deltaTime;
  player.y += player.vy * deltaTime;
}
When the player jumps, we assign a negative vertical velocity:
function jump() {
  if (player.grounded) {
    player.vy = -player.jumpStrength;
    player.grounded = false;
  }
}
Now the sequence becomes:
Jump begins: Vertical velocity is negative.
Rising: Gravity gradually reduces the upward velocity.
Jump apex: Vertical velocity approaches zero.
Falling: Vertical velocity becomes positive.
Landing: Collision detection stops the player at the platform.
Calculating approximate jump height
A simplified physics formula is:
[
h = \frac{v^2}{2g}
]
Where:
- (h) = maximum jump height
- (v) = initial jump speed
- (g) = gravitational acceleration
Suppose:
- Jump speed = 400 pixels/second
- Gravity = 1,000 pixels/second²
Then:
[
h = \frac{400^2}{2(1000)} = 80
]
The player will rise approximately 80 pixels above the starting position.
This assumes continuous motion without collisions or other constraints. A real frame-based game may produce a slightly different result.
How changing gravity affects gameplay
<escape>|</escape> Gravity | Gameplay feeling |
|—|—|
| Low | Floaty jumps, longer airtime |
| Medium | Balanced movement |
| High | Faster falling, shorter jumps |
These settings affect much more than animation.
They determine which gaps can be crossed, how high platforms can be placed, and how much time players have to react.
Practical experiment: Keep jump strength constant and double gravity. Predict how the jump height and airtime will change before testing.
4. Horizontal Movement: Making Controls Feel Responsive
Jump physics is only part of the experience.
A platformer also needs responsive horizontal movement.
The simplest approach is to assign velocity based on keyboard input.
const keys = {
  left: false,
  right: false
};

function updateMovement() {
  player.vx = 0;

  if (keys.left) {
    player.vx = -player.speed;
  }

  if (keys.right) {
    player.vx = player.speed;
  }
}
Then update the position:
player.x += player.vx * deltaTime;This creates immediate movement.
But not every game should feel the same.
Some platformers use instant acceleration and stopping.
Others use momentum.
Adding acceleration
Instead of changing velocity instantly, we can gradually increase it.
const acceleration = 900;
const maxSpeed = 220;

if (keys.right) {
  player.vx += acceleration * deltaTime;
}

player.vx = Math.min(player.vx, maxSpeed);
A complete movement system would also handle leftward acceleration, friction, and maximum speed in both directions.
Acceleration creates a different feeling from immediate movement.
A character may take time to reach full speed or slide slightly when stopping.
Neither approach is automatically better.
The right choice depends on the experience you’re designing.
Three questions to ask when designing movement
Responsiveness: Does the character react quickly enough to player input?
Predictability: Can the player anticipate where the character will move?
Consistency: Does the same input produce similar results in similar situations?
These questions are often more useful than asking whether movement is technically correct.
5. Collision Detection: How Players Land on Platforms
A platformer needs to know when objects touch.
Without collision detection, the player would simply fall through platforms and walls.
One common method for rectangular objects is Axis-Aligned Bounding Box collision detection, or AABB.
Basic rectangle collision detection
function overlaps(a, b) {
  return (
    a.x < b.x + b.width &&
    a.x + a.width > b.x &&
    a.y < b.y + b.height &&
    a.y + a.height > b.y
  );
}
This function checks whether two rectangles overlap.
If they overlap horizontally and vertically, a collision is detected.
But detecting a collision isn’t enough.
The game also needs to decide what happens next.
Resolving a landing
Suppose the player is falling toward a platform.
We need to check that:
- The player is moving downward.
- The player’s previous bottom edge was above the platform.
- The player’s new position overlaps the platform.
For example:
const previousBottom =
  player.y + player.height;

// Apply vertical movement
player.y += player.vy * deltaTime;

const currentBottom =
  player.y + player.height;

if (
  player.vy >= 0 &&
  previousBottom <= platform.y &&
  currentBottom >= platform.y &&
  player.x < platform.x + platform.width &&
  player.x + player.width > platform.x
) {
  player.y = platform.y - player.height;
  player.vy = 0;
  player.grounded = true;
}
This is a simplified one-way platform landing check. A complete collision system also needs to handle ceilings, walls, multiple platforms, and cases where objects move too far between updates.
Notice what happens after landing.
We position the player’s bottom edge exactly on top of the platform.
Then we set vertical velocity to zero.
This prevents the player from continuing to fall.
Why collision resolution matters
Poor collision handling can produce frustrating behavior:
- Players falling through platforms
- Characters getting stuck inside walls
- Unexpected bouncing
- Jumping when not actually grounded
- Inconsistent movement near corners
Collision detection is a good example of how programming logic directly affects game quality.
6. Tile-Based Level Design: Creating Worlds from Small Pieces
Many 2D games use tiles to construct their levels.
A tile is a small reusable section of the game world.
For example, a level might use a grid of 32 × 32 pixel tiles.
Each tile represents something:
- Empty space
- Solid ground
- A hazard
- A collectible
- A checkpoint
- An exit
Representing a level with data
Consider this example:
const level = [
  "............",
  "....S.......",
  "...###......",
  "P.......E...",
  "############"
];
Where:
P = player starting position
S = star
# = solid platform
E = exit
. = empty space
We can loop through the level data:
const tileSize = 32;

level.forEach((row, y) => {
  [...row].forEach((tile, x) => {
    if (tile === "#") {
      ctx.fillStyle = "#334155";

      ctx.fillRect(
        x * tileSize,
        y * tileSize,
        tileSize,
        tileSize
      );
    }
  });
});
The code converts each grid position into a pixel position.
This makes level design easier because you can change the arrangement of tiles without rewriting the entire rendering system.
Why tile-based design is useful
Tiles provide a reusable structure.
You can build multiple levels from the same set of elements.
You can also create visual editors that allow users to place tiles by clicking a grid.
This separates level content from game engine logic.
That separation becomes especially important as projects grow.
7. Designing Challenges That Feel Fair
A game can have perfectly functioning code and still be frustrating to play.
Good game design requires more than technical correctness.
Players need to understand the rules, recognize challenges, and feel that their decisions matter.
The difference between difficulty and unfairness
Imagine a gap between two platforms.
The player must jump across it.
If the gap is slightly shorter than the maximum jump distance, the challenge may be reasonable.
If the gap is longer than the maximum possible jump, the level is impossible.
If the gap is technically possible but requires extremely precise timing, it may be too difficult for the intended audience.
This is why understanding physics helps with level design.
Estimating jump distance
For a simplified jump that begins and ends at the same height:
[
t = \frac{2v}{g}
]
Where (t) is the approximate total airtime.
If the jump speed is 400 pixels/second and gravity is 1,000 pixels/second²:
[
t = \frac{800}{1000} = 0.8
]
The player stays airborne for approximately 0.8 seconds.
If horizontal speed is 200 pixels/second:
[
d = 200 \times 0.8 = 160
]
The theoretical horizontal travel distance is approximately 160 pixels.
Real gameplay can differ because of acceleration, collision boundaries, jump timing, and other mechanics.
But this calculation gives level designers a useful starting point.
Practical design challenge
Create three gaps:
- An easy gap requiring roughly 40% of the player’s maximum jump distance.
- A medium gap requiring roughly 65%.
- A difficult gap requiring roughly 85%.
Test each gap several times.
Does the difficulty increase gradually?
Are the landing areas large enough?
Can players understand why they missed a jump?
Key lesson: Game physics and level design should be developed together, not independently.
8. Game State: Collectibles, Checkpoints, and Winning Conditions
A game needs to remember what has happened.
This information is called game state.
For a platformer, game state might include:
const gameState = {
  lives: 3,
  starsCollected: 0,
  totalStars: 5,
  checkpoint: null,
  completed: false
};
When the player collects a star:
function collectStar(star) {
  if (star.collected) return;

  star.collected = true;
  gameState.starsCollected++;
}
When the player reaches the exit:
function checkExit(playerAtExit) {
  if (
    playerAtExit &&
    gameState.starsCollected ===
      gameState.totalStars
  ) {
    gameState.completed = true;
  }
}
This creates a simple objective:
Collect all stars before completing the level.
Why checkpoints matter
Checkpoints allow players to resume from a saved location rather than restarting the entire level.
For example:
function activateCheckpoint(x, y) {
  gameState.checkpoint = { x, y };
}
When the player needs to respawn, the game can restore the saved position.
Checkpoints can make challenging levels more approachable.
They also introduce useful programming concepts such as storing state, resetting objects, and managing transitions between gameplay states.
9. Debugging Games: Understanding What Went Wrong
Game development involves a lot of testing.
Sometimes the player moves too quickly.
Sometimes collisions behave unexpectedly.
Sometimes a jump works on one platform but fails on another.
Debugging becomes easier when you can inspect the game’s internal state.
Useful values to display
During development, consider showing:
- Player X and Y position
- Horizontal and vertical velocity
- Grounded status
- Current frame time
- Collision boundaries
- Remaining lives
- Current checkpoint
A simple debug message might look like this:
console.log({
  x: player.x,
  y: player.y,
  vx: player.vx,
  vy: player.vy,
  grounded: player.grounded
});
For a continuously running game, avoid logging every frame for long periods because excessive console output can slow down debugging.
Instead, log specific events or display selected values on screen.
A useful debugging technique
When something goes wrong, ask:
What did I expect to happen?
What actually happened?
Which variable or condition controls that behavior?
What is the smallest change I can test?
This approach helps you investigate the cause rather than randomly changing code.
10. Playtesting: Turning a Working Game into a Better Game
Completing the code doesn’t mean the game is finished.
Players experience your game differently from the way you experience it as the developer.
You already know where the hazards are.
You understand how the jump works.
You know which route to take.
A new player doesn’t have that knowledge.
That’s why playtesting is essential.
The Observe → Improve → Test cycle
Start with one question.
For example:
“Can a beginner understand how to reach the exit?”
Watch or record a playthrough.
Look for moments when the player hesitates, makes repeated mistakes, or misunderstands the objective.
Then change one element.
Perhaps the exit needs better visual contrast.
Perhaps a platform needs to be wider.
Perhaps the checkpoint should appear earlier.
Test again.
Example playtesting notebook
| Observation | Possible cause | Improvement |
|---|---|---|
| Players repeatedly miss a jump | Landing area too narrow | Widen the platform |
| Players overlook a collectible | Poor visual contrast | Change its appearance |
| Players lose progress too often | Checkpoint too far away | Add an earlier checkpoint |
| Controls feel sluggish | Slow acceleration | Adjust movement settings |
| Players don’t understand the exit | Unclear objective | Add visual feedback |
The goal isn’t to make every game easy.
It’s to make the challenge understandable and intentional.
11. Put These Concepts into Practice with Game Development Studio
Now that you’ve explored the foundations of platformer development, you can apply these ideas in an interactive environment.
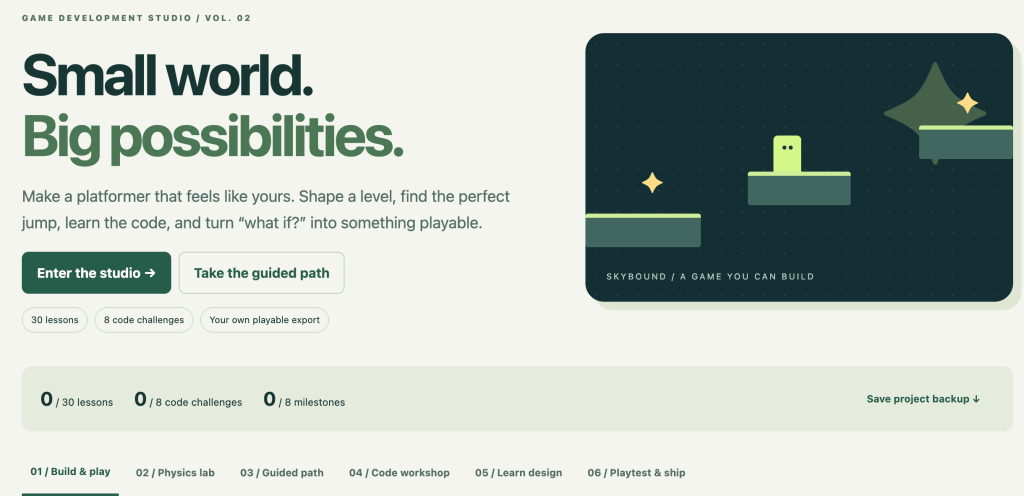
I’ve created Game Development Studio: Skybound, a free browser-based learning resource on DiscoveryVIP.
The studio combines a playable 2D platformer, a level editor, physics experiments, JavaScript challenges, guided lessons, and playtesting tools.
Instead of simply reading about how games work, you can experiment with the systems yourself.
What you’ll find inside
30 practical lessons
Explore concepts such as gravity, movement, checkpoints, feedback, and game design through guided explanations and activities.
8 guided development milestones
Progress from working with your first tile toward designing and exporting a complete small game.
8 JavaScript code challenges
Complete missing expressions and test your understanding against different inputs.
These challenges teach concepts used in the game engine without directly modifying the live engine.
Interactive platformer
Play a game where you collect gold stars, avoid hazards, activate checkpoints, and reach the exit.
Visual level designer
Place and modify tiles to create your own platforming challenges. The editor supports undo and redo.
Physics laboratory
Experiment with jump settings, examine predicted trajectories, and compare calculations with actual gameplay.
Debugging tools
Inspect game behavior and step through updates to understand how the simulation works.
Playtesting notebook
Record observations, document problems, and identify improvements.
Complete JavaScript game engine
Explore the source code behind the playable platformer.
Downloadable HTML game
Export your project as a standalone HTML file that can run locally in a browser.
No account, external game assets, or build tools are required.
12. Five Practical Challenges to Try in Skybound Studio
To get the most from the resource, approach it as a learning laboratory rather than simply a game.
Challenge 1: Find the perfect jump
Open the Physics Lab.
Start with the default settings.
Observe the predicted jump height and airtime.
Change the settings to create a floatier jump.
Then test the new settings in the playable game.
Learning objective: Understand how gravity and jump velocity influence player movement.
Challenge 2: Build a fair platforming challenge
Open the Level Designer.
Create a sequence of platforms with increasing gap distances.
Test whether the player can cross each gap.
Adjust the platforms until the difficulty feels progressive.
Learning objective: Connect mathematical movement constraints with practical level design.
Challenge 3: Investigate collision behavior
Enable the debug view.
Move the player toward a platform or obstacle.
Observe how the game responds.
Use the step-one-tick control to examine changes more carefully.
Learning objective: Understand how position, velocity, and collision logic interact.
Challenge 4: Solve a JavaScript code challenge
Open the Code Workshop.
Choose a challenge involving a game engine concept.
Predict the missing expression.
Run the automated checks.
If your answer fails, investigate the reason before requesting a hint.
Learning objective: Develop problem-solving skills through focused JavaScript practice.
Challenge 5: Create, test, and export your own game
Design a level with collectibles, hazards, and a checkpoint.
Play through it.
Record at least three observations in the playtesting notebook.
Make improvements based on those observations.
Export the finished HTML game.
Learning objective: Experience the complete development cycle from design through testing and release.
Explore Game Development Studio — Free
Game Development Studio: Skybound
Learn JavaScript game development through guided lessons, practical challenges, physics experiments, level design, and a complete playable platformer.
Start building here:
https://discoveryvip.com/game-development-studio/#build
You can also explore the guided learning path, code workshop, and downloadable 30-lesson handbook.
This is a focused learning environment for a small 2D platformer, rather than a general-purpose game engine.
13. Why Building Games Is Such an Effective Way to Learn JavaScript
Game development brings many programming concepts together in one project.
Instead of learning each topic in isolation, you begin to see how the pieces connect.
Variables store positions, velocities, scores, and settings.
Objects organize player, enemy, and game-state information.
Functions manage movement, rendering, collisions, and interactions.
Conditionals determine what happens when players jump, collect items, or reach objectives.
Arrays represent levels, tiles, and collections of objects.
Events connect keyboard input with gameplay.
Mathematics determines movement, jump trajectories, and collision boundaries.
Debugging helps identify unexpected behavior.
Testing helps improve reliability and the player experience.
These skills extend far beyond game development.
The same principles are useful when building interactive websites, dashboards, simulations, educational tools, and web applications.
And perhaps most importantly, creating a game gives you a reason to keep learning.
You can see the results of your code.
You can experiment with new ideas.
You can identify problems and work toward solutions.
You can turn an empty canvas into an interactive world.
This is the kind of learning experience that connects naturally with the Vibe Learning Framework — curiosity, exploration, understanding, practice, feedback, reflection, and creation.
Final Thoughts: Start Small, Build Something, Keep Improving
You don’t need to create a massive game to learn valuable programming skills.
Start with a rectangle.
Make it move.
Add gravity.
Create a platform.
Detect a landing.
Add a collectible.
Design a level.
Then test your creation and improve it.
Each small step teaches you something new.
And each new skill gives you more possibilities for what you can build next.
The most valuable part of your first game isn’t the finished game itself. It’s everything you learn while creating it.
Whether you’re a beginner learning JavaScript, an educator looking for hands-on activities, or a developer interested in interactive experiences, building a platformer is a practical way to strengthen your skills.
Continue Learning
🎮 Game Development Studio:
https://discoveryvip.com/game-development-studio/#build
🕹️ Game Creation Lab:
https://discoveryvip.com/game-creation-lab/#walkthrough
🌐 DiscoveryVIP:
https://discoveryvip.com/
📚 Vibe Learning:
https://vibelearning.ca/
Written by Laurence Lars Svekis — Web developer, author, Google Developer Expert, and creator of the Vibe Learning and Vibe Teaching frameworks. Laurence has taught more than 3 million students through online courses and educational resources.
Join the Discussion
What makes a platformer enjoyable for you?
Is it responsive movement, challenging jumps, clever level design, or the satisfaction of mastering difficult mechanics?
And if you were building your own JavaScript platformer, what feature would you add first?
Share your thoughts and ideas!
#JavaScript #GameDevelopment #GameDesign #LearnToCode #HTML5Canvas #Platformer #GamePhysics #WebDevelopment #JavaScriptTutorial #CodingForBeginners #CreativeCoding #GameProgramming #VibeCoding #VibeLearning #LearningByDoing #ProgrammingEducation #GameDev #DiscoveryVIP #LaurenceSvekis